The Secrets Of Sewing Narrow Seams
The Inside Secrets To Creating Beautiful Garments
It is a truth universally acknowledged that sheer or lightweight fabrics need neat and delicate seams!
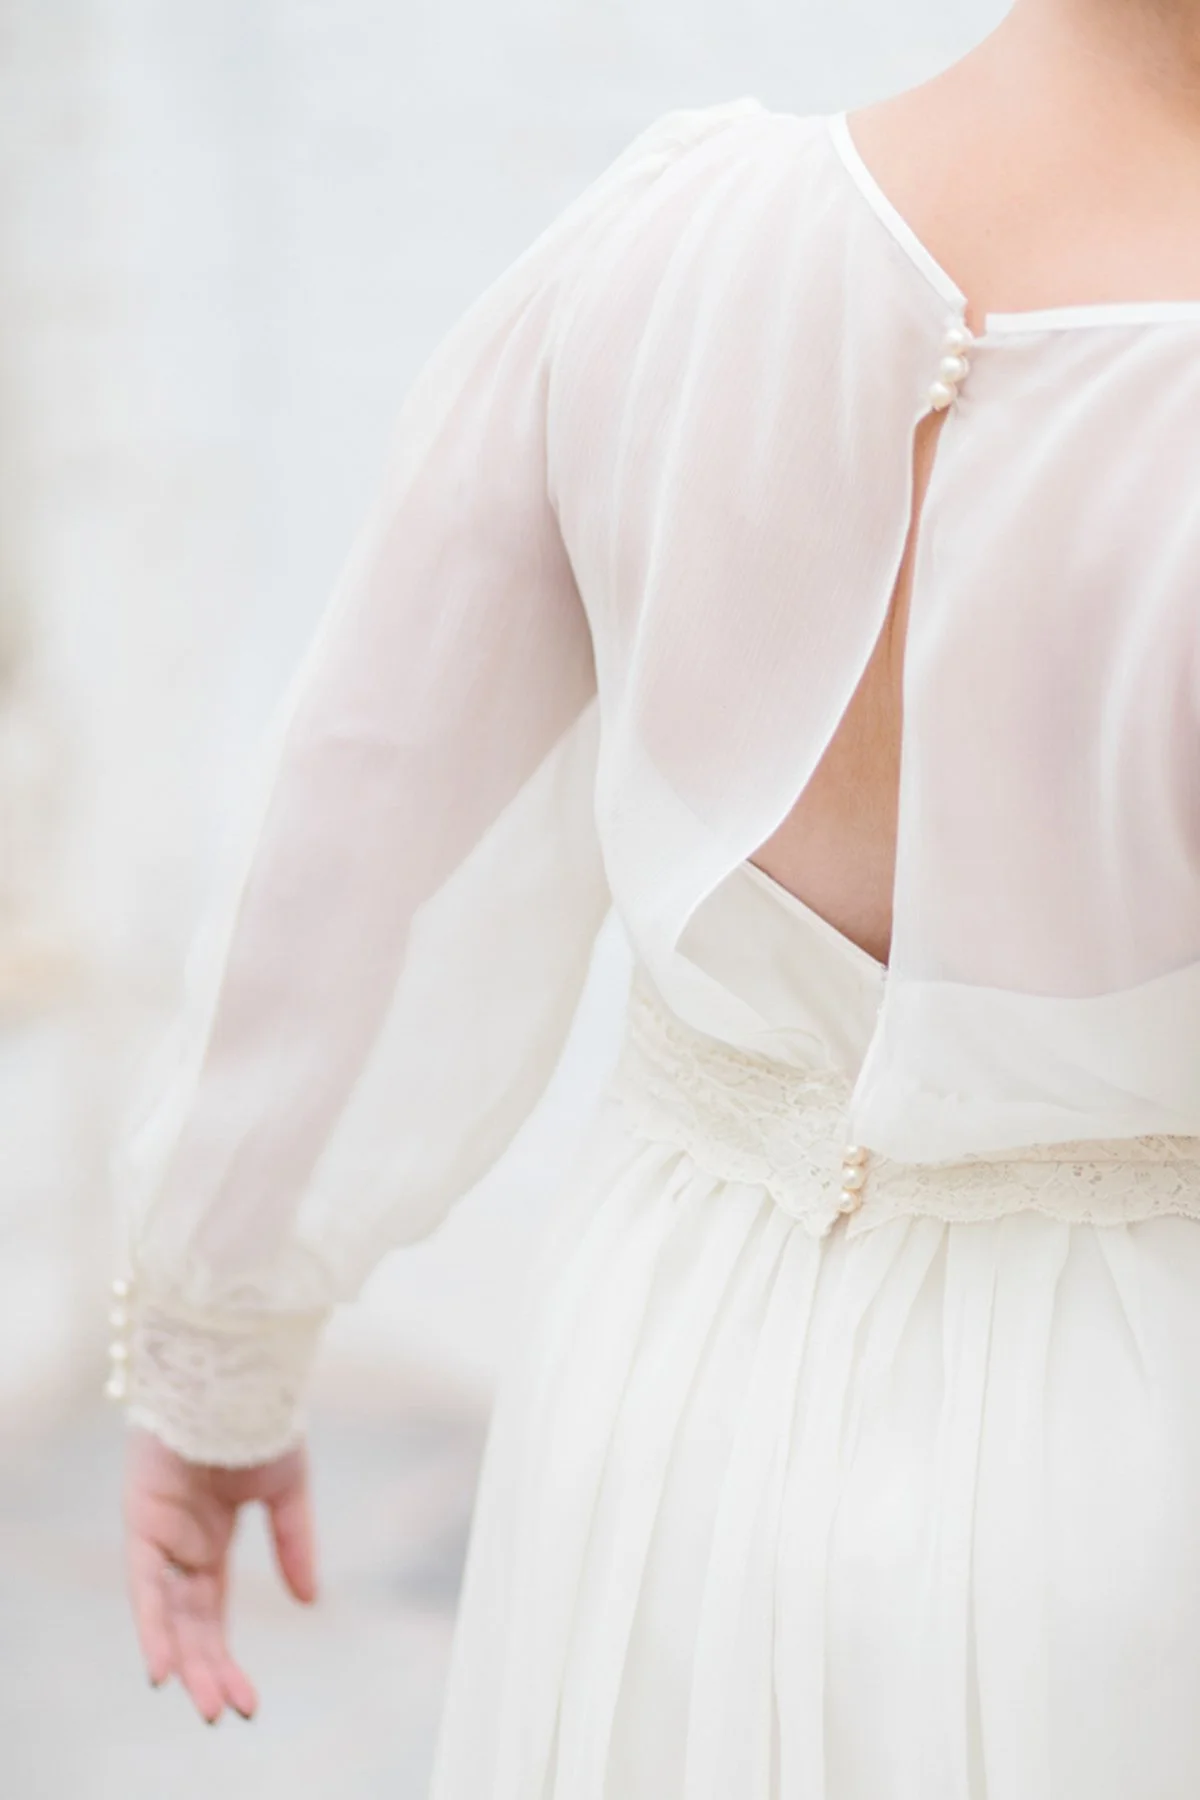
A soft, floaty, dress in silk chiffon, with French seams.
But have you ever wondered if there was an easier way to create narrow seams? This guide will walk you through a few simple steps that can transform your sewing and help you create the most beautiful garments with a couture finish.
Before You Begin
You can't sew narrow seams and get frustrated with them- it will show! Couture dressmaking is mindful sewing at its finest, and the best garments are sewn calmly and with a lot of love!
So take a deep breath and let go of all that tension, play some soothing music, light a candle. Do whatever you need to do to find a state of flow.
Use a new sharp needle and good-quality thread
Choose a fine needle suitable for fine or lightweight fabrics, such as a size 70/10 or 80/12.
Select a thread that’s fine and strong, in a matching colour to your fabric, an all-purpose polyester thread will do the trick.
Pin the seams
Pin the fabric securely at right angles to the direction that you are sewing in, matching notches and the edges of the fabric. Remember to move the pins as you stitch so that they don’t get tangled up in your machine.
Adjust stitch length and width
Reduce the stitch length to ensure that the stitching is strong, about 2.0 mm should create smaller more secure stitches. Stitch a sample on a scrap piece of fabric first, and adjust the stitch length and tension until you are happy.
Find a seam guide
Check which marking on your machine would be the best one for the width of the seam that you are stitching. For more usual seam allowances the standard seam guide marks on the bed of your machine (e.g. 1.5 cm etc) will help you.
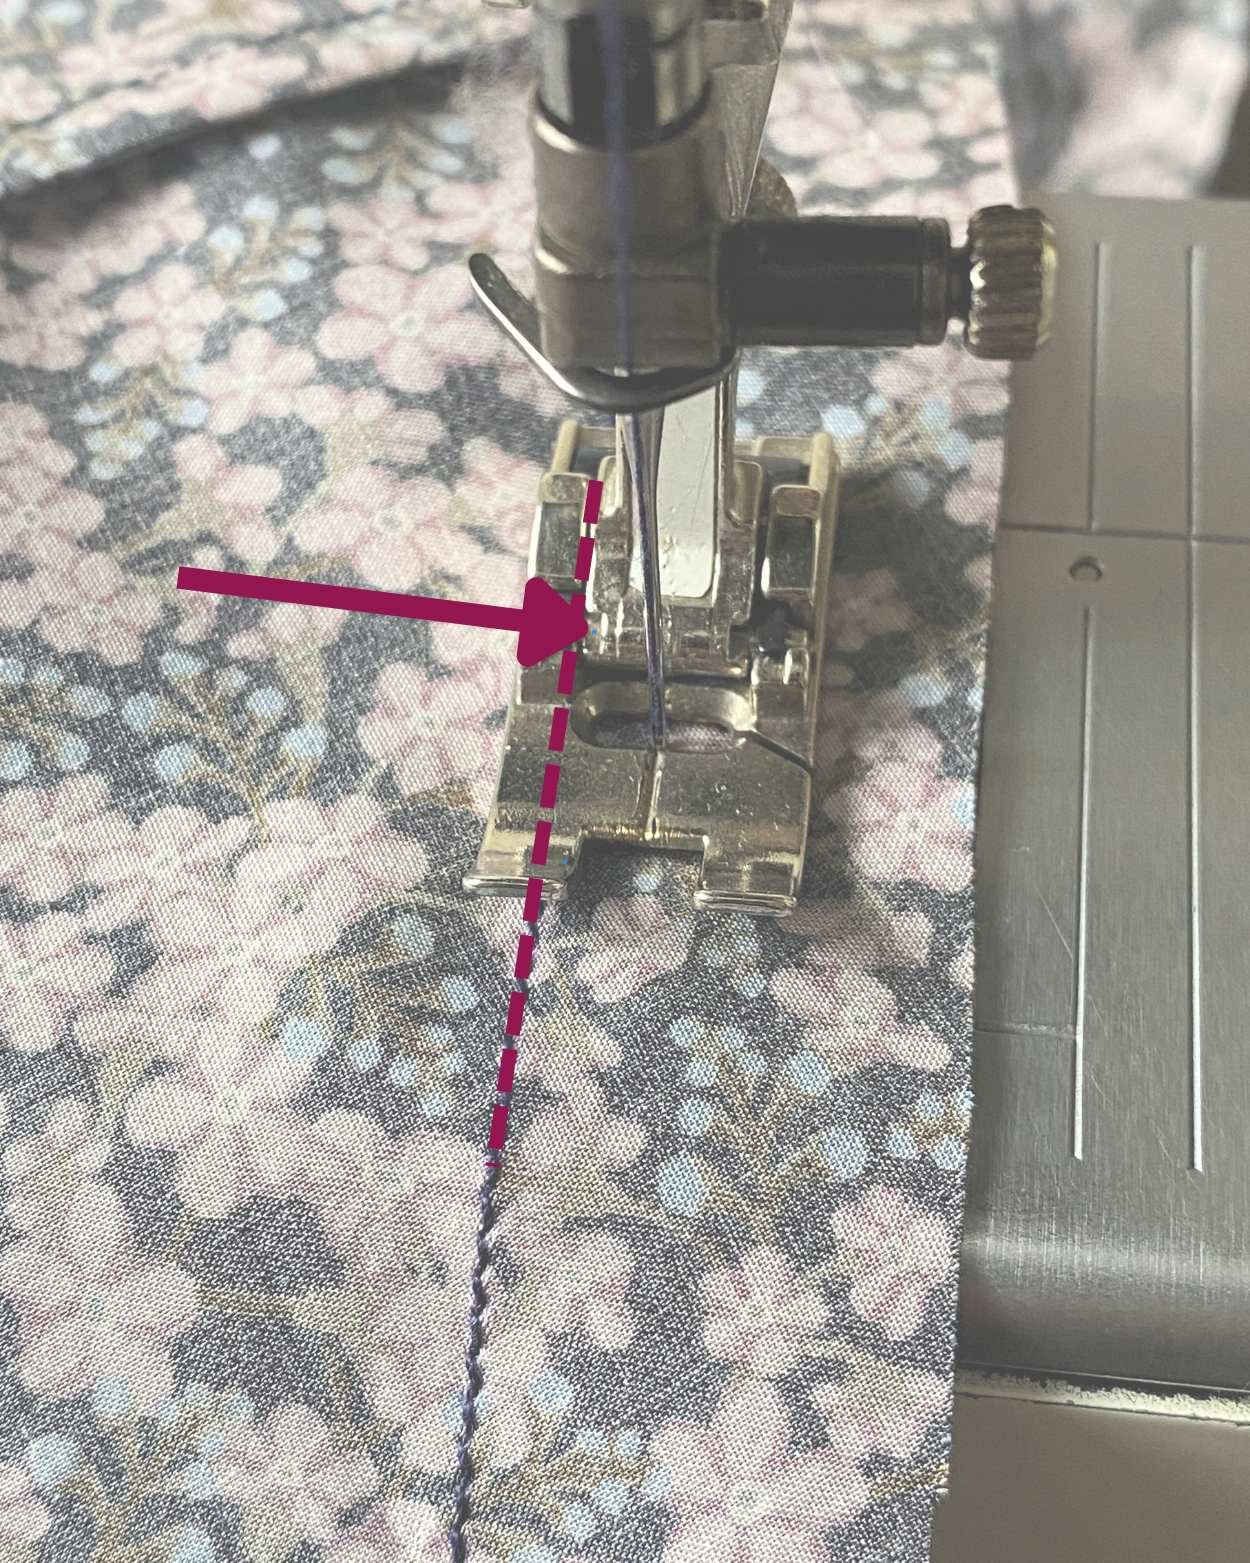
However, for smaller seam allowances you’ll need to find something to guide you, otherwise you’ll feel as if you are flying blind! I often find that the lines and marks on your sewing foot will help, and then I’ll adjust the needle position left and right if I need to.
Here I’m adding a second row of stitching. I’m using where the foot attaches to the shank ( red arrow), to guide me along my first line of stitching (dotted line).
Sew slowly and steadily
You need a light touch - you're not sewing fast as if you're motor racing and pressing the foot to the floor here!
At the start of a seam, lower the presser foot to secure the fabric, then insert the needle. If you can, set the machine so that it will stop with the needle down when you take your foot off the pedal. Hold the threads as you begin sewing to stop the fabric from disappearing down into the needle plate.
Breathe, and sew slowly and steadily. Stitch a maximum of 15-20 cm (6-8 inches), then stop with the needle in the fabric, pause and stitch again. Repeat until the entire seam is stitched.
Support your fabric and don’t let it hang from the table while you sew. I usually move my machine as far to the right of the table as I can, so that I have lots of table space beside my machine to rest my garment on.
Press each of your garment seams as you go.
A French Seam
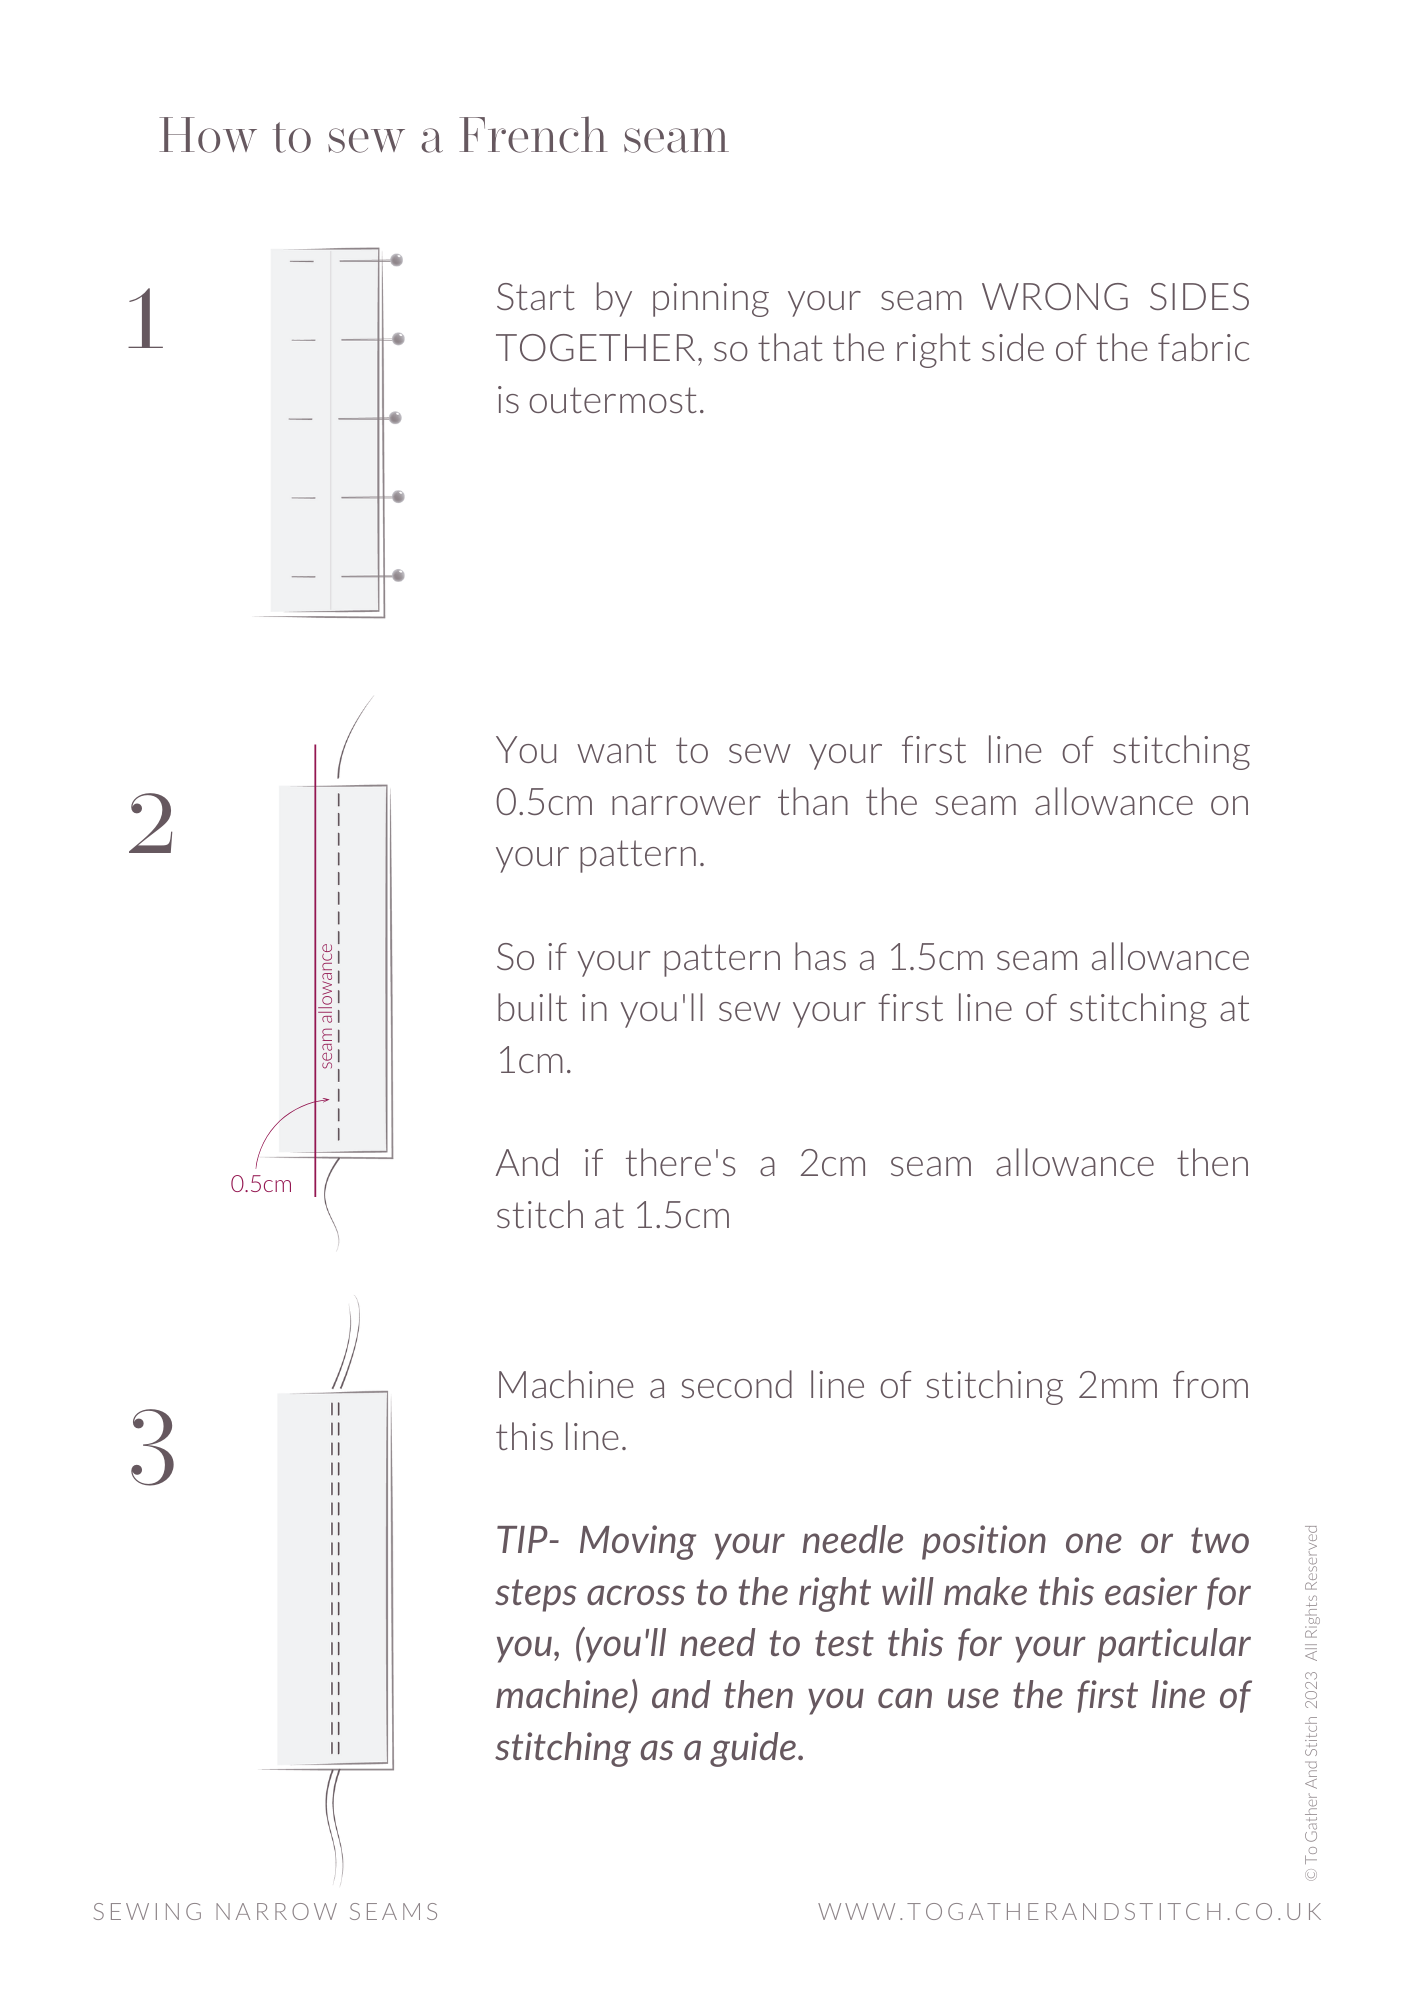
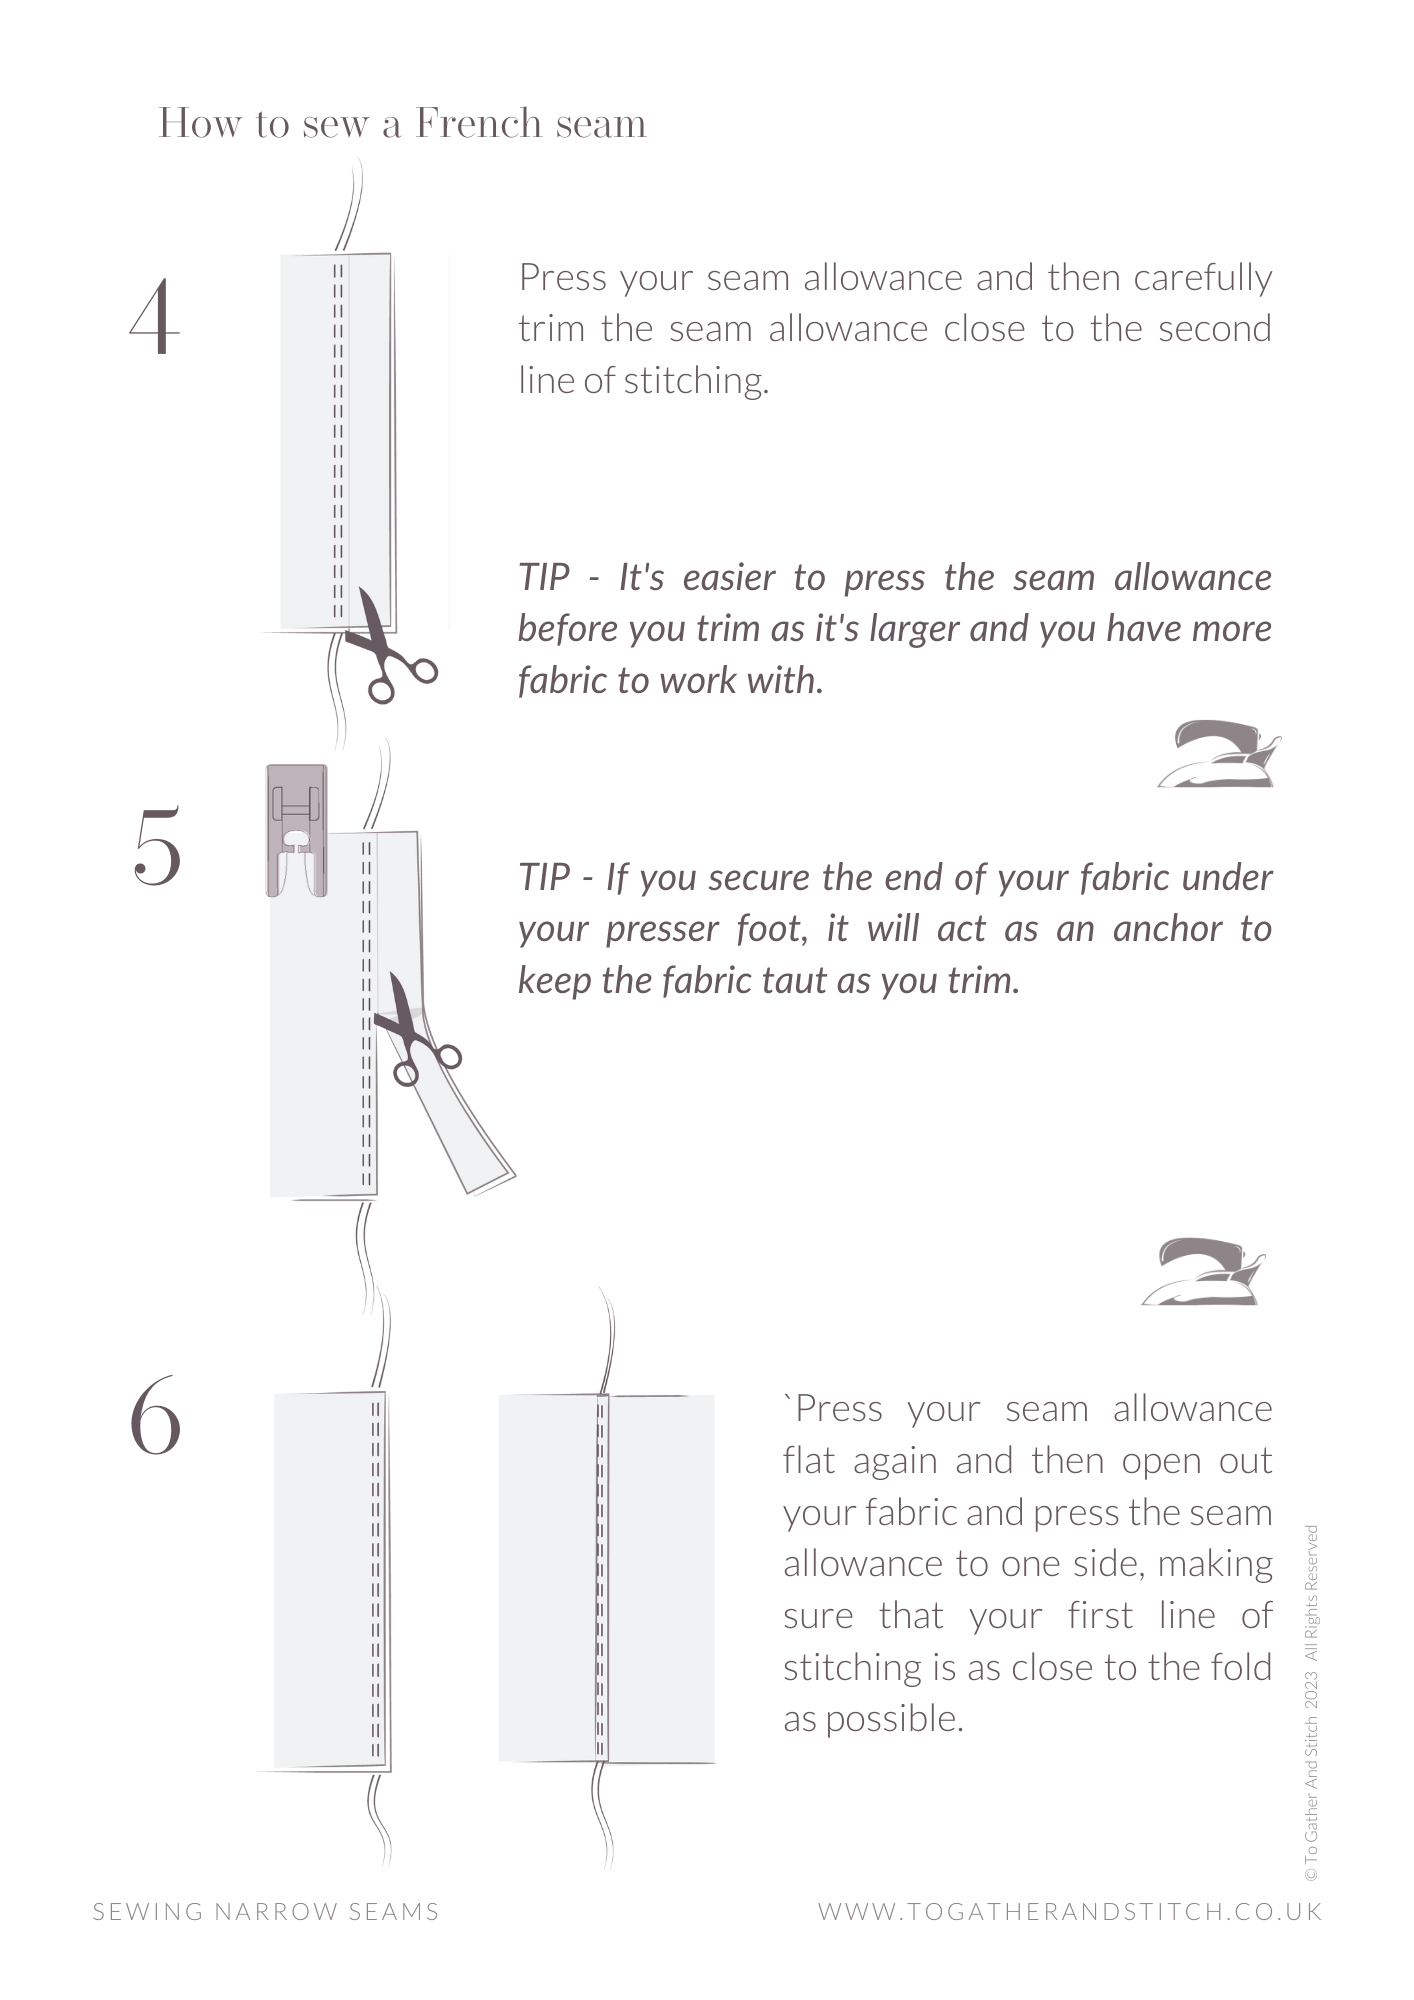
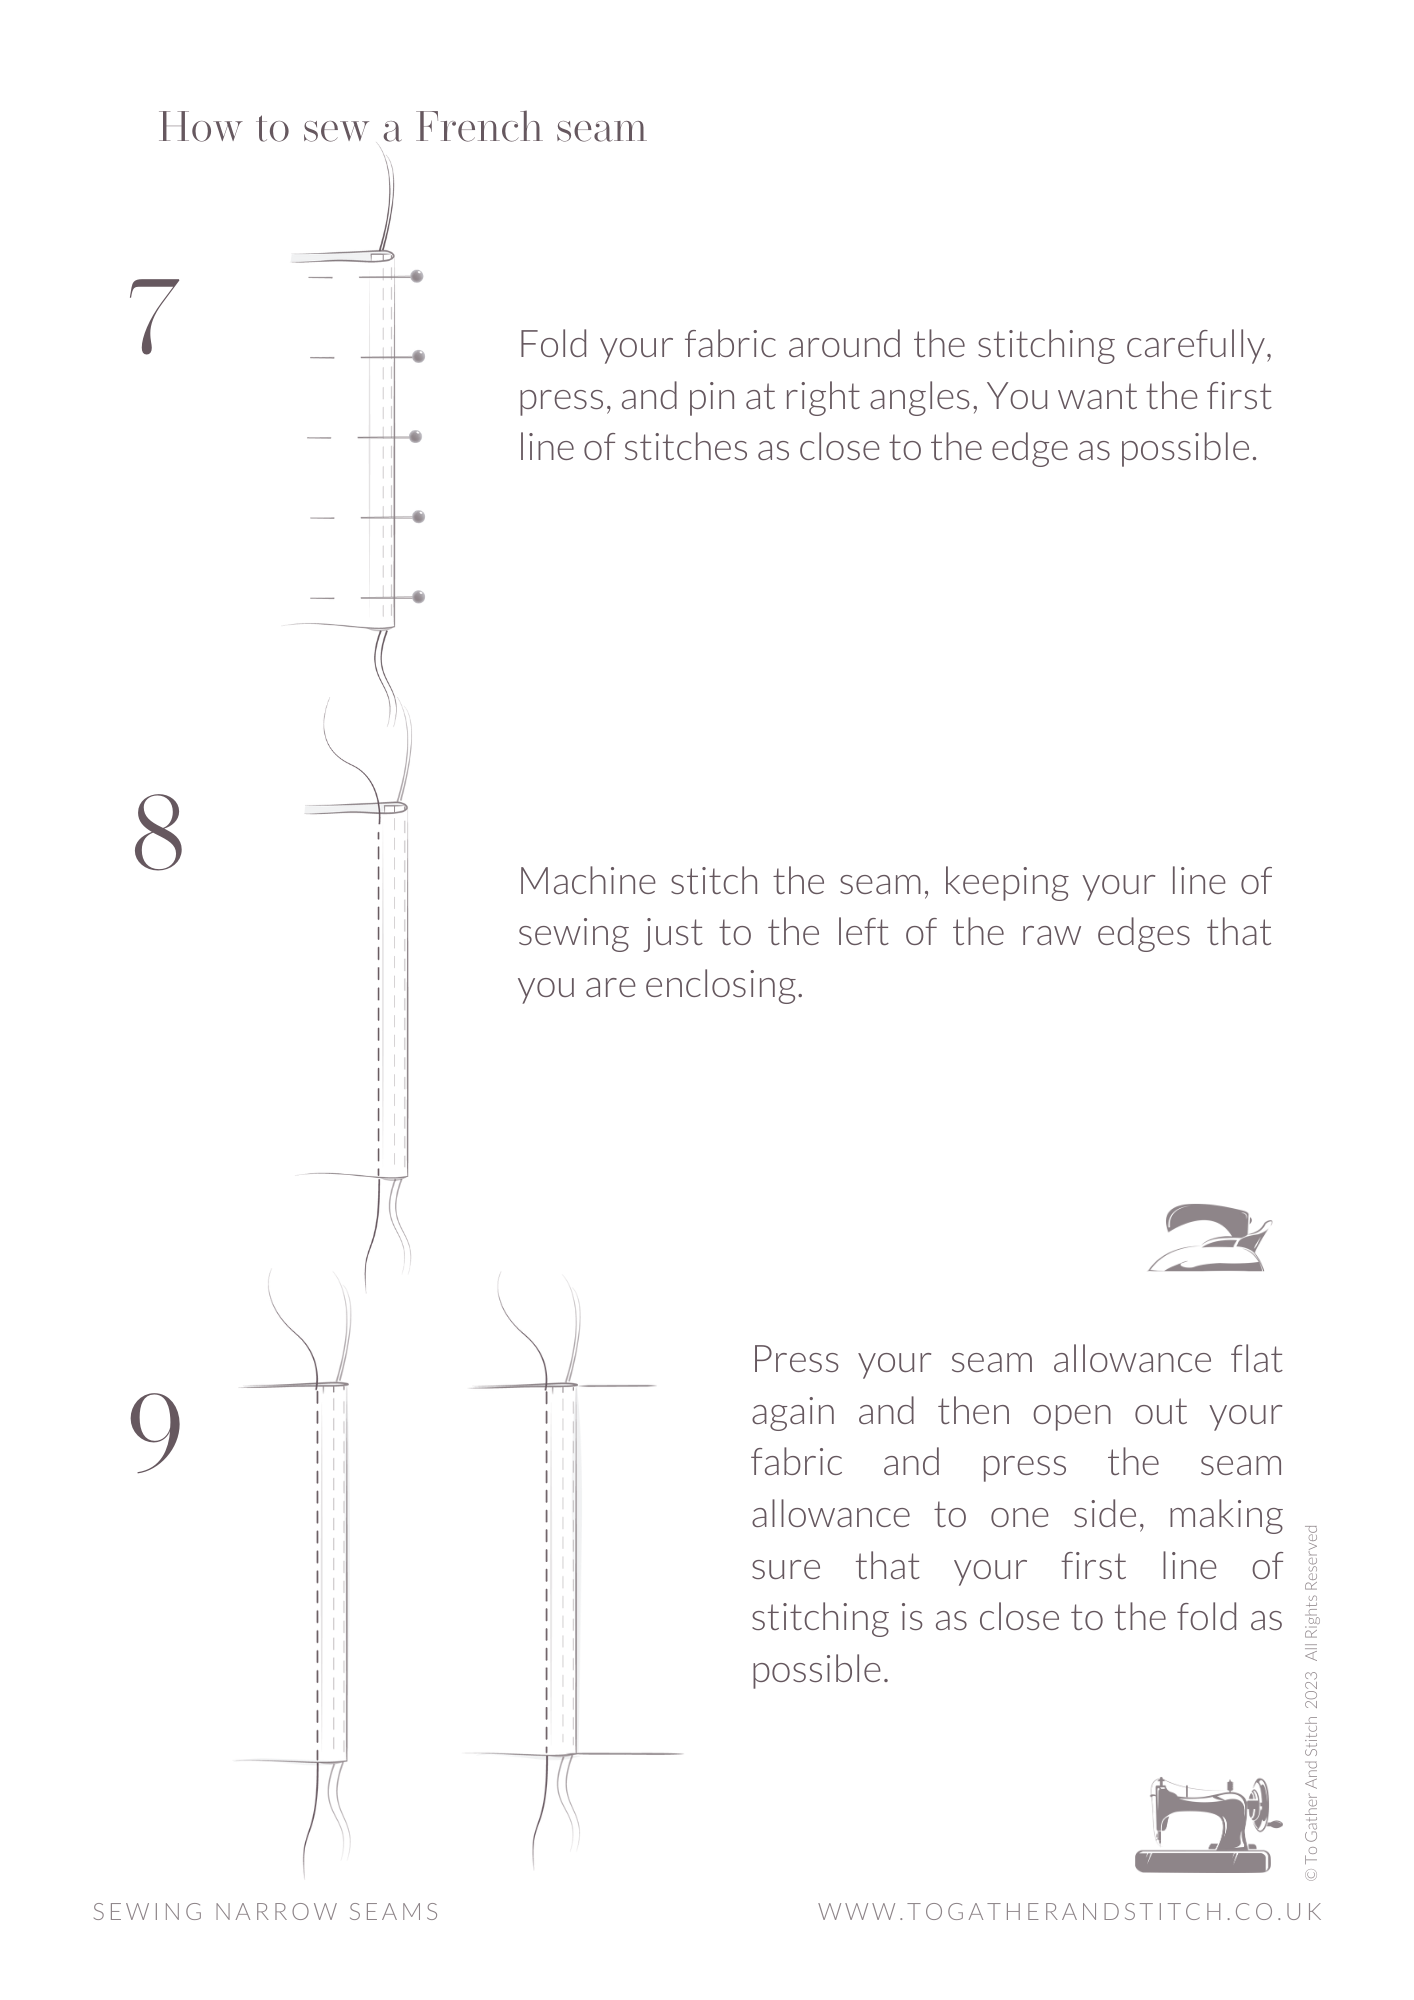
A French seam is a type of seam finish that encloses the raw edges of fabric for a clean and polished look on the inside of a garment. It is commonly used in lightweight and sheer fabrics.
Here's where you might use a French seam:
In fine fabrics such as chiffon, organza and silk, French seams prevent fraying and provide a neat finish without bulk. This is especially relevant in sheer fabrics where the wrong side is visible.
For delicate garments like lingerie, nightwear, or fine blouses, where they provide a luxurious finish and feel comfortable against the skin.
For children's clothing, as they eliminate scratchy or irritating raw edges.
Unlined garments, giving a professional tidy finish even when the inside is visible.
On straight seams: French seams work best with straight seams.
They are less suitable for curved or intricate seams, and thicker fabrics.
TIP:
Remember to check the fit of your garment after you have sewn the first line of stitching and alter your garment before you stitch the second line of stitching and trim.
A Mock French Seam
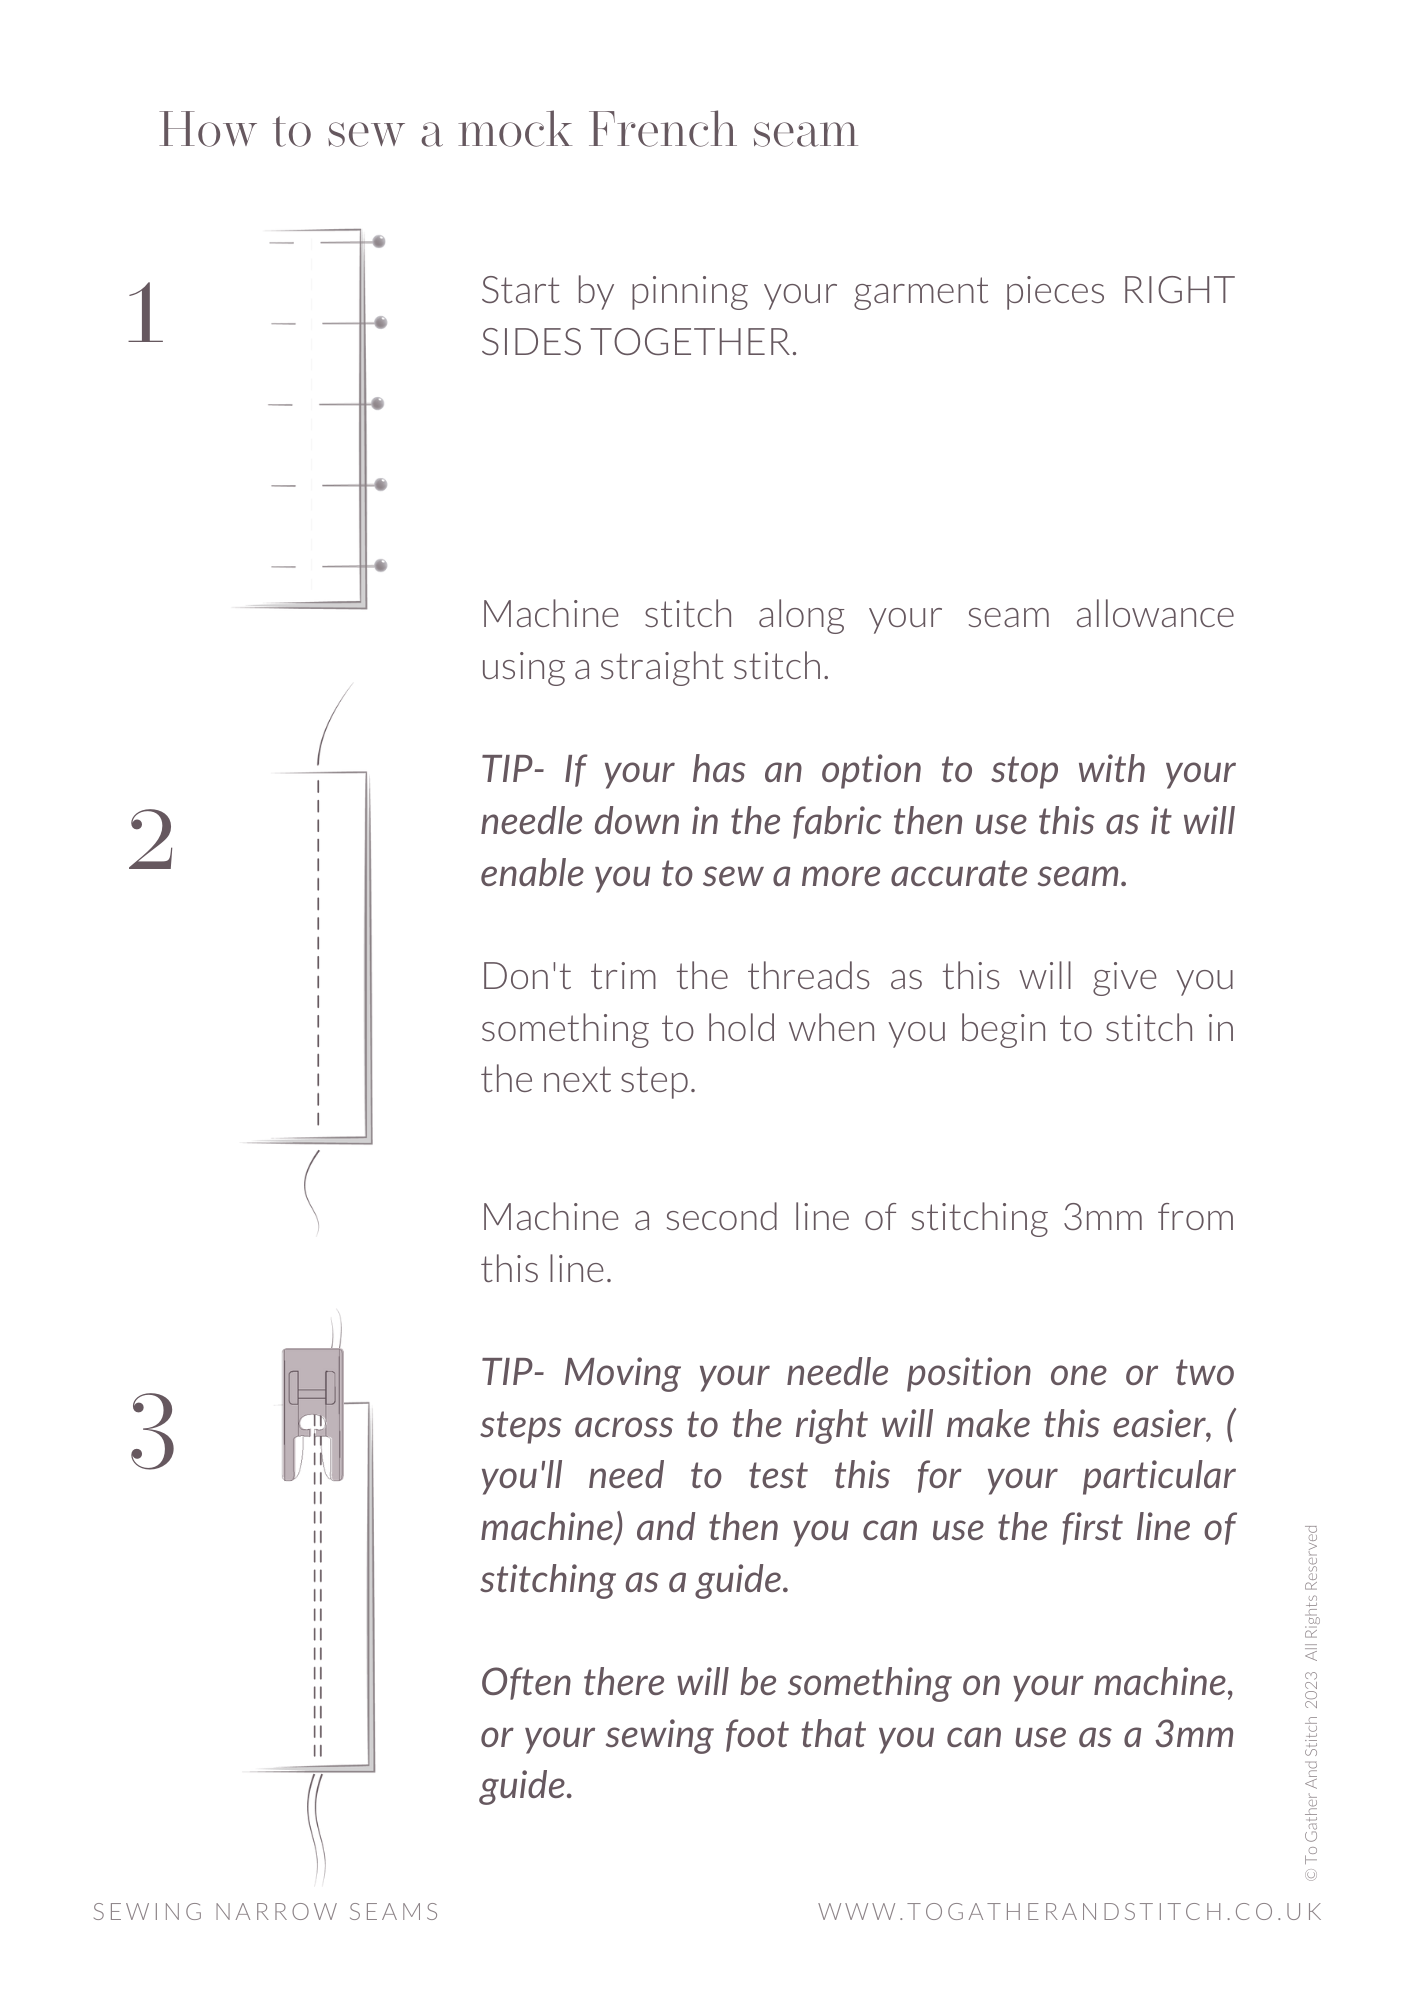
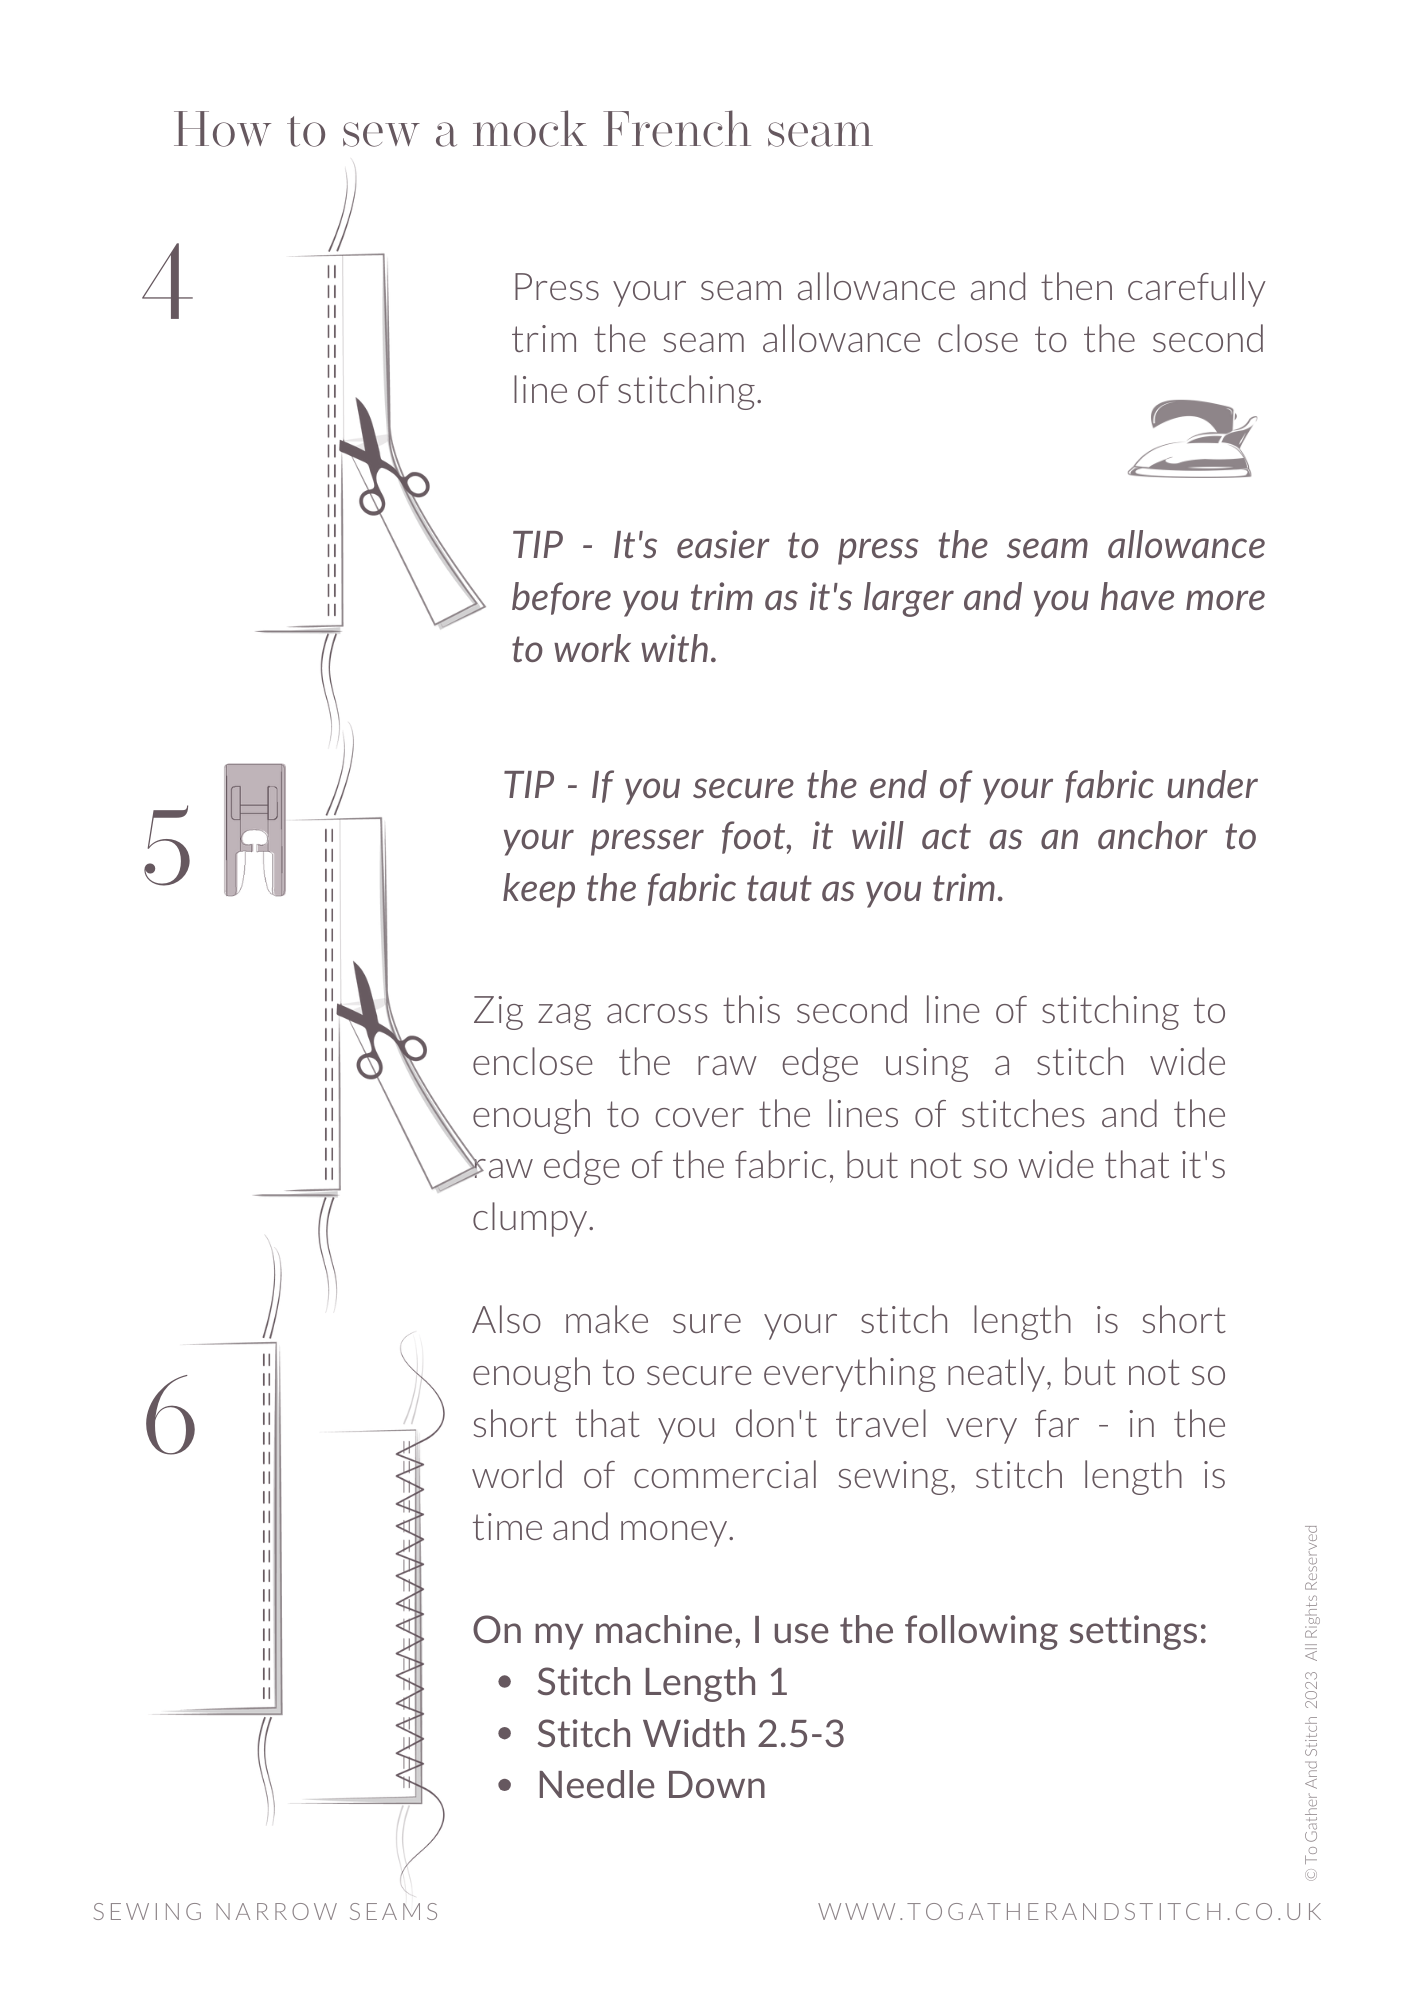
A mock French seam is an alternative to a traditional French seam. Here are some situations where mock French seams might be appropriate:
For speed: The mock French seam is a great option if you need a quick seam finish that mimics the look of a French seam.
To avoid bulk in thicker fabrics: Heavier fabrics can get bulky from traditional French seams. Then a mock French seam can provide a cleaner finish without adding unnecessary thickness since it reduces the amount of fabric layers in the seam.
On curved seams: Traditional French seams work best on straight seams. A mock French seam is easier to sew if you're working with curved seams.
Less confident dressmakers: A mock French seam provides a tidy finish without the complexity of the traditional French seam.
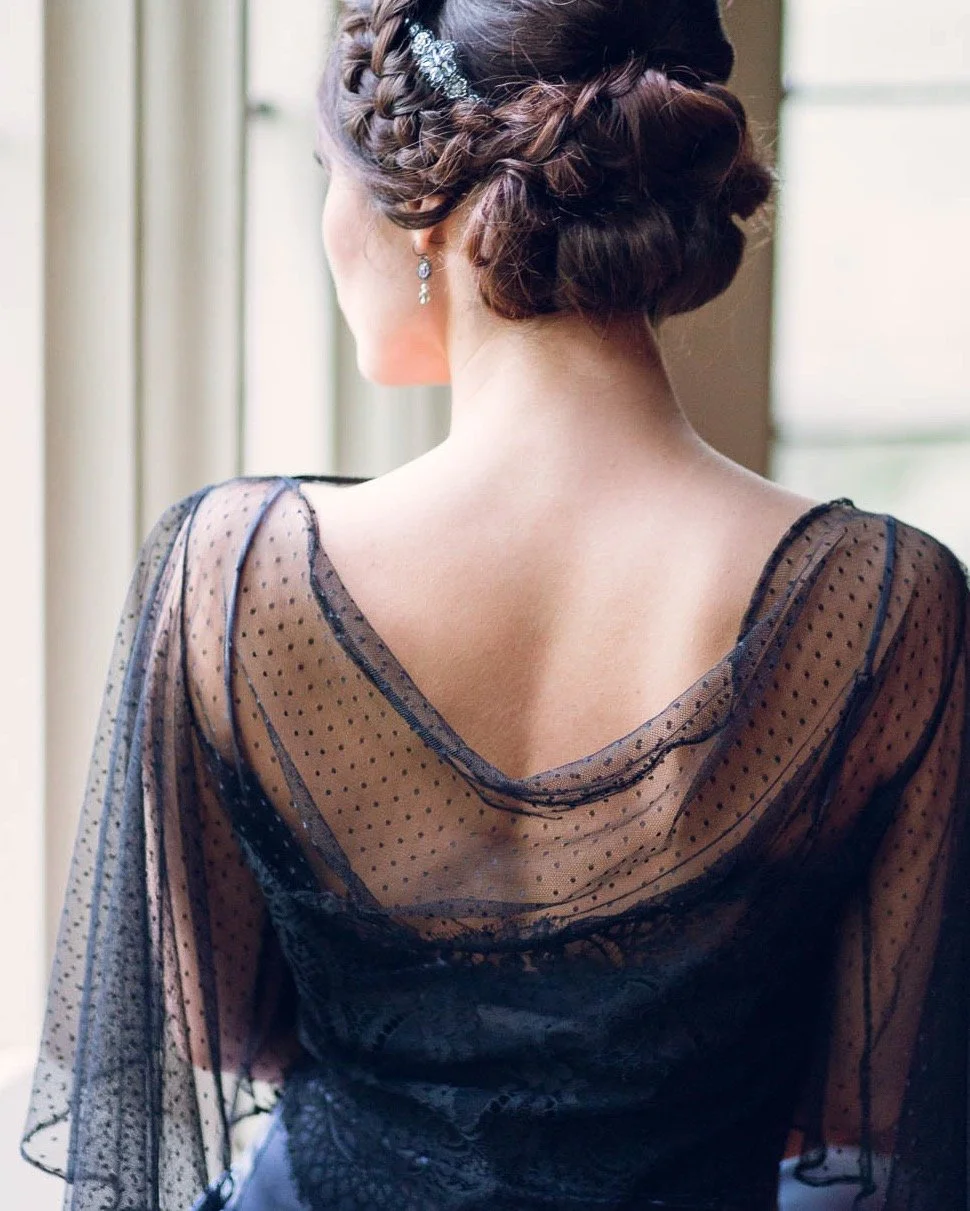
A soft, floaty top in spotted tulle. The sleeve is joined to the bodice by a mock French seam.
Remember practice makes perfect, but you can master sewing narrow seams!
Begin with a mock French seam, aim for slightly wider seam allowances to begin with and then when you feel confident challenge yourself by trying to make them narrower. As a result, you'll be able to create a wardrobe that is beautifully handcrafted and finished to a professional standard.
Happy sewing!

PS. The Inside Secrets Of Sewing Bias Cut Garments will be available as a downloadable PDF soon.

Are you on Pinterest?
If you enjoyed this post here are some pins to share