How To Lengthen A Sewing Pattern
A Step By Step Tutorial
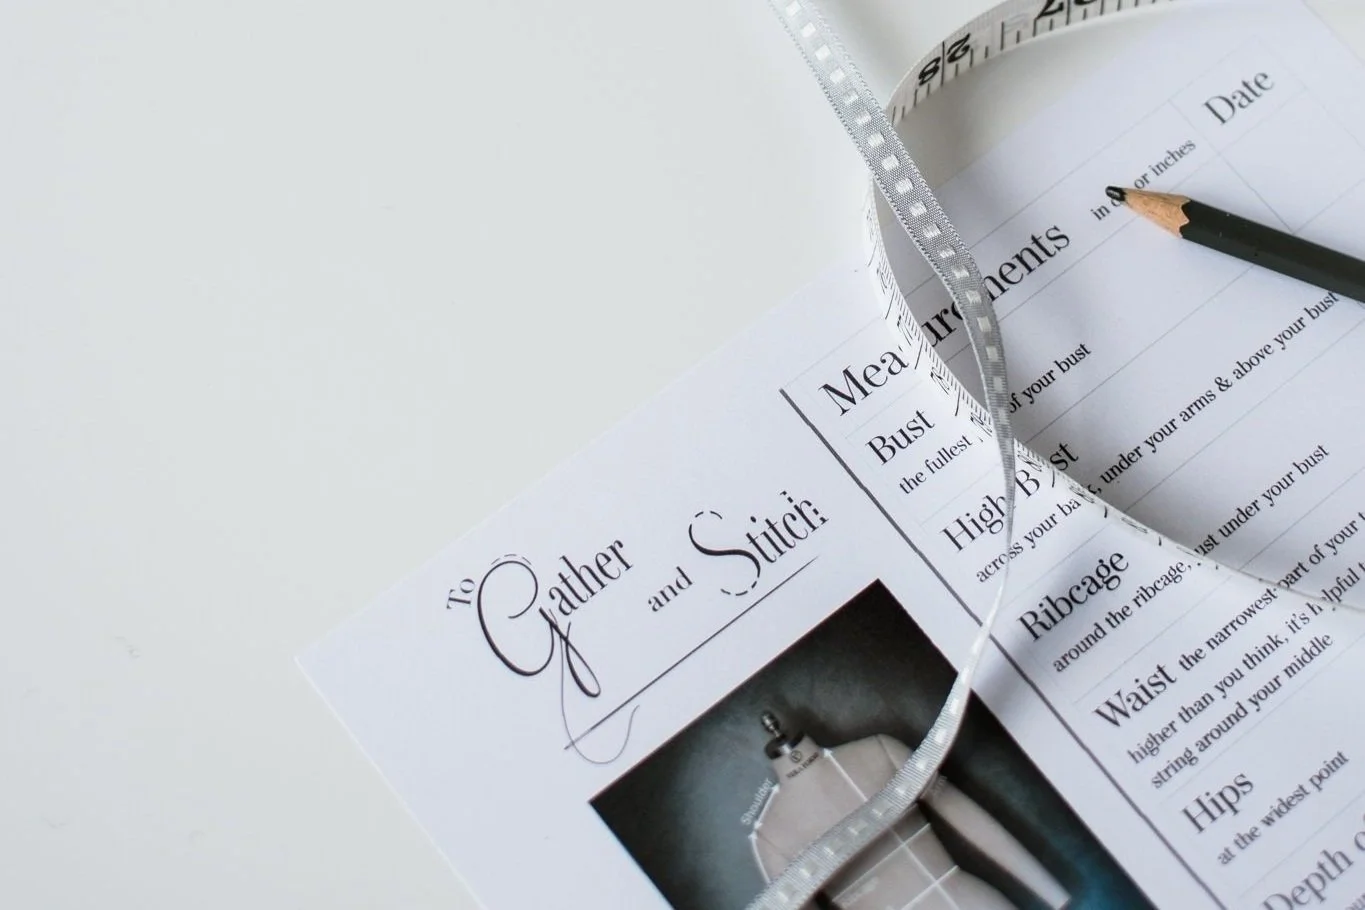
If you’re making your own clothes, the chance is that you’re keen to create something that fits you perfectly. But if you’re tall, long in the body, or perhaps long-legged the chances are you'll need to adjust the length of a sewing pattern.
Or for a step-by step tutorial on how to shorten a sewing pattern click here.
So how do you know if you need to alter the length of a pattern?
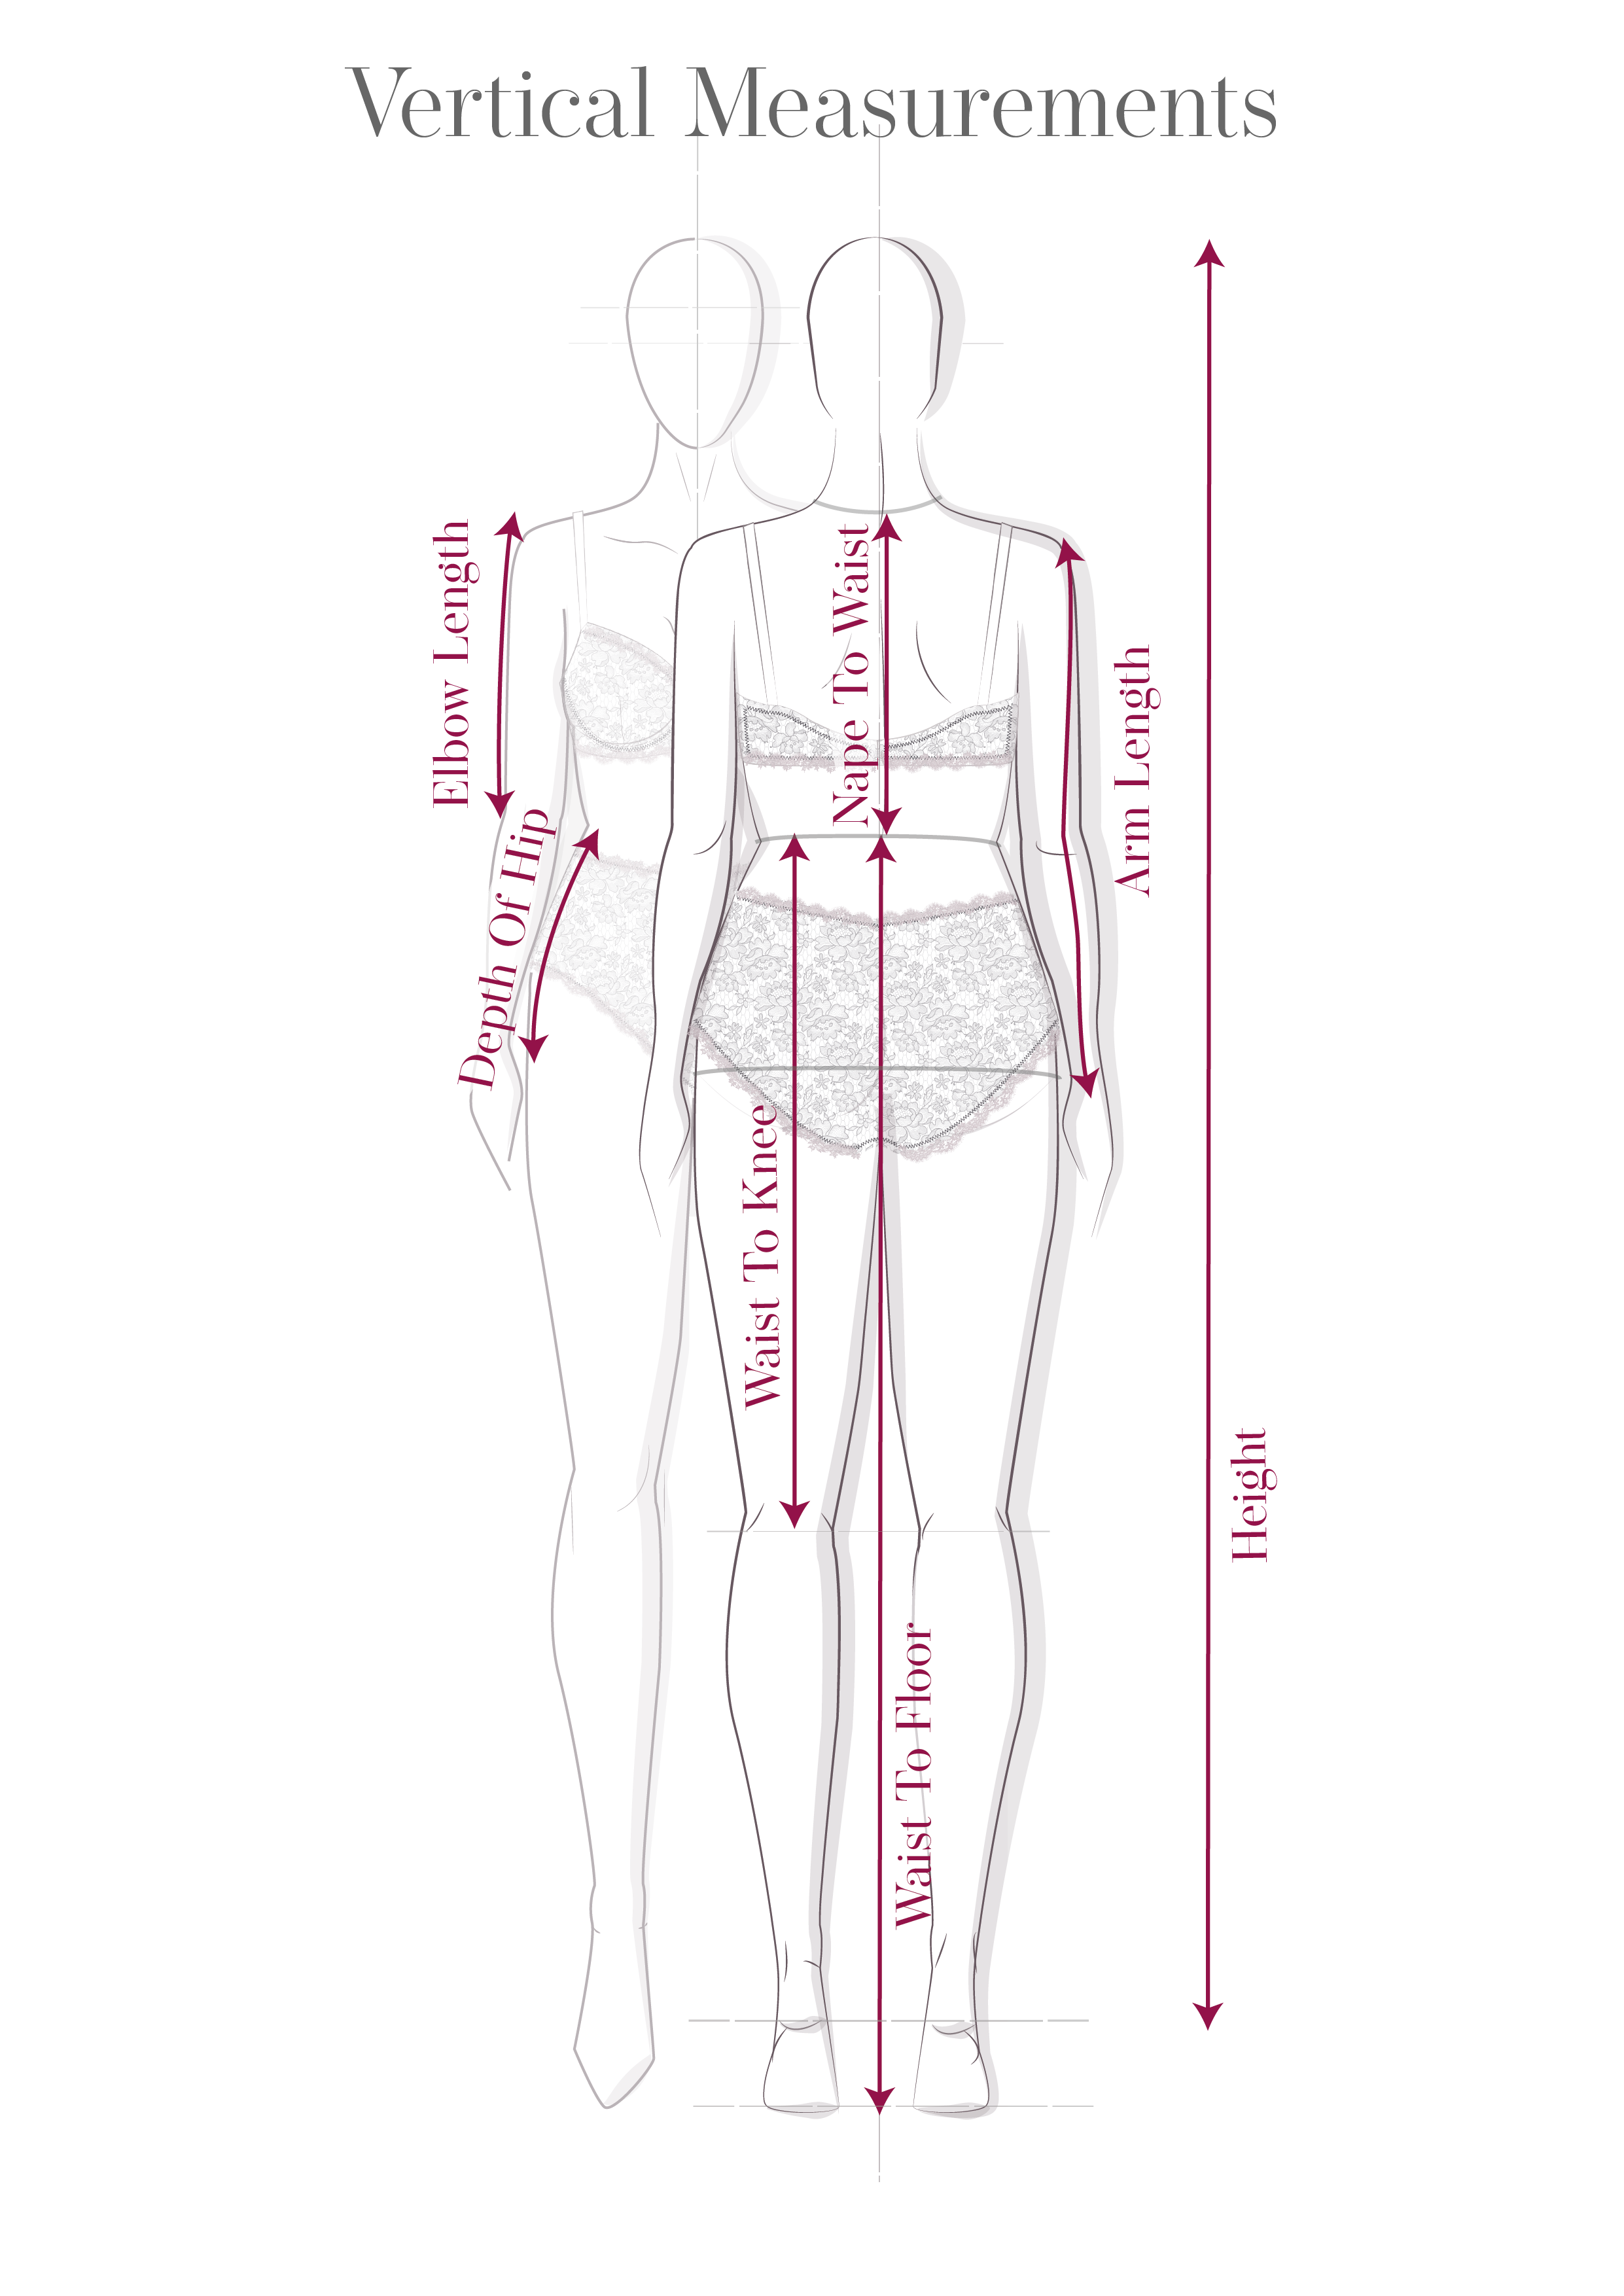
Start by taking your measurements and then compare them with the size chart. Pay close attention to how your measurements align with the longitudinal measurements provided on the chart, such as nape to waist, hip depth, waist to knee length, and arm length.
Then look at the finished garment measurements, typically found on the back of the pattern envelope or within the sewing instructions. Focus on measurements like garment length, sleeve length, skirt length, trouser length, and so on.
Once you've noted the differences between your measurements and the desired finished measurements, decide how much you need to lengthen or shorten the pattern for a perfect fit.
If the pattern is straight and boxy you can add length to the hem of the pattern:
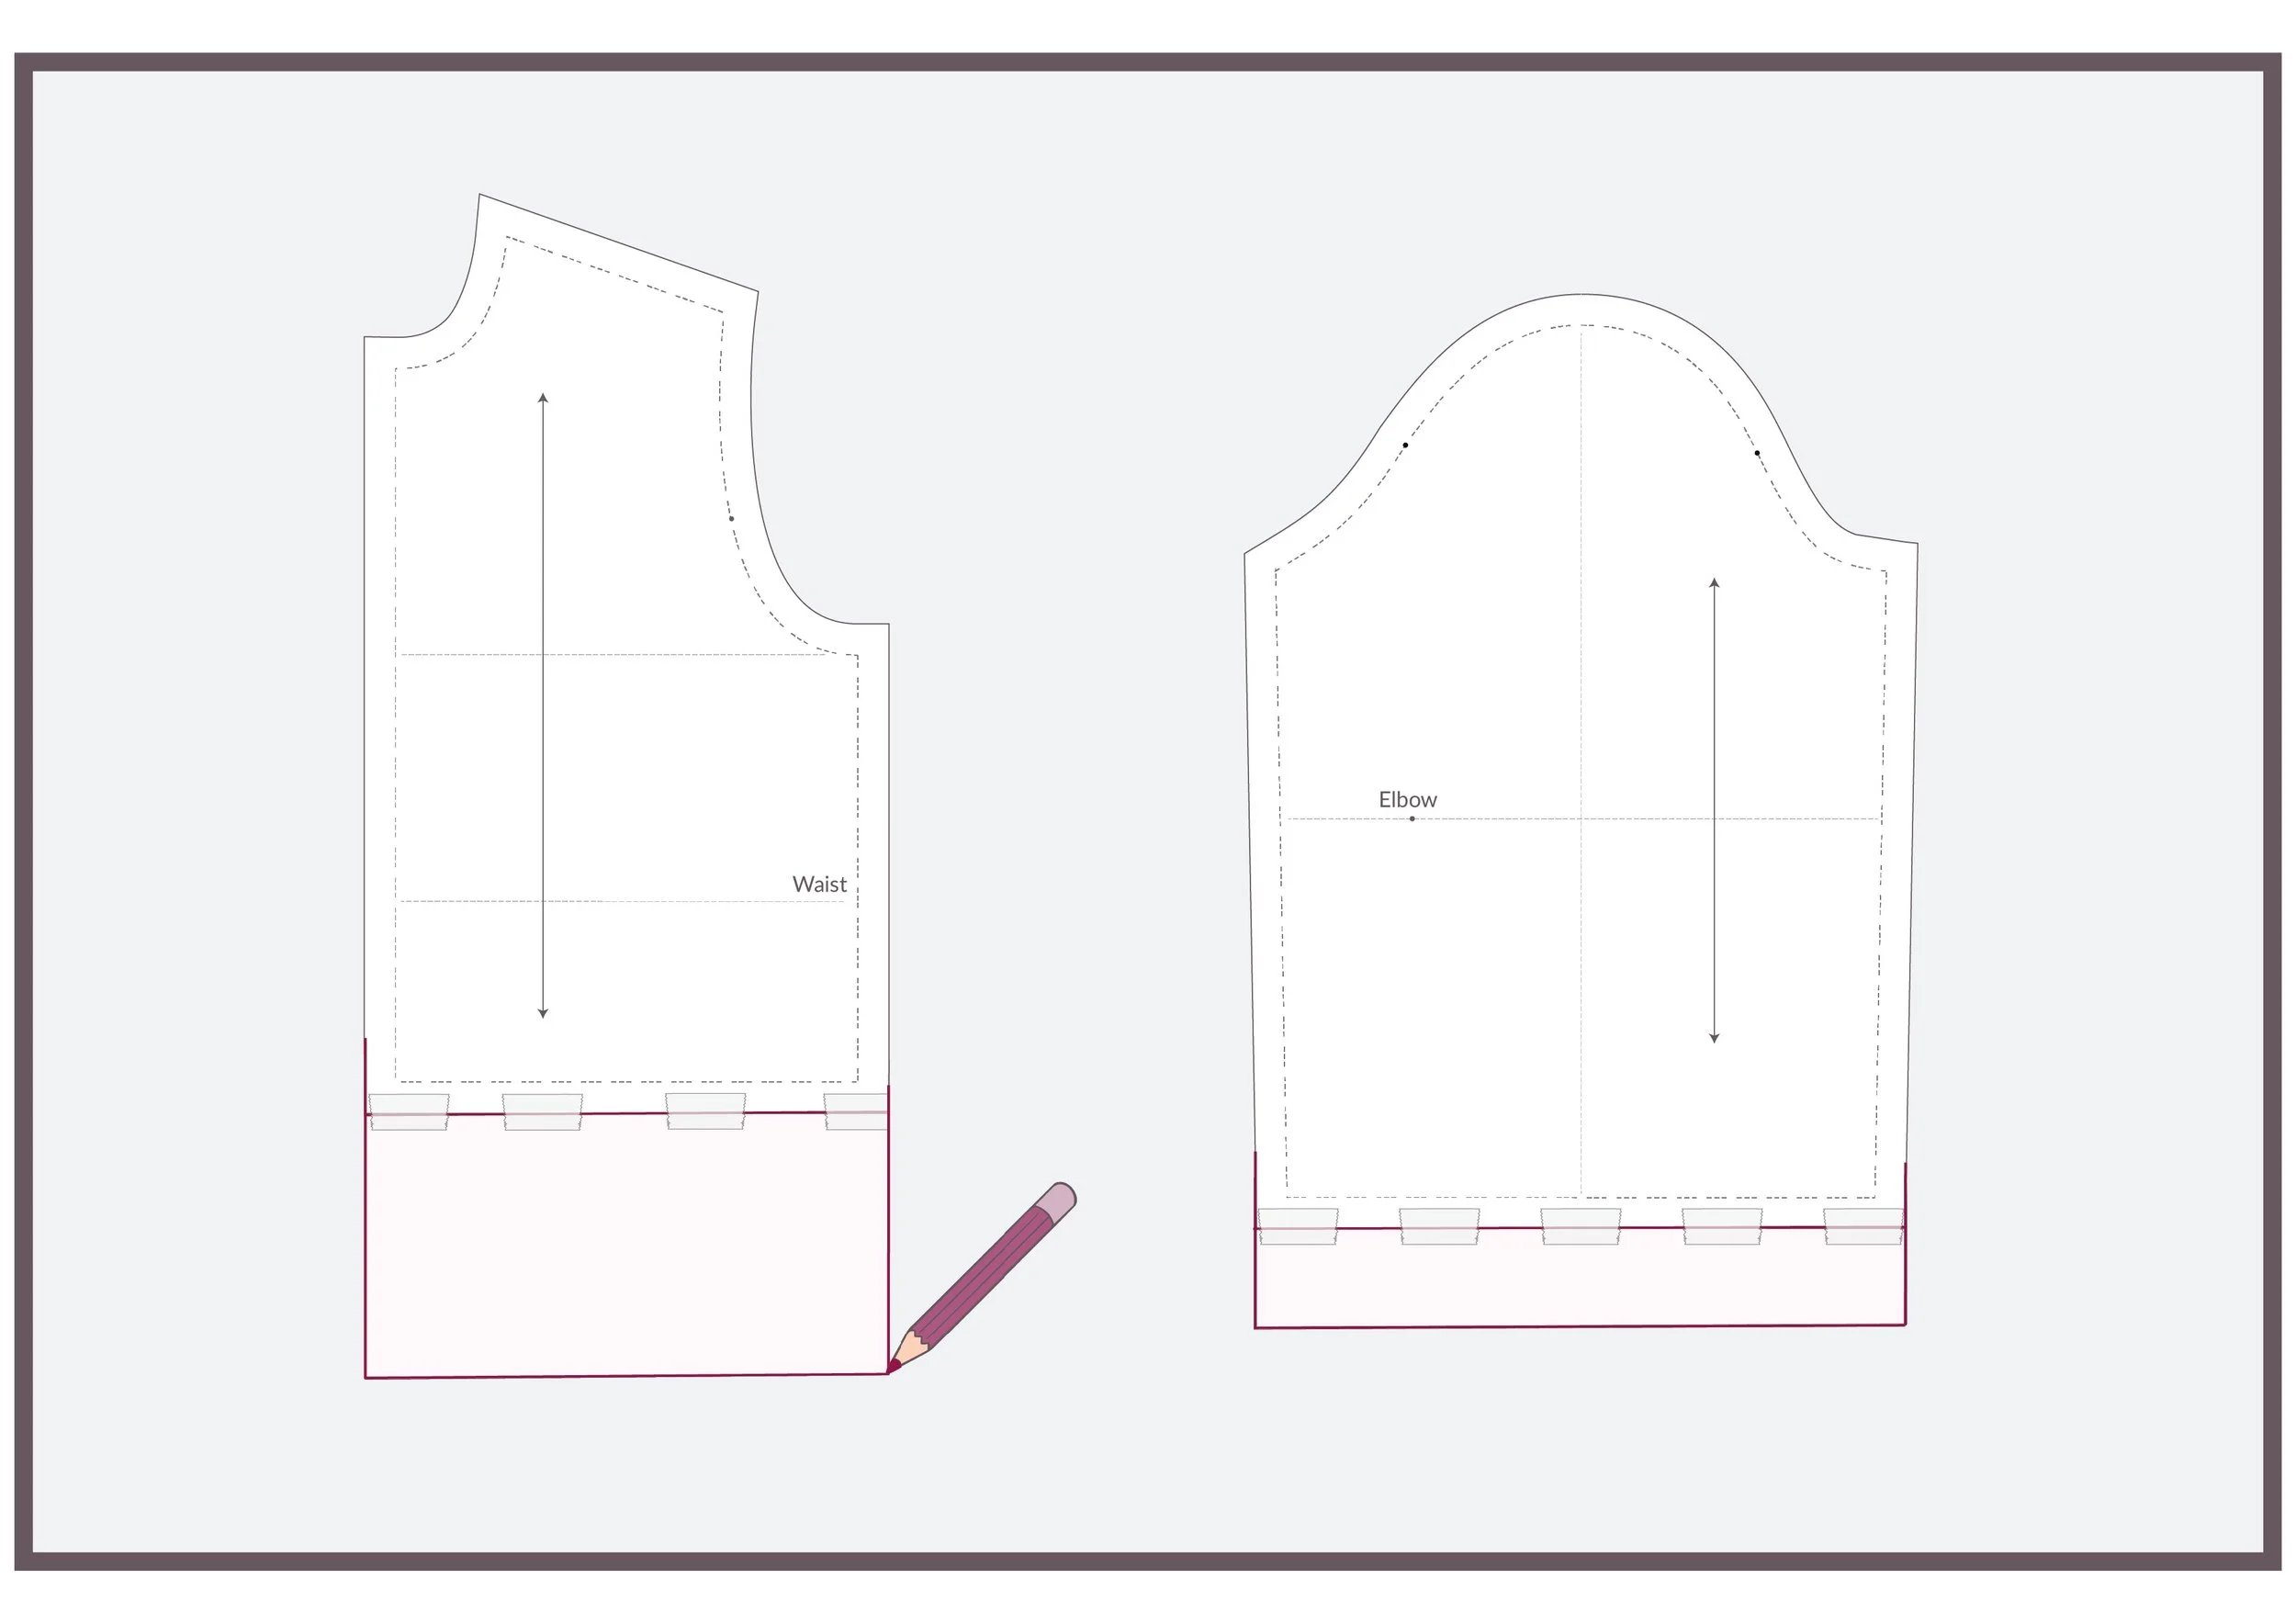
But if your garment is fitted or flared, just adding length to the hem will change the hem width - see below.

Adding length just at the hem of a tapered sleeve makes the wrist narrower.

Adding length just to the hem of a flared skirt makes the hem wider.
There is another way! You can cut along the “Shorten And Lengthen Lines” and spread the amount you need to subtract. This way the hem width stays the same. Most sewing patterns have adjustment lines for length marked on them.

You’ll find a step-by-step tutorial for this method below.
Where are “Shorten And Lengthen” lines?

You’ll find “Shorten And Lengthen” lines:
On a bodice above the waistline and below the bust dart, and through any waist darts.
On a skirt below the hip line (and avoiding any pocket details).
Long skirts will have two lines; above and below the knee, so that the side seam blends evenly and the hem width says the same.
Fitted sleeves will have lengthen or shorten lines below the armscye and above the elbow, and between the elbow and the wrist
Trousers: below the waist darts and above the crotch line; and between the crotch and the knee line.
Tip - It’s best to lengthen the pattern first before you do any other alterations.
To Lengthen Pattern Pieces
You will need:
A tape measure.
A pen or pencil.
The pattern envelope or instructions for the design with the size chart on it and also the finished garment measurements.
A copy of the printed or PDF sewing pattern of the garment you plan to make. If the pattern is layered select and print out the sizes you need.
A strip of paper, wider than the pattern piece you are altering.
Sellotape, adhesive tape or a glue stick.
A ruler. Depending on the shape of your garment a Pattern Master or French Curves might be useful too.
A tabletop to lay out your pattern pieces.
Step-by-step instructions for lengthening your sewing pattern
First Steps
1.
Take your measurements and decide how much length you need to add to the length of your pattern.
2.
Tip: Gather all the pieces you need to lengthen together, there’s nothing more frustrating than only altering the front pattern and then finding that the back is too short when you go to sew your garment together! And then work on one piece at a time until you are all done.
3.
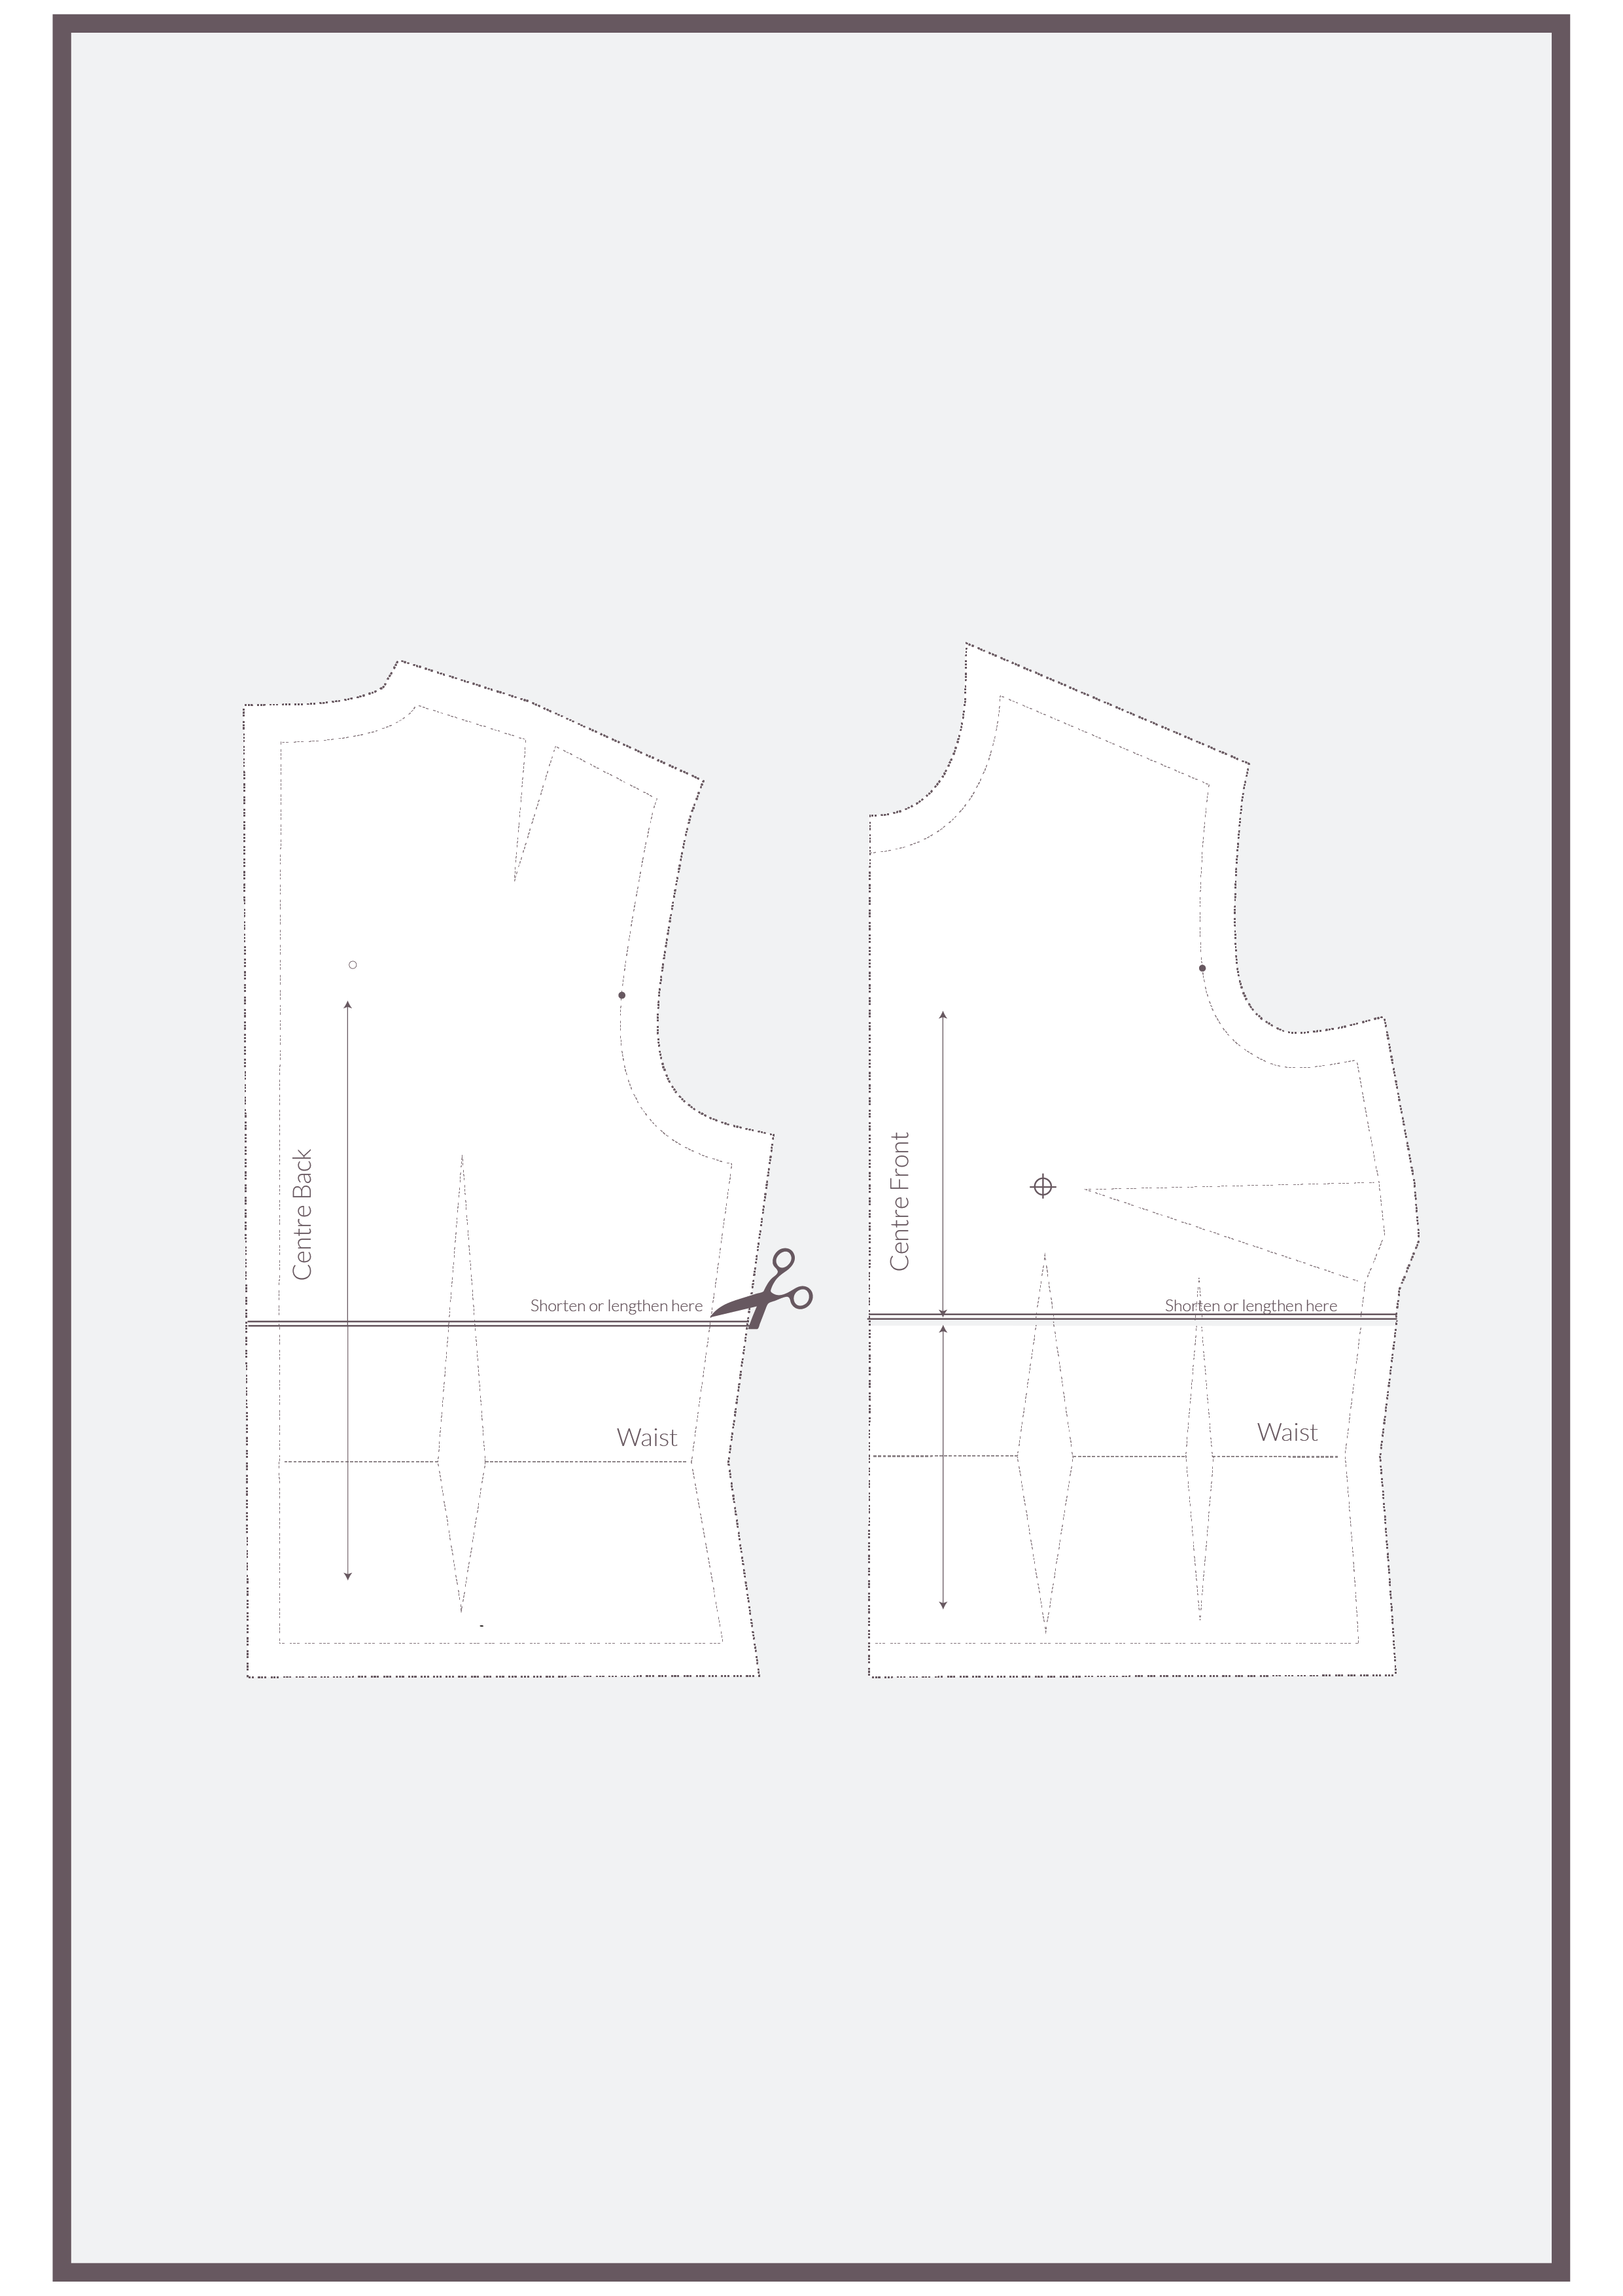
Cut along the “Lengthen Or Shorten Here” lines on your pattern piece.
4.
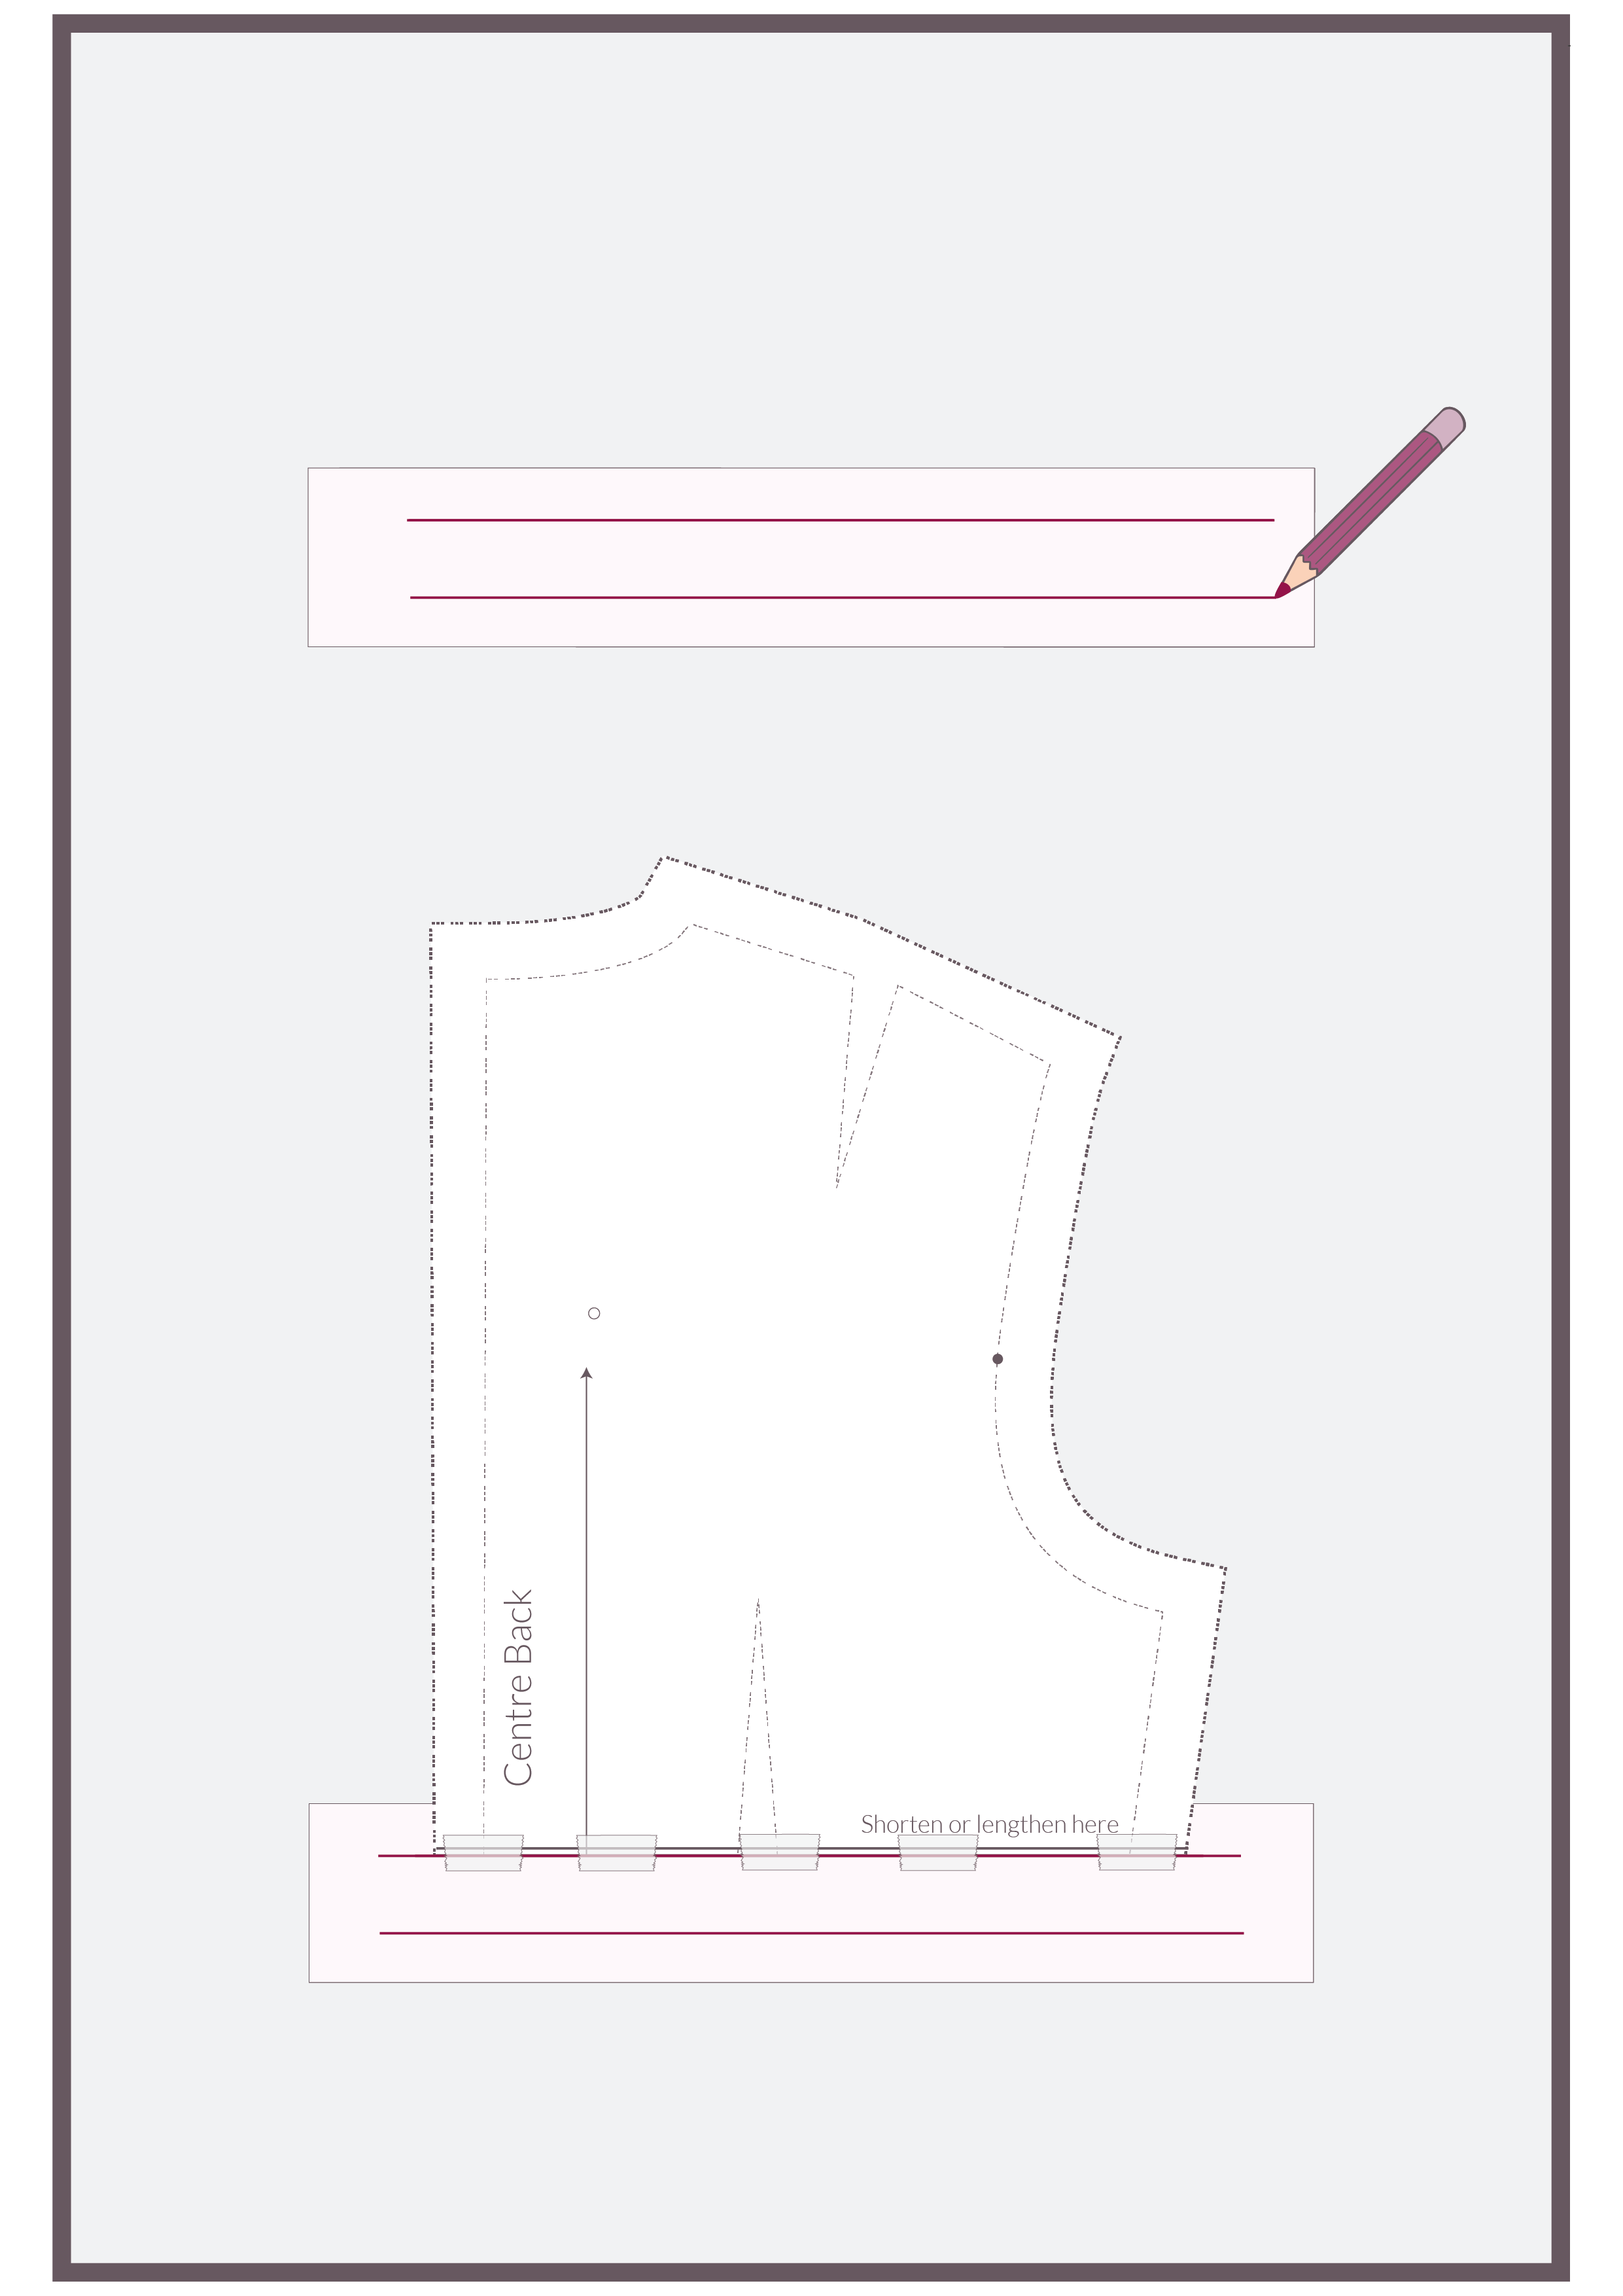
On a separate piece of paper wider than your pattern piece, draw two parallel lines the distance apart that you want to lengthen your pattern by.
Place the upper part of the pattern piece on the top line you have drawn and secure it in place with tape.
5.
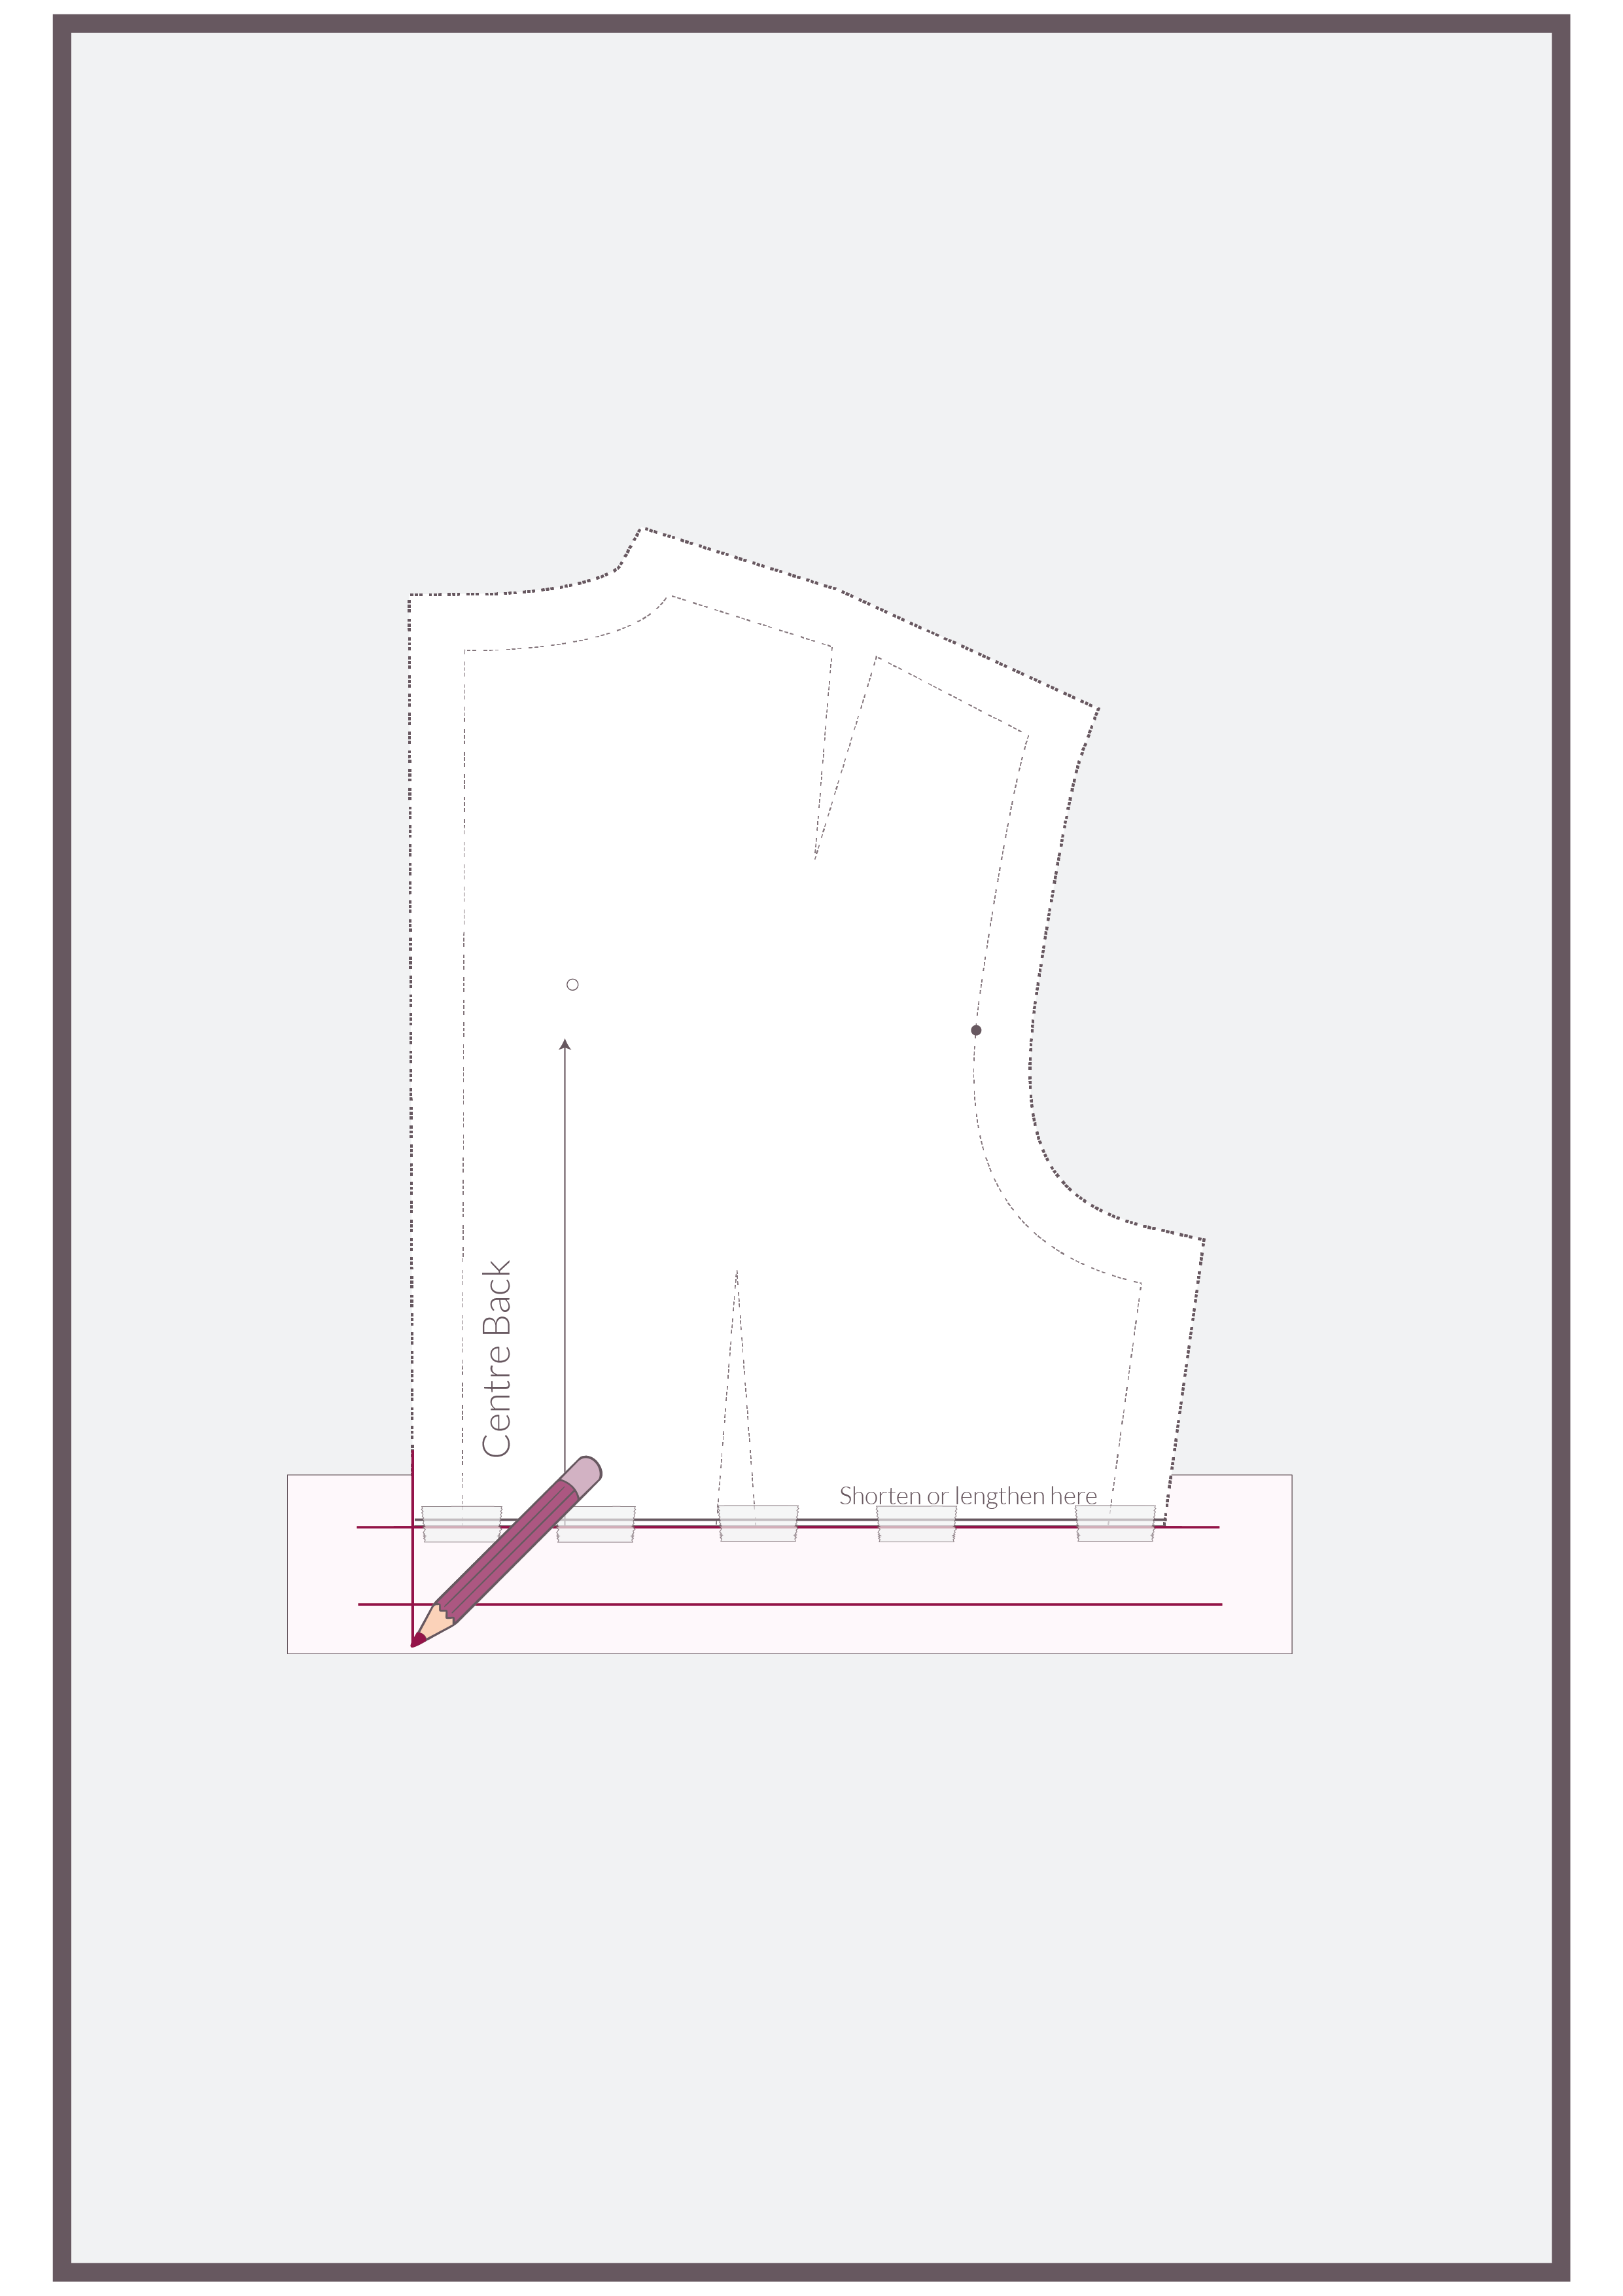
Note if there’s a vertical line on the pattern that you can use as a guide to ensure that the lower part of the pattern lines up correctly, rule an extension from these lines across onto your paper to help you. Often this will be a CF or CB line, if the pattern is cut on the straight grain you could also use a grainline.
6.
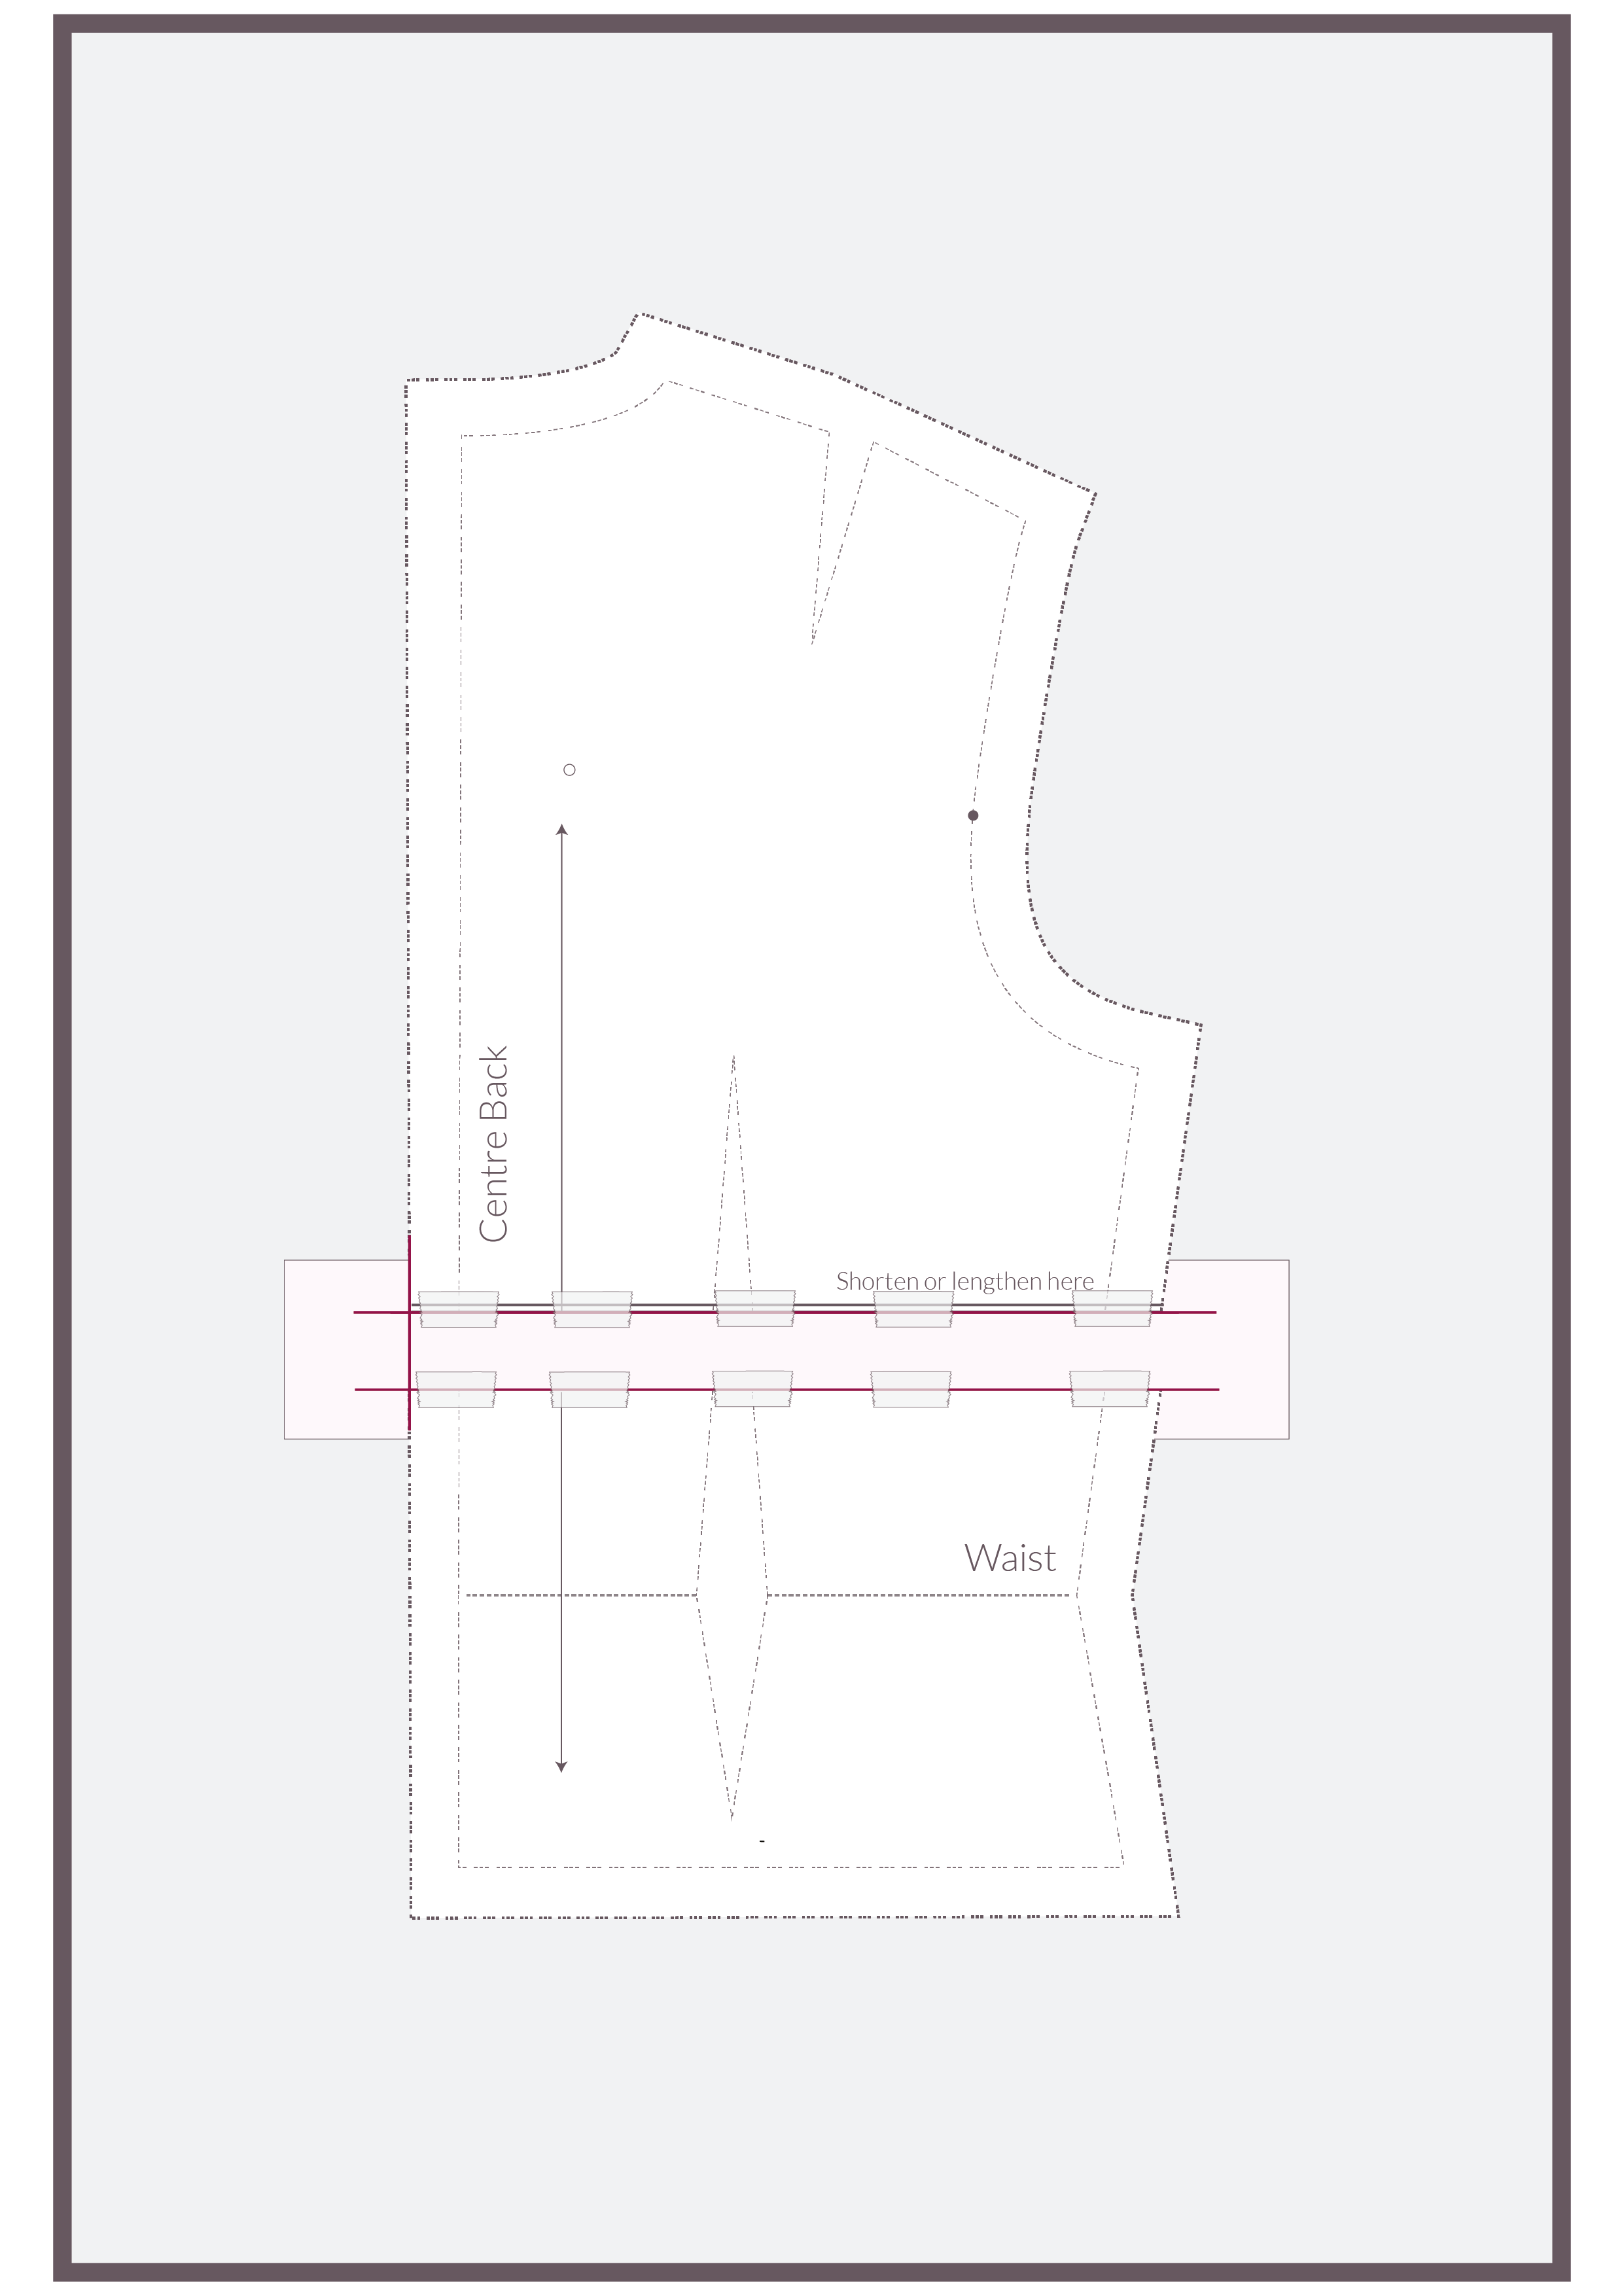
Lay the lower part of the pattern along the bottom line you have drawn, using the guideline to line up the pattern correctly and tape or glue it in place.
7.
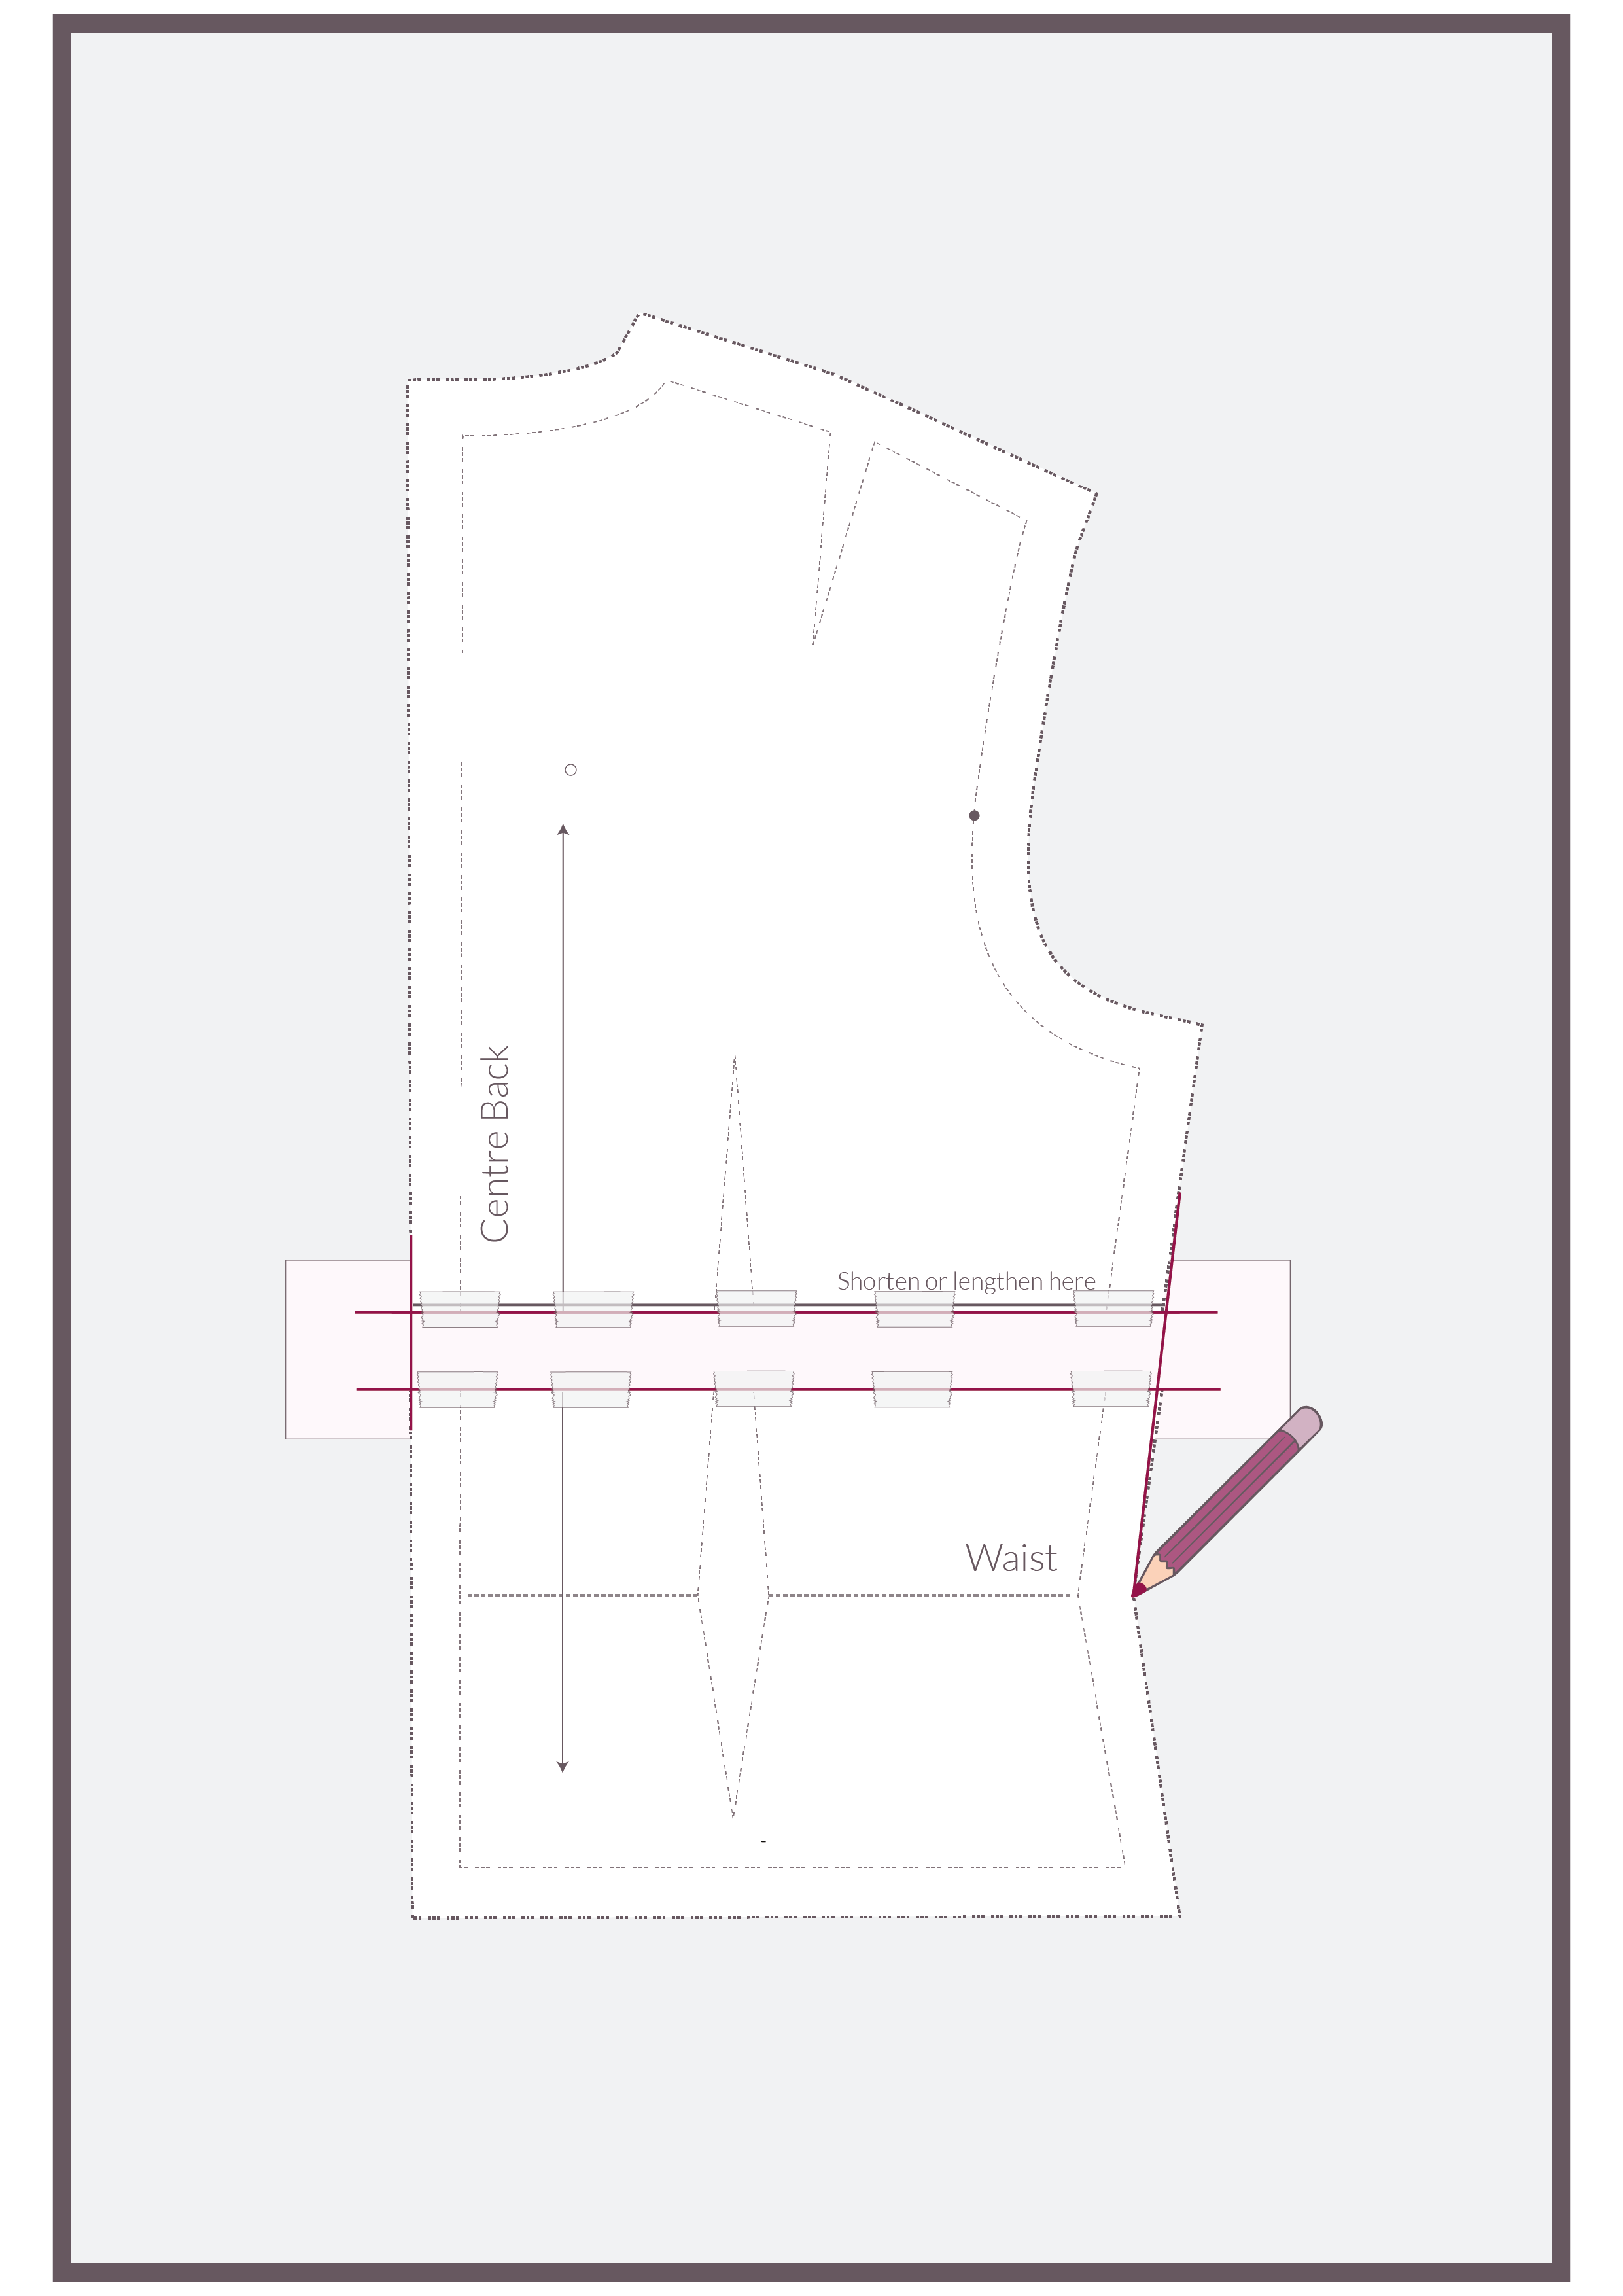
At the sides of the pattern piece blend a line from one piece of the pattern to the other. If you need to draw a curve a French Curve for a Patternmaster will help you.
8.
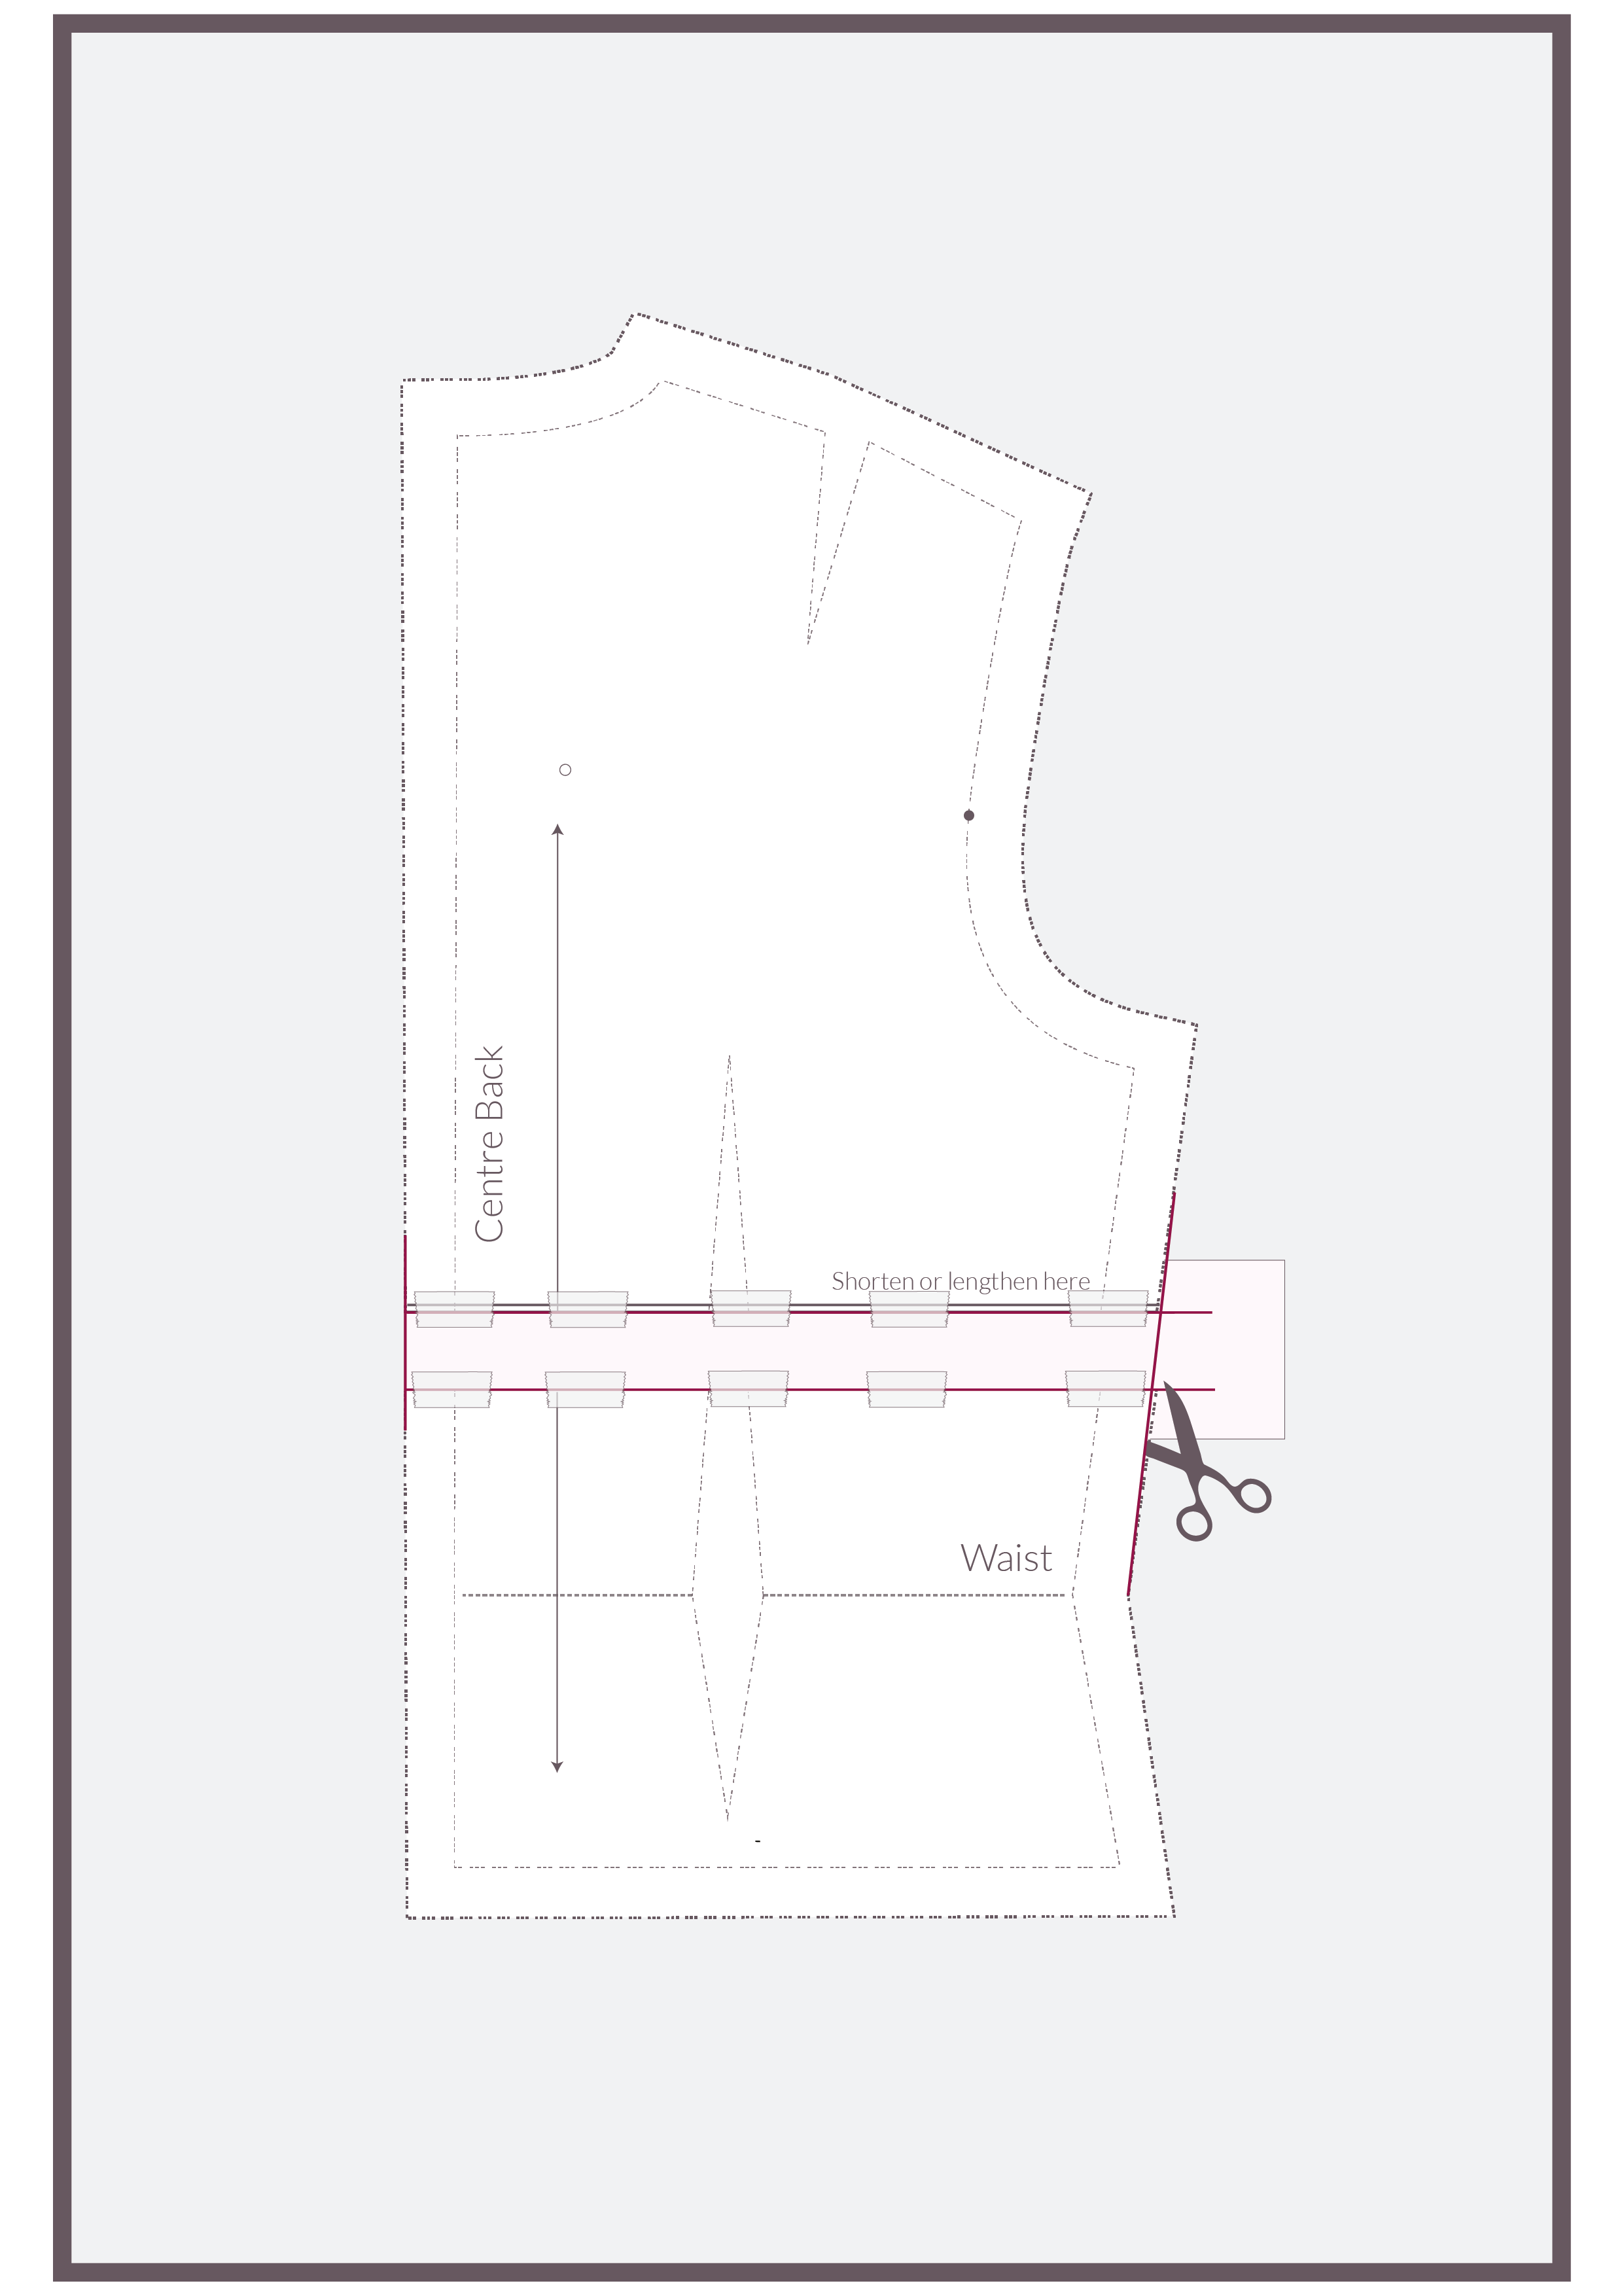
Trim the paper behind the pattern along the lines on each side.
You’re nearly there!
9.
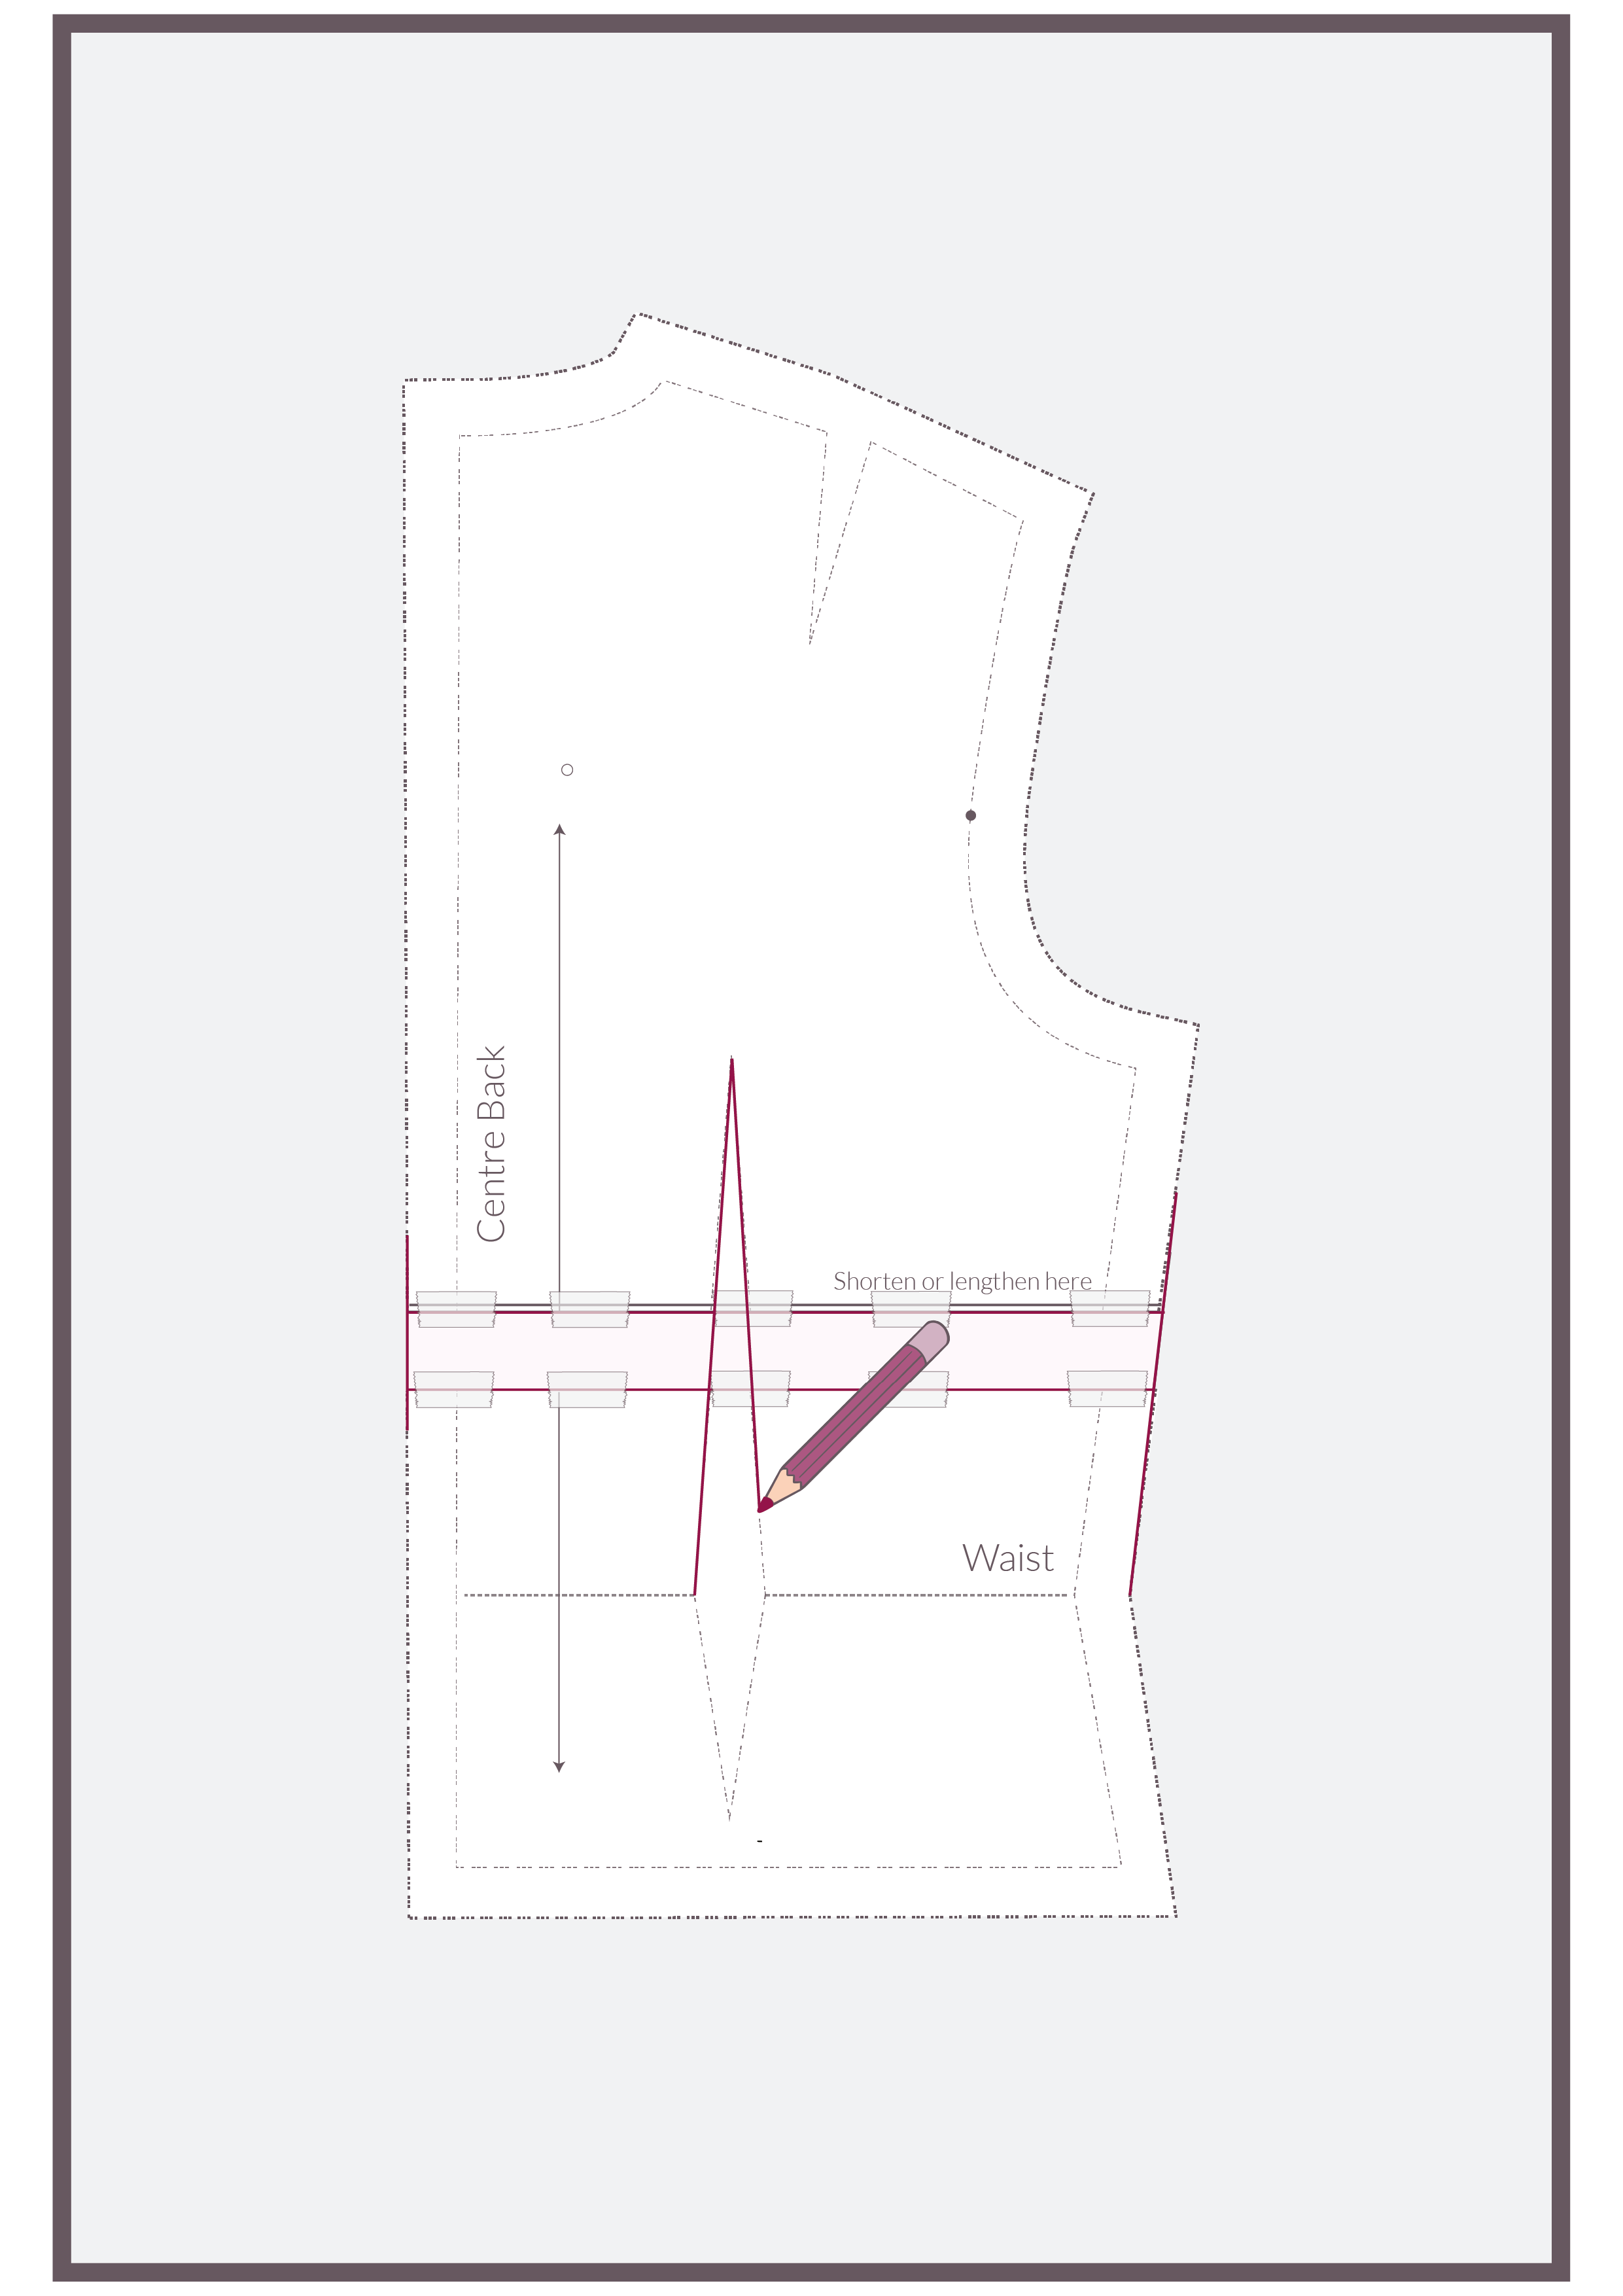
Redraw any dart lines as shown, and you have your lengthened pattern piece.
10.
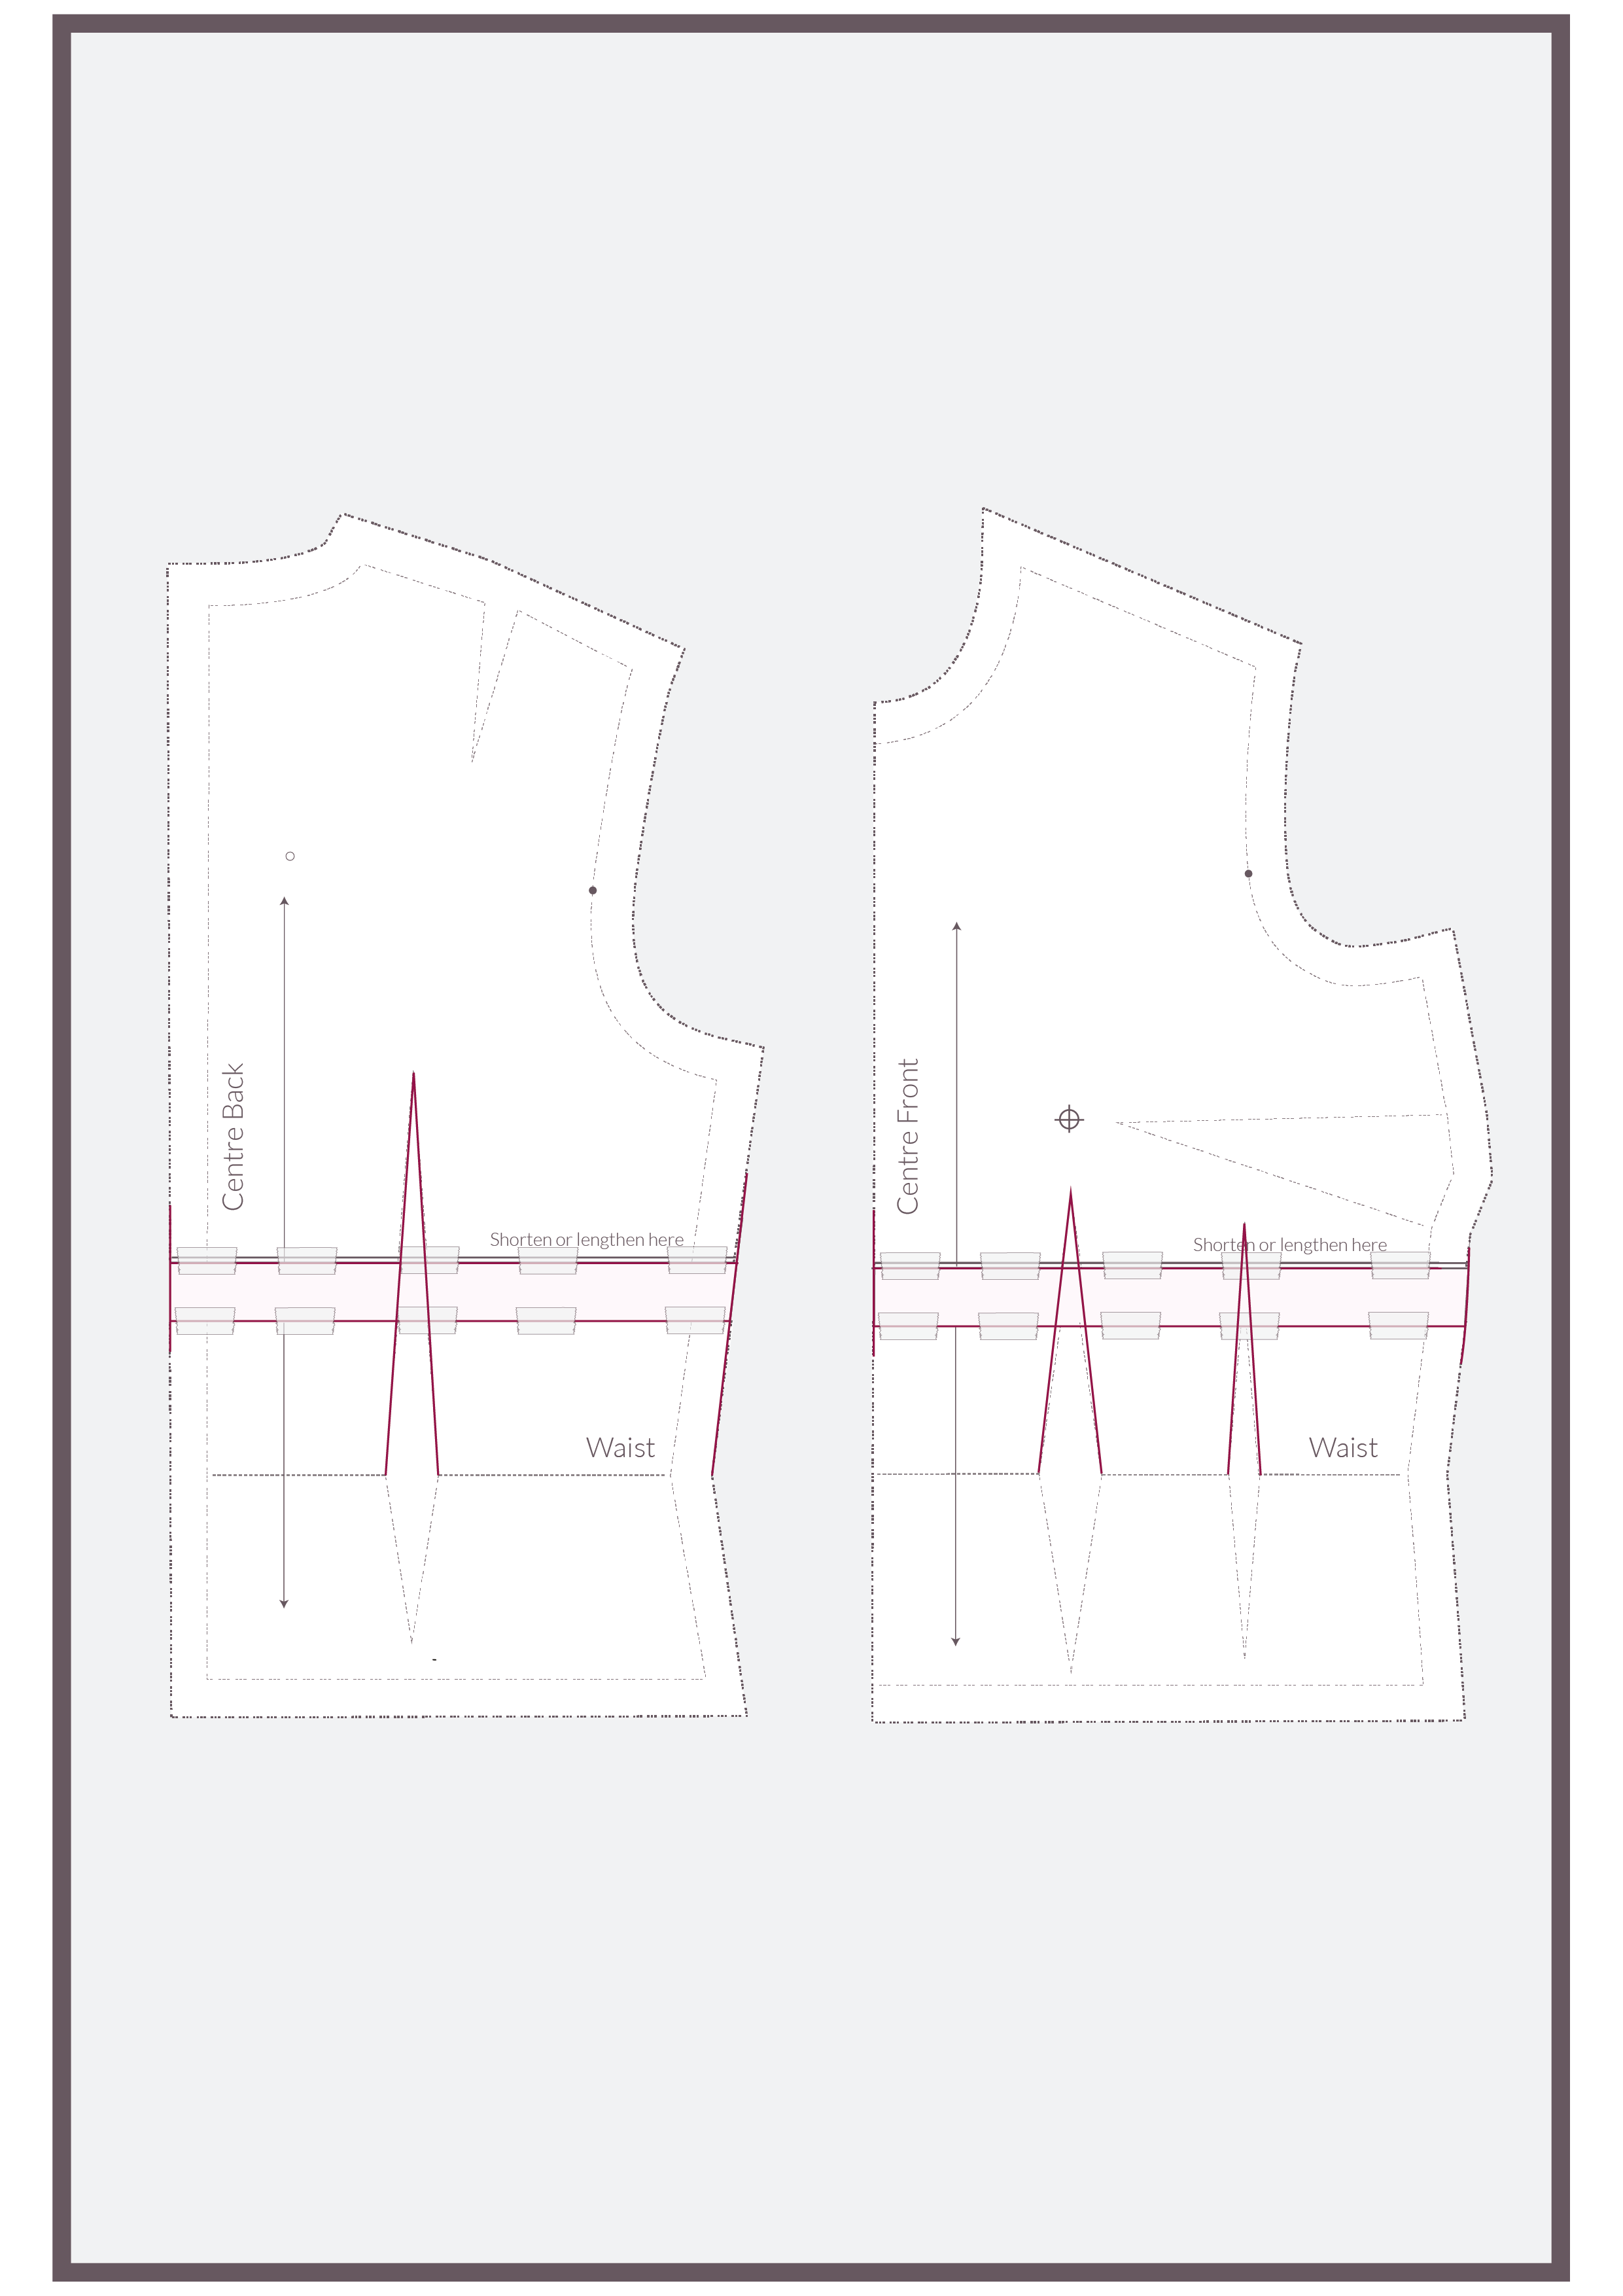
Repeat for all the corresponding pieces in your pattern including any facings too.
Et voilà, you’ve added extra length to your pattern! Time for a nice cup of tea! ☕️
Make sure that you check and refine the fit by making a muslin or toile before you sew the garment in its chosen fabric.
Happy sewing!