How To Grade Between Pattern Sizes
A Step By Step Tutorial
If you’re making your own clothes, the chance is that you’re keen to create something that flatters you. But what do you do if you’ve taken your measurements and found that there isn’t one size that works for you?
This is familiar to me, and the reason why I started to make my clothes as I couldn’t find anything in the shops that fit me. I have two sizes difference between my waist and hips. My waist is size 10, and my hips a size 14 (and after a good Christmas, three sizes and more like a size 16!) So I could never find a shift dress that ticked all the boxes!
Remember, everybody is different, so a pattern will rarely fit nicely without any adjustments. But, again, it’s not a fault; it’s completely normal! Even if a pattern designer could spend all their time developing every possible pattern size, that’s lots of work, especially if you think about how many bra and cup sizes there are in the shops. The chances are you’ll still need to adjust the pattern until you’re happy.
So what do you do if you think you’re between sizes?
Don’t worry!
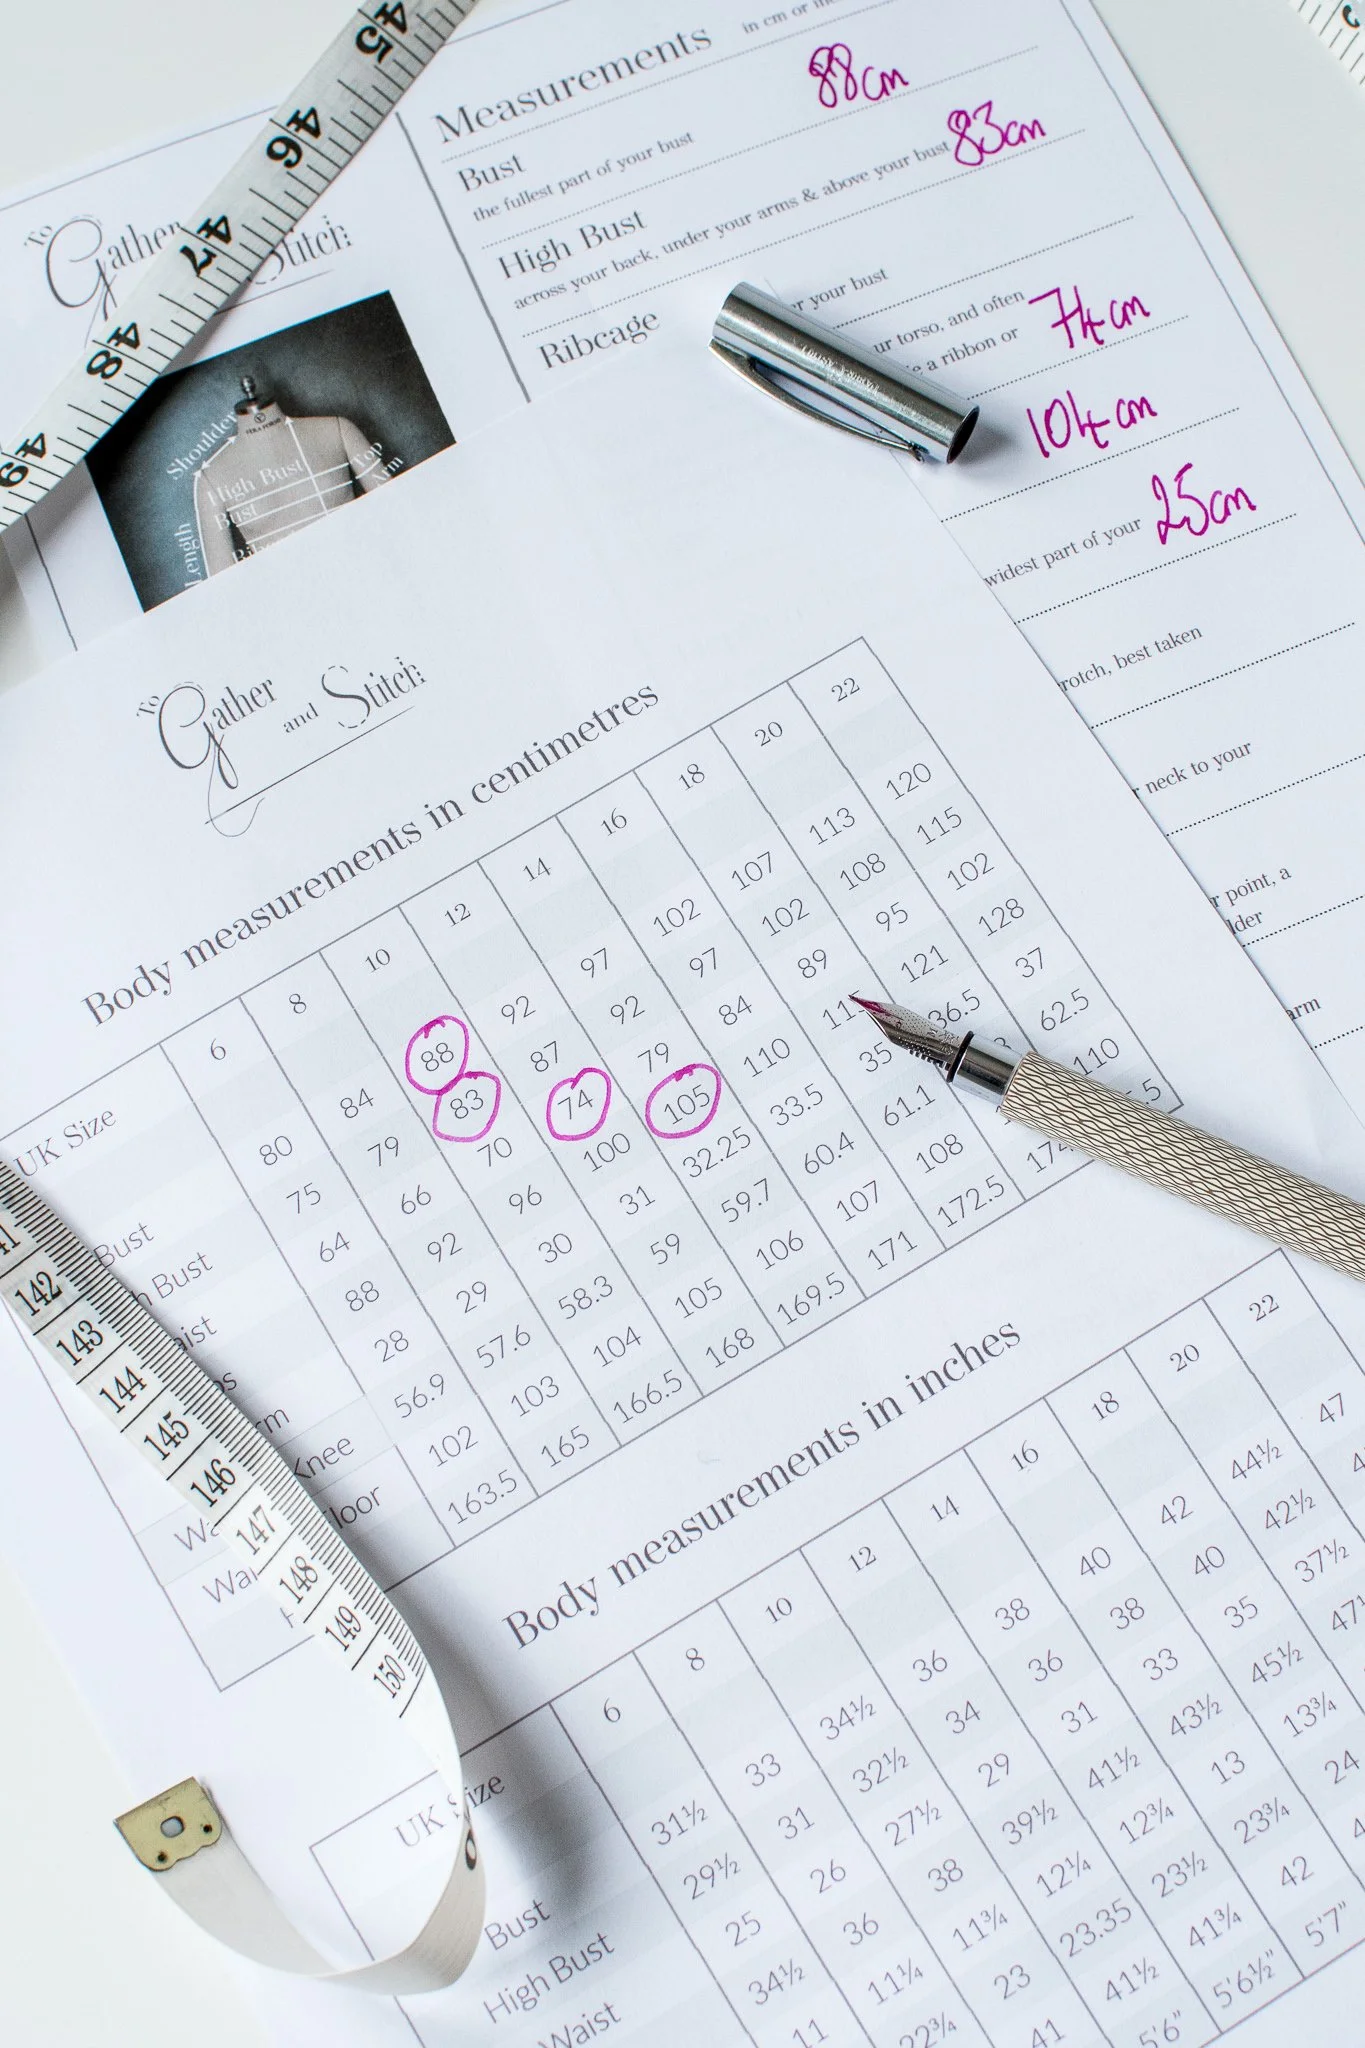
Take your measurements and compare them with the size chart. I find it helpful to mark what size I am for at each level, as it helps me see where I am at a glance.

Then look at the finished garment measurements, usually recorded on the back of the pattern envelope or in the sewing instructions.
Most patterns for woven fabrics have wearing ease - the additional amount needed to make sure that you can breathe, sit down and move about (usually 5 cm -7.5 cm in most garments), and design ease, which depends on how the garment is cut, i.e. is the garment fired or loose-fitting etc.
You might find that you're happy with the ease amount. Use your tape measure to see if the garment measurement feels comfortable. Are you satisfied with it, or do you want to alter it?
If the ease amount isn’t the solution, then try the following:
For a skirt or trousers choose a pattern that fits your hips and adjust your waist and depth of hips to fit. If the sewing pattern is multi-sized, you can use the waist of one size and the hip measurement of another and grade or blend between the sizes.
Select a dress pattern that fits your neck and shoulders. This is where your high bust measurement comes in handy. If you need to adjust the bust area by doing a full bust or small bust adjustment, do that next.
Then grade the pattern between sizes if you need different sizes in the waist and hip area. To do this…
You Will Need
A tape measure.
A pen or pencil.
Paper to write your measurements on, or you can download a handy chart here.
The pattern envelope or instructions for the design with the size chart on it and also the finished garment measurements.
A copy of the printed or PDF sewing pattern of the garment you plan to make. If the pattern is layered select and print out the sizes you need.
French curves or a Pattern Master.
A tabletop to layout your pattern pieces.
How to grade a pattern between sizes
Use your measurements to decide what size you are at each level.
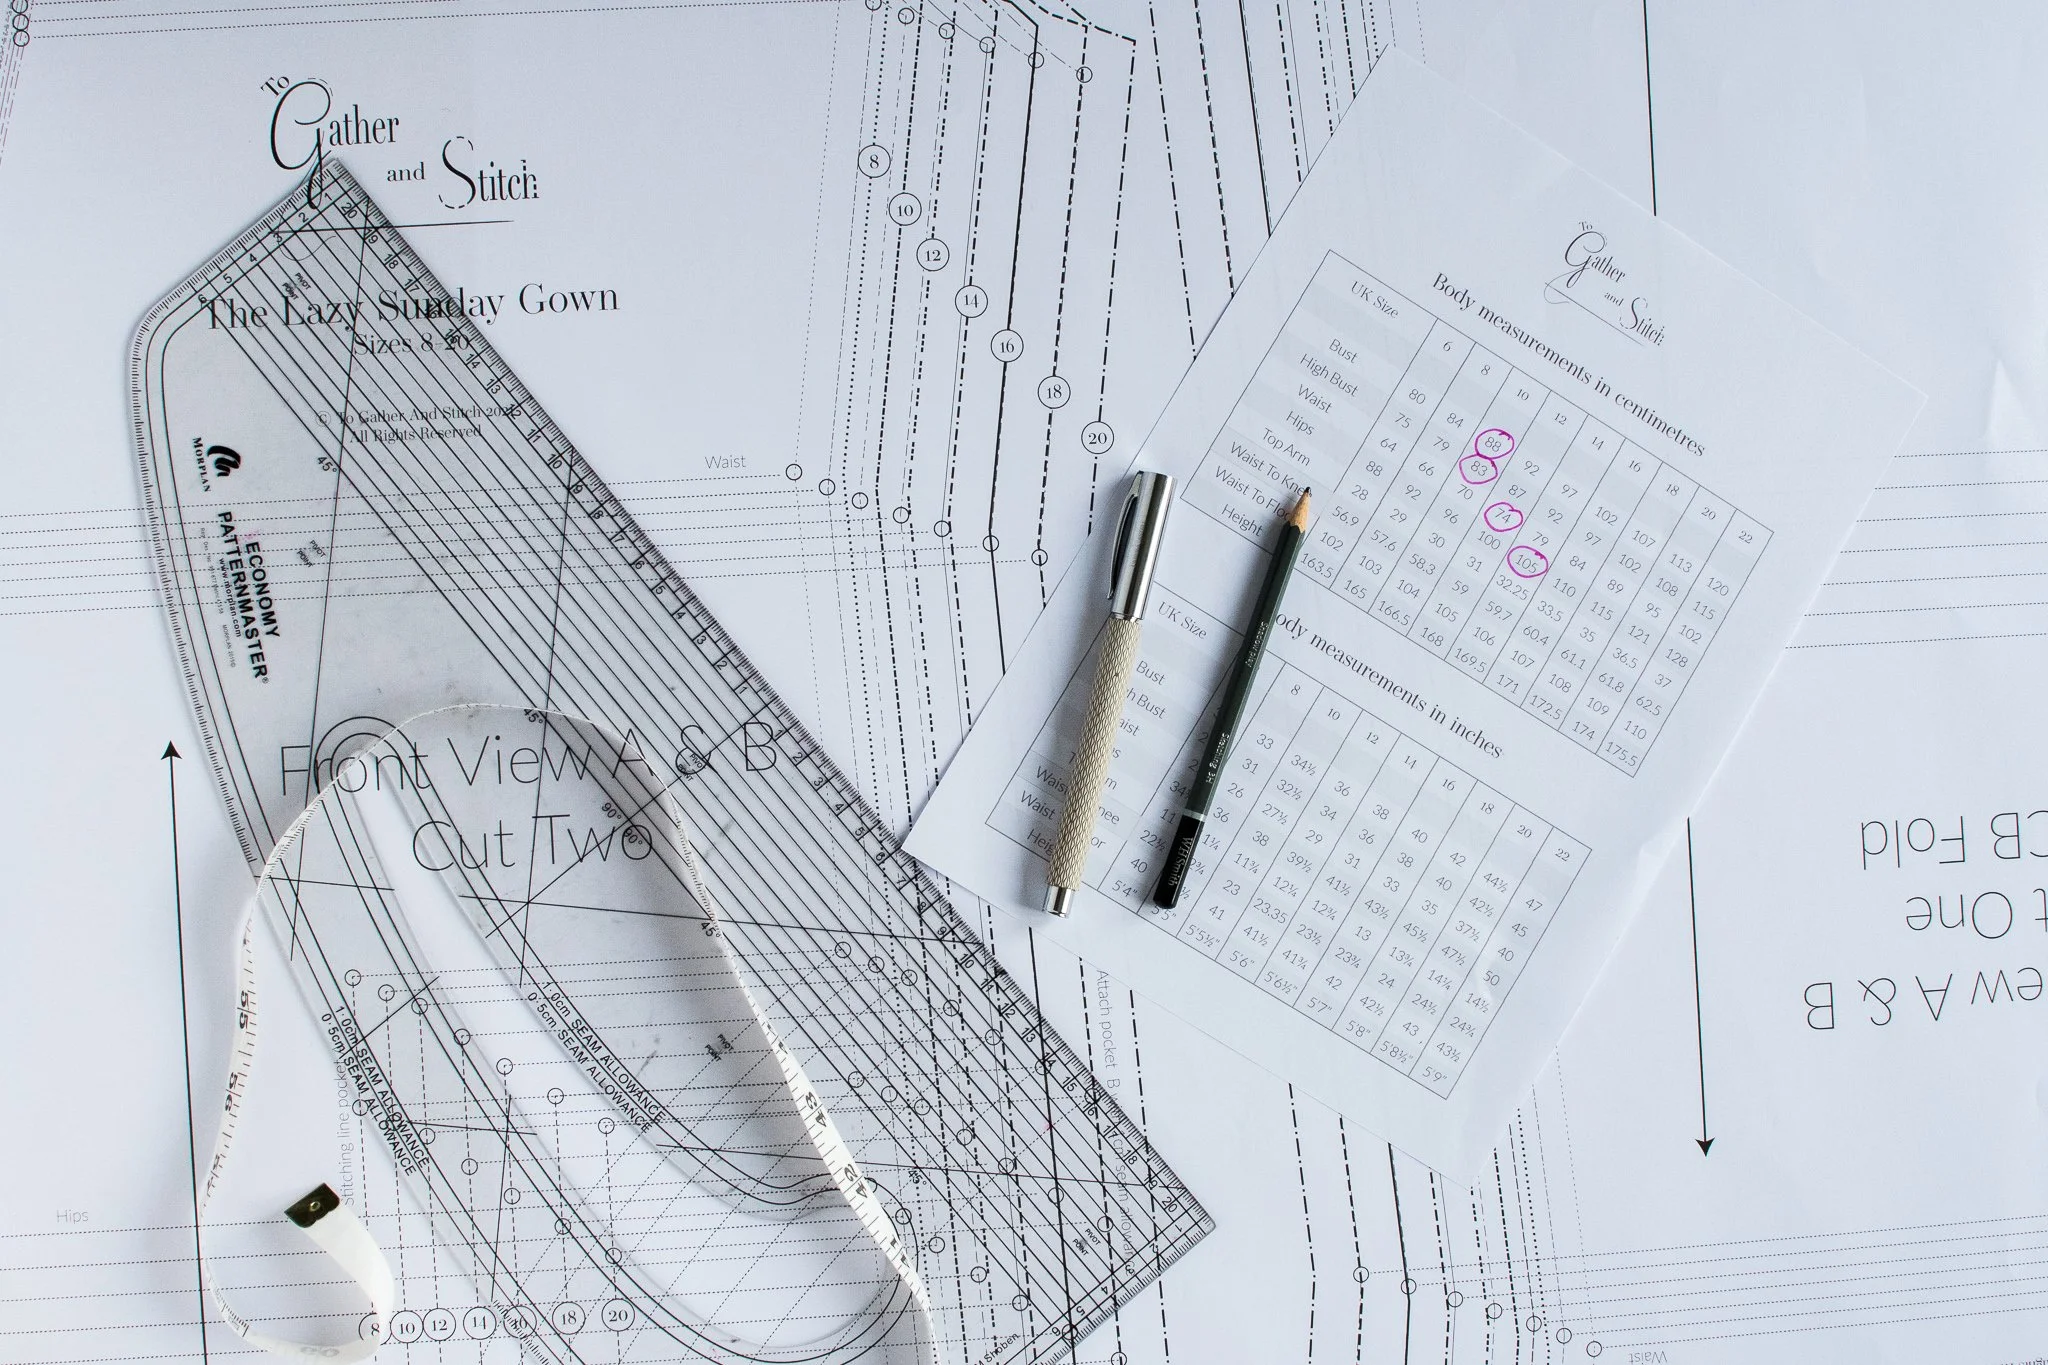
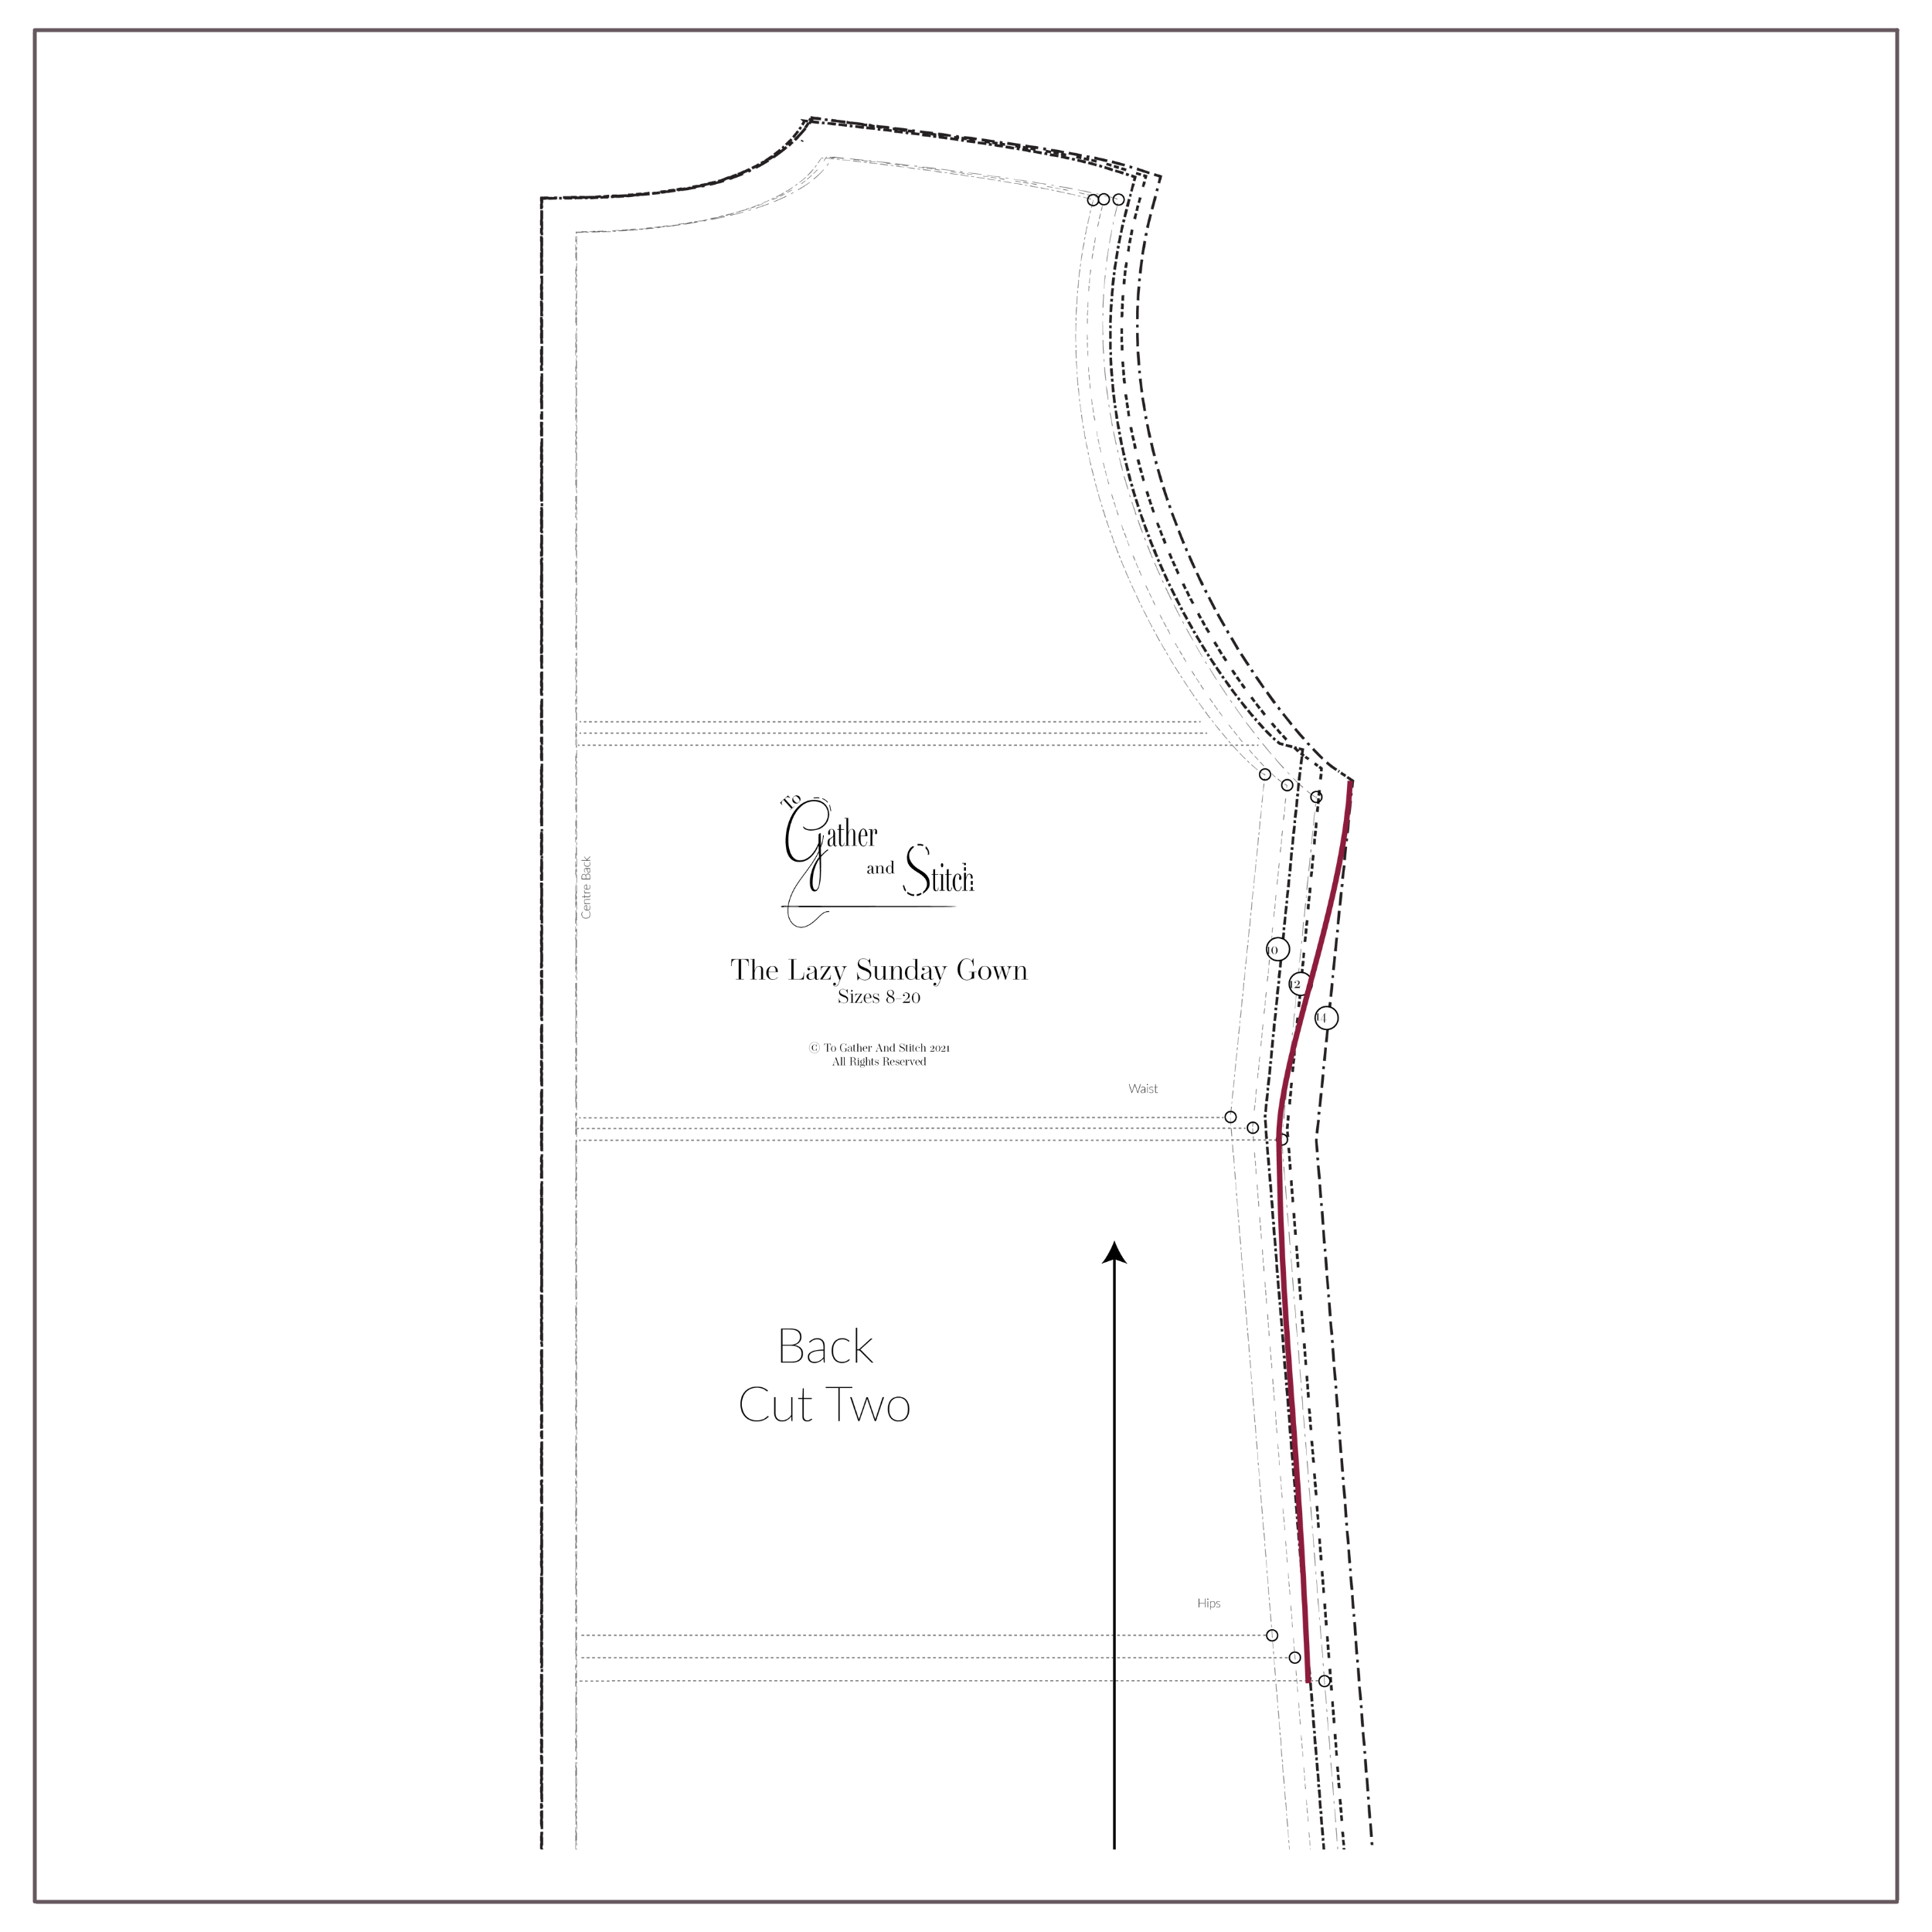
E.g. a size 10 at bust level, a size 12 at waist levels and a size 14 at hip level.
Using your coloured pencil, draw a smooth line between the sizes. The line must be a smooth curve as bodies do not have straight lines or corners! A French curve or pattern master, or even a curve tool will help you.
See the diagram below:

What to do next
Repeat the same steps for all your pattern pieces, front and back.
If there’s a seam that falls across your blending lines, e.g. an empire line, pin and the pattern pieces together so that you can blend a smooth line from top to bottom (see diagram.)
Adjust any pockets that sit on these blending lines - e.g. side seam pockets.
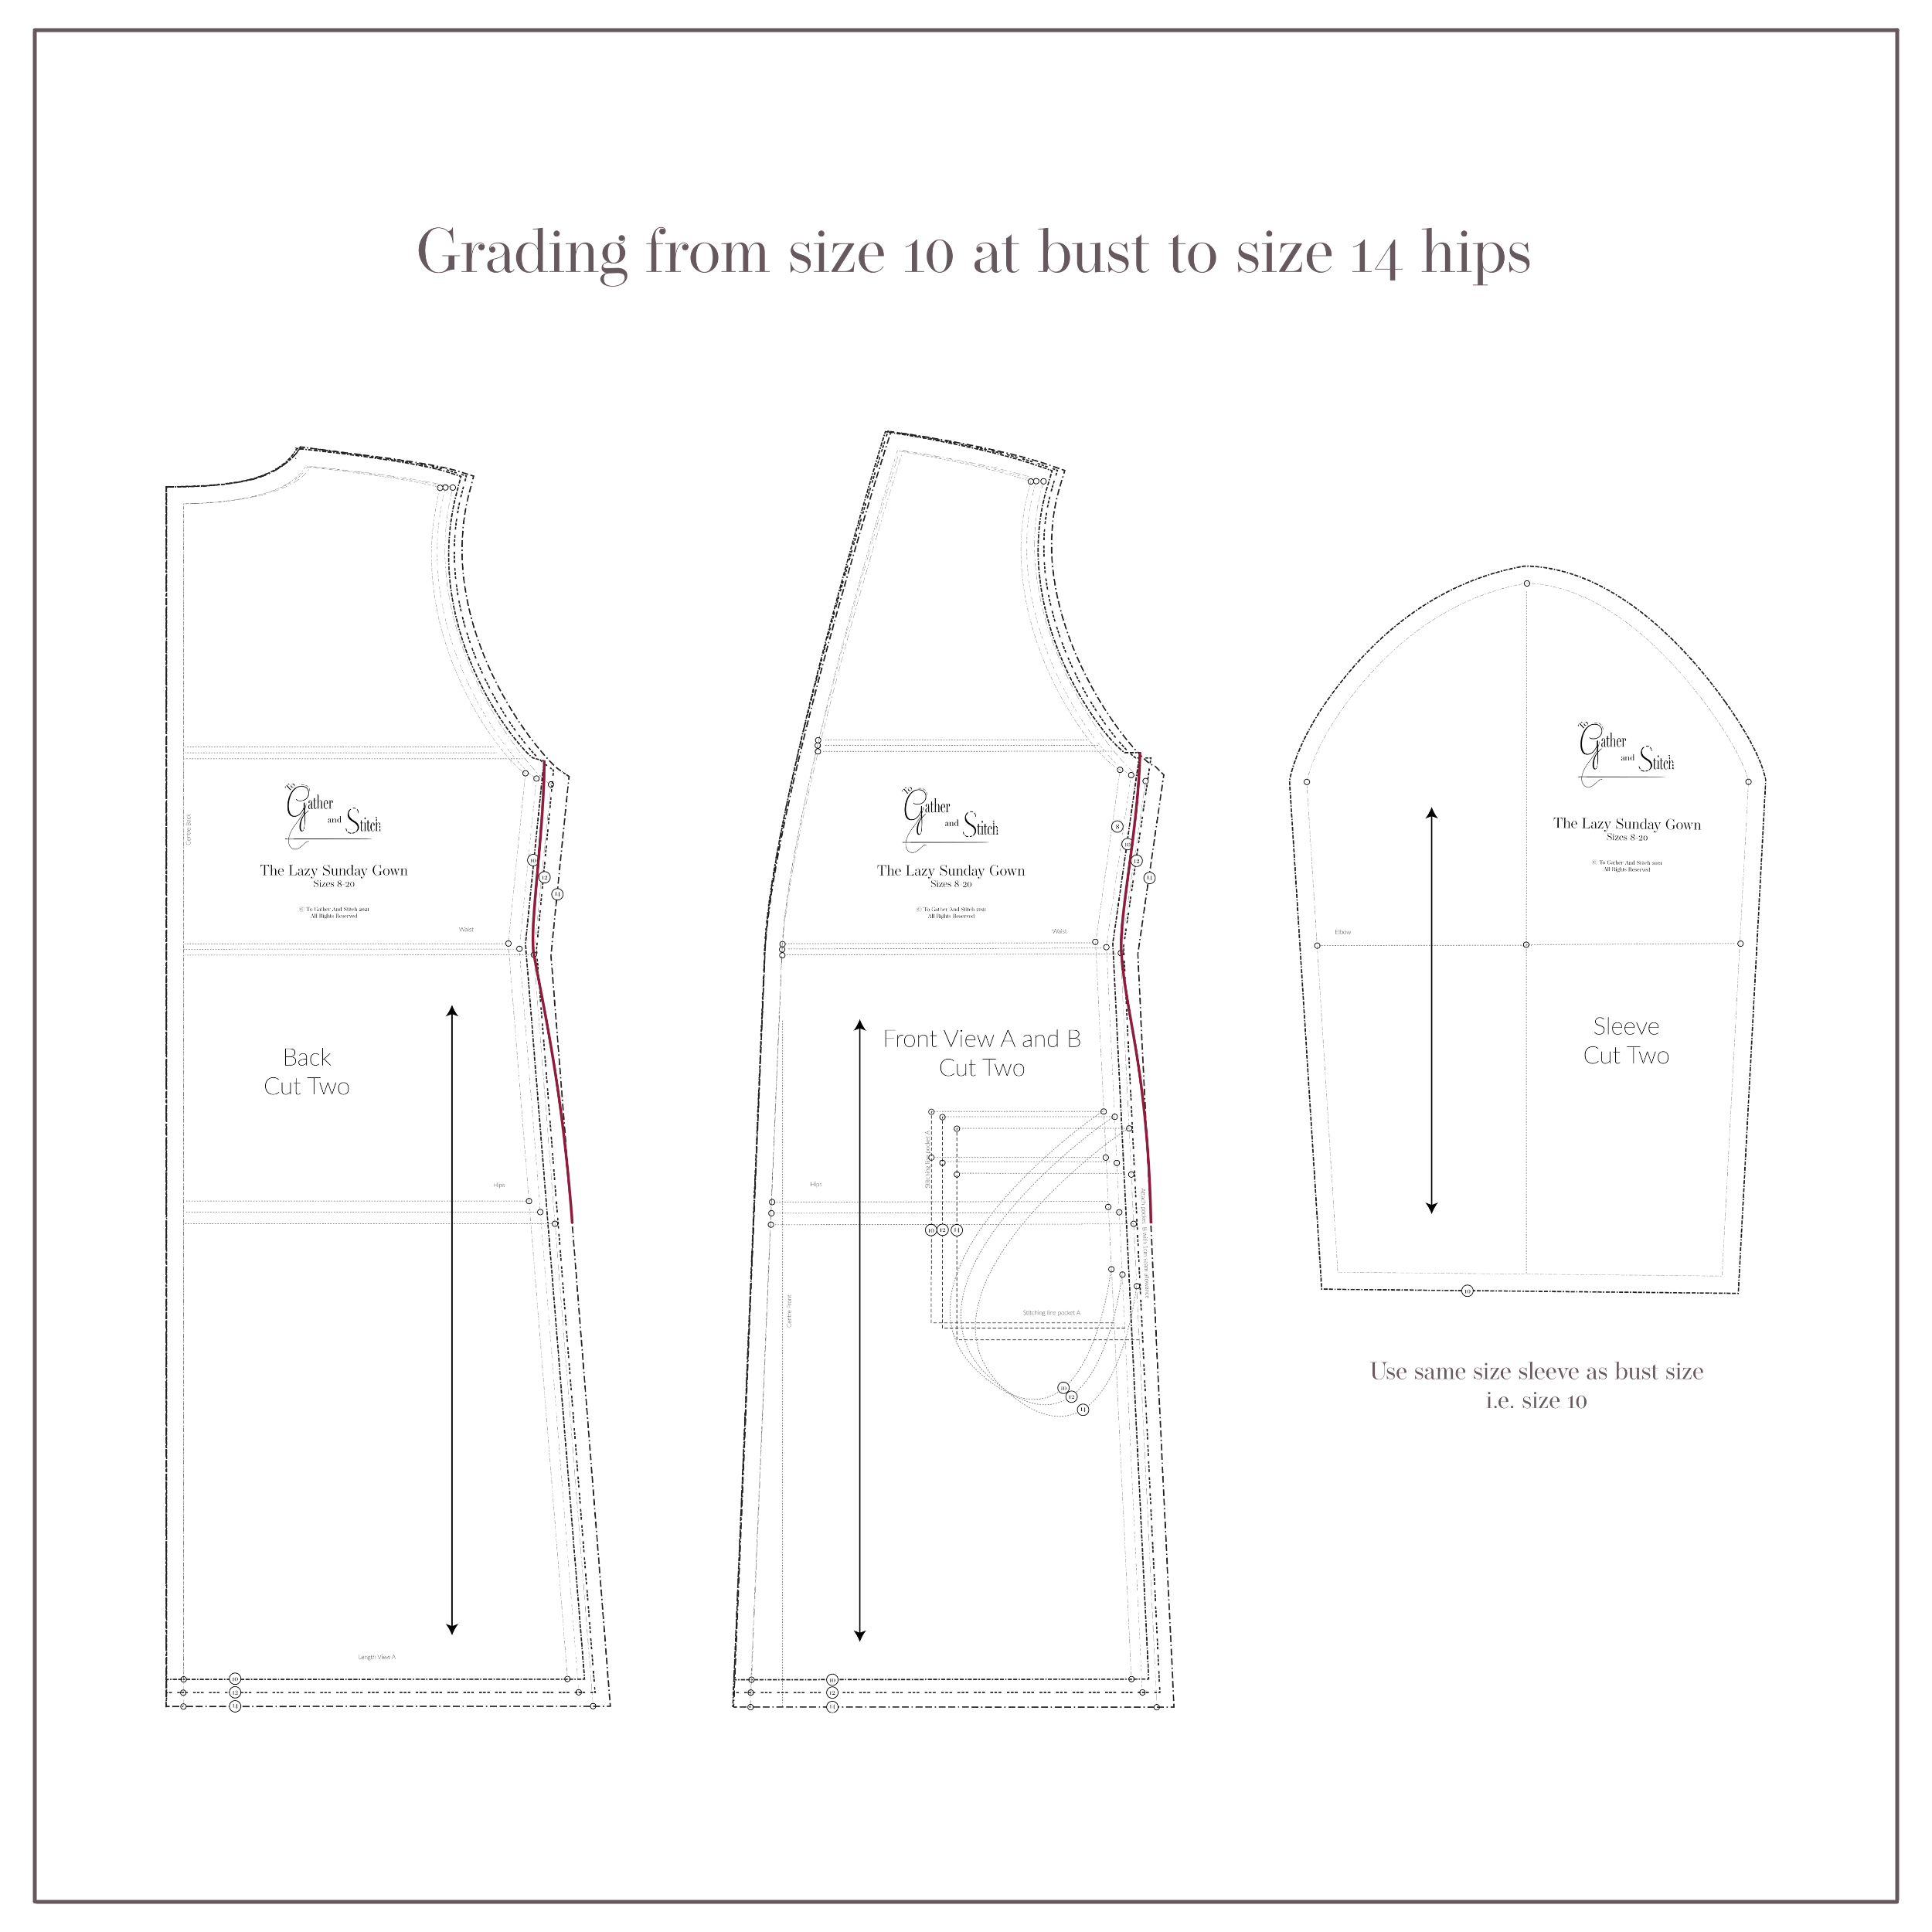
Finally, select the sleeve size that corresponds with your bust size.
You can do a similar adjustment if you are a size 14 bust and a smaller size 10 hips, but only if you are the same pattern cup size as the pattern. If you are a large bust cup size you’d be better off making a full bust adjustment instead.
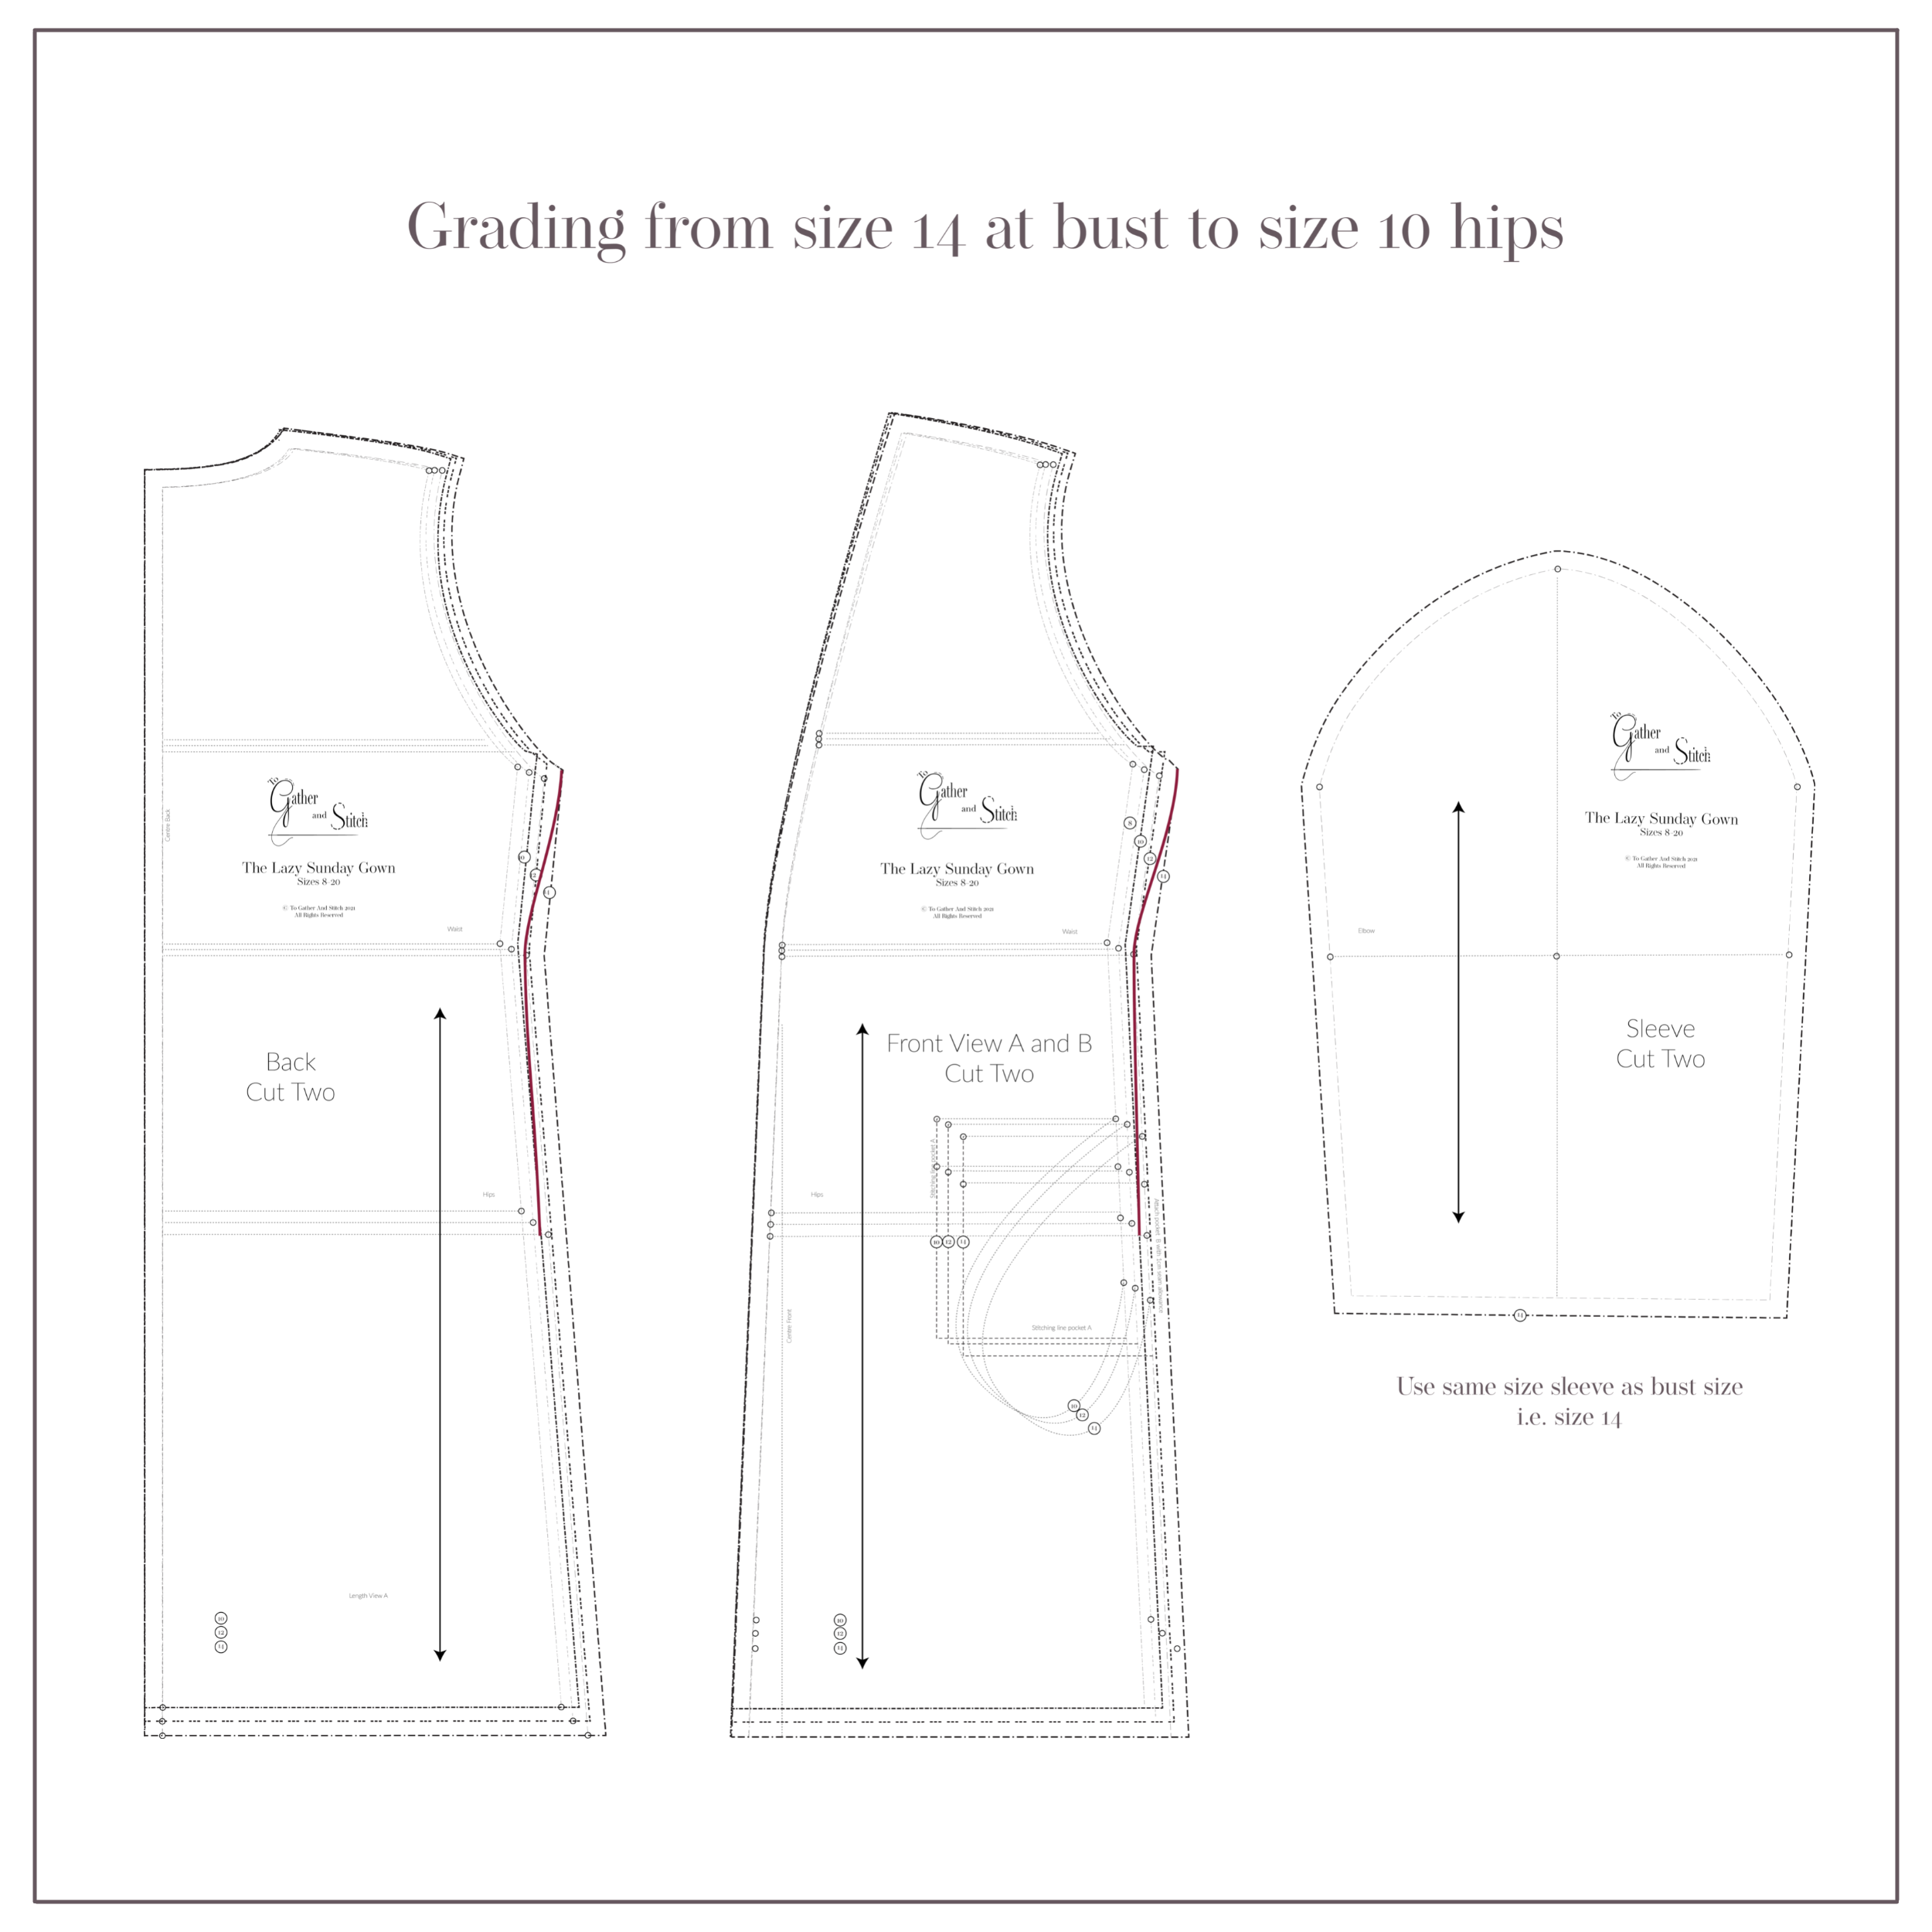
In this case, you’d select a size 14 sleeve to fit your armhole.
Hopefully the above will help you to create a shift dress that fits perfectly. If you have any questions please get in touch.
Happy sewing!